Okra, also known as lady finger or bhindi, is a nutritious and versatile vegetable that thrives in warm climates. Growing okra in pots is perfect for gardeners with limited space, balconies, terraces, or patios. With proper care, your okra plant can produce abundant pods in just 100 days, giving you fresh, organic vegetables right from your home garden. This guide provides a step-by-step approach to growing okra in pots, including tips, care instructions, and a full 100-day update for maximum yield.
1. Why Grow Okra in Pots?
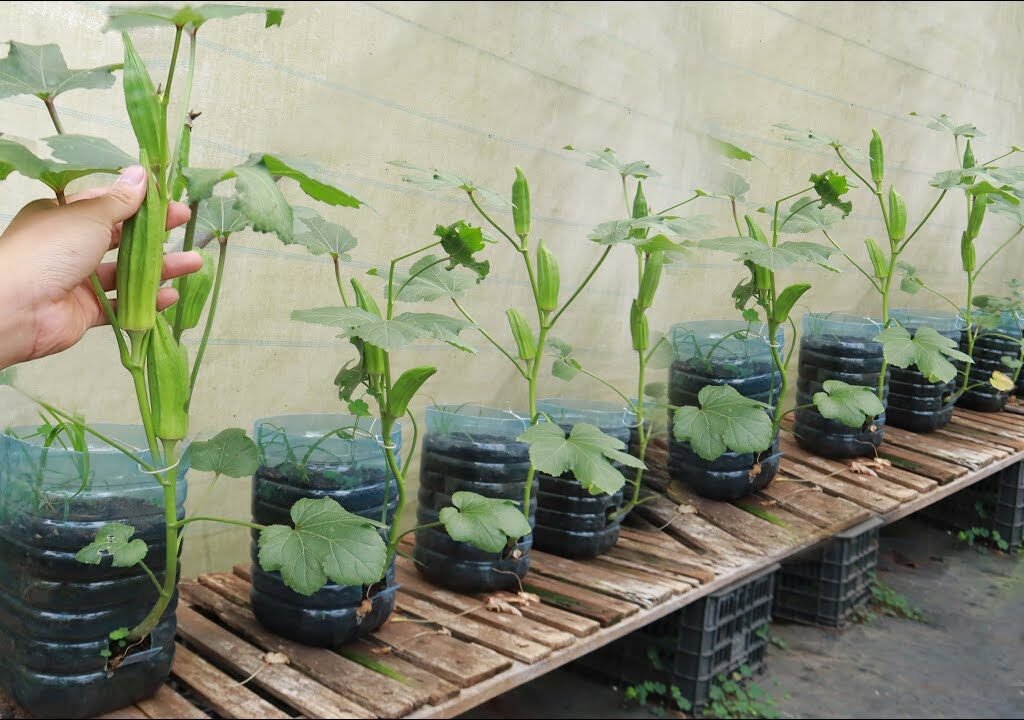
Growing okra in pots offers several advantages:
- Space-saving: Ideal for small homes, balconies, or patios.
- Control over soil: Easily provide nutrient-rich soil for optimal growth.
- Pest management: Easier to monitor and prevent infestations.
- Continuous harvest: Regular picking encourages more pod production.
- Freshness: Enjoy organic, homegrown okra with better taste and nutrition.
Pot cultivation allows gardeners to grow vegetables without the need for large garden beds.
2. Choosing the Right Okra Variety
Selecting the right variety is crucial for healthy growth and high yield:
- Dwarf varieties: Compact plants like “Baby Star” or “Clemson Spineless” are ideal for pots.
- Tall varieties: Require bigger containers and occasional staking.
- Local varieties: Adapt well to regional conditions and can produce more pods.
Choosing the right variety ensures faster growth and better adaptability to container conditions.

3. Selecting the Right Pot and Soil
Proper container and soil setup is key for healthy okra plants:
- Pot size: Use a pot at least 12–16 inches deep with a diameter of 12–14 inches for a single plant. Larger pots can accommodate 2–3 plants.
- Drainage: Ensure pots have sufficient drainage holes to prevent waterlogging.
- Soil mix: Use a well-draining mix of garden soil, compost, and coco peat or sand (2:1:1).
- Soil pH: Slightly acidic to neutral (6.0–7.0) is ideal for nutrient absorption.
Healthy soil provides essential nutrients and proper drainage, both crucial for pot-grown okra.
4. Sowing Okra Seeds in Pots

Planting seeds correctly ensures fast germination and strong seedlings:
- Seed preparation: Soak seeds in lukewarm water for 12–24 hours to soften the outer coat. This helps faster germination.
- Planting depth: Sow seeds 1 inch deep in the soil.
- Spacing: Place 2–3 seeds per hole to ensure germination. Thin later to one healthy seedling per spot.
- Watering: Lightly water the soil after sowing to keep it moist. Avoid overwatering.
Seeds usually germinate within 5–10 days under optimal conditions.
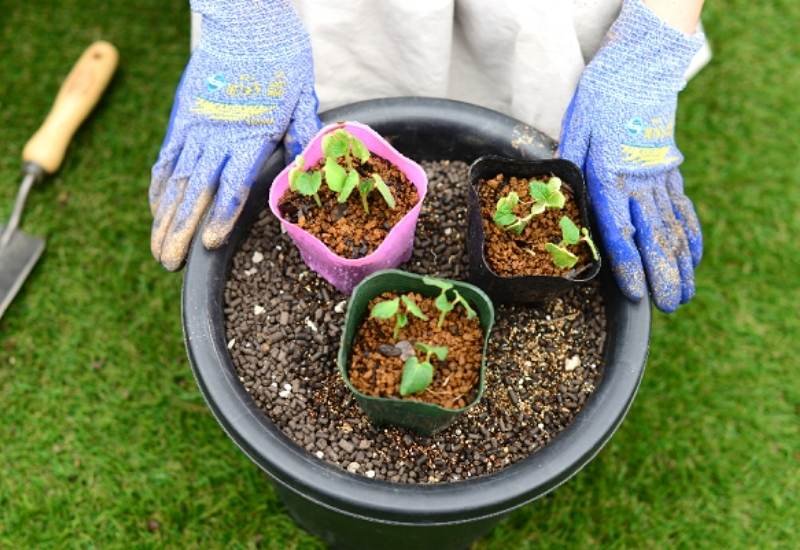
5. Caring for Okra Seedlings
Proper care during the early stage ensures strong plants:

- Sunlight: Place pots in a sunny location with 6–8 hours of direct sunlight daily.
- Temperature: Okra grows best at 24–35°C (75–95°F). Protect young seedlings from cold drafts.
- Watering: Keep soil consistently moist until seedlings establish. Gradually reduce frequency as plants grow.
- Thinning: Once seedlings develop 2–3 true leaves, remove weaker seedlings, leaving the healthiest one.
Healthy seedlings set the foundation for strong flowering and pod development.
6. Fertilization and Nutrient Management

Okra requires regular feeding for abundant pods:
- Initial fertilization: Mix compost or organic manure into the soil before planting.
- Growth stage: Apply a nitrogen-rich fertilizer every 2–3 weeks during vegetative growth.
- Flowering stage: Switch to phosphorus and potassium-rich fertilizers to promote flower and pod formation.
- Organic alternatives: Vermicompost, neem cake, or fish emulsion works well for pot cultivation.
Balanced fertilization ensures strong stems, lush foliage, and higher pod yield.
7. Supporting Tall Varieties
Some okra varieties grow tall and need support:
- Staking: Use bamboo sticks or wooden stakes to support stems. Tie gently with soft twine.
- Pruning: Remove any damaged or yellow leaves to promote airflow and reduce disease risk.
- Spacing: Ensure adequate space between plants to prevent overcrowding in pots.
Proper support prevents stem breakage and ensures healthy pod development.

8. Watering and Daily Care
Consistent watering is crucial for optimal growth:
- Frequency: Water deeply 2–3 times a week, adjusting for temperature and rainfall.
- Avoid overwatering: Waterlogged soil can lead to root rot.
- Mulching: Apply a thin layer of mulch to retain moisture and regulate soil temperature.
Proper watering keeps plants healthy, reduces stress, and promotes steady growth.
9. Flowering and Pod Formation
Okra produces flowers that eventually develop into edible pods:
- Flowering period: Usually starts 40–50 days after sowing.
- Pollination: Okra flowers are self-pollinating. You can assist by gently shaking flowers to improve pod set.
- Pod development: Pods grow rapidly and are ready to harvest 5–7 days after flowering.
Regular observation ensures you can harvest pods at the right stage for tenderness and flavor.
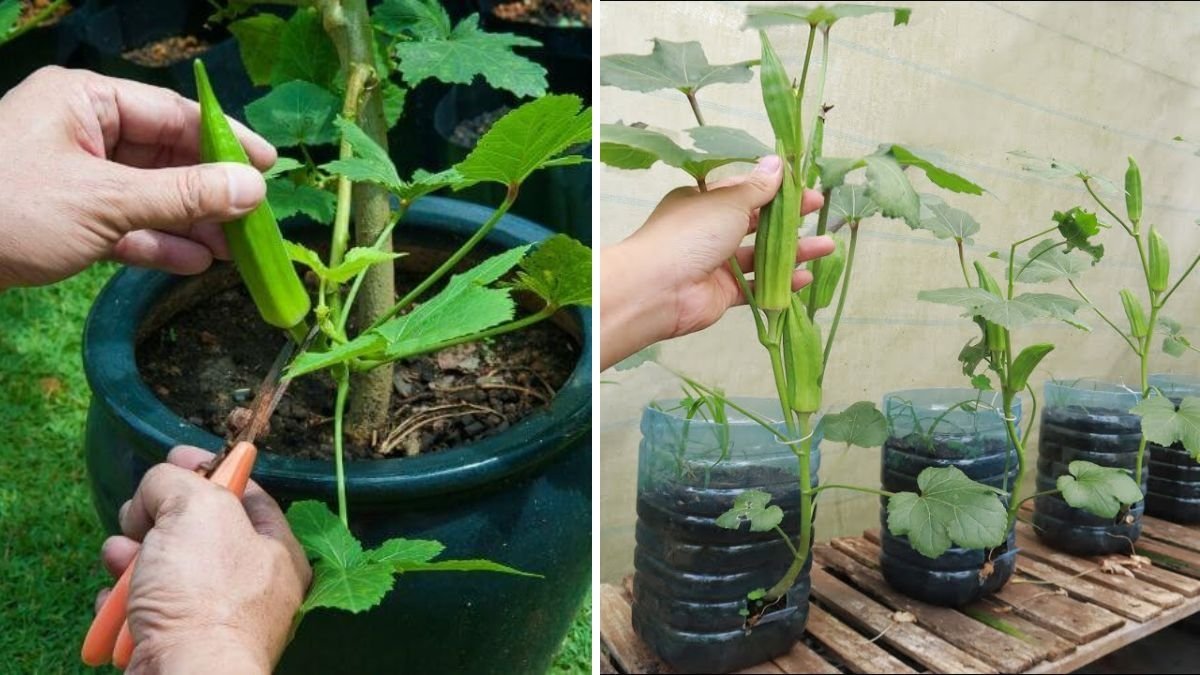
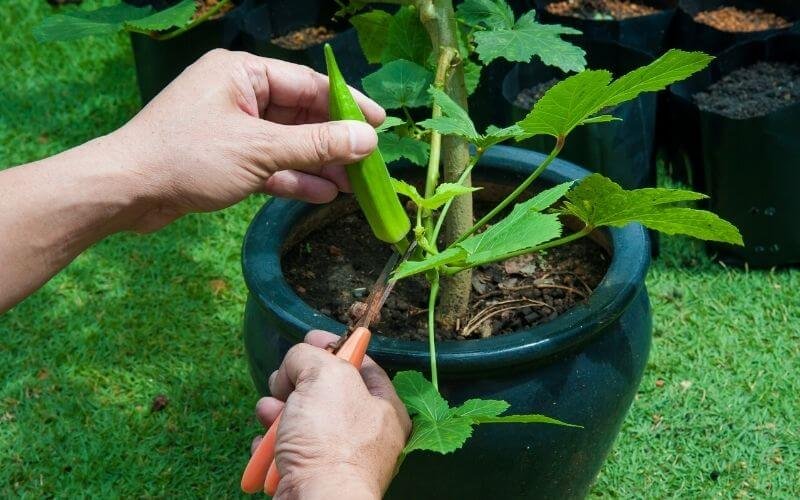
10. Harvesting Okra
Timely harvesting is key to enjoy tender and crisp pods:

- Harvest stage: Pick pods when they are 3–5 inches long. Older pods can become tough and fibrous.
- Frequency: Check plants every 2–3 days during peak season. Frequent harvesting encourages new pod formation.
- Method: Use scissors or gently twist the pods to avoid damaging the plant.
Consistent harvesting ensures continuous yield throughout the growing season.
11. 100-Day Growth Update
Tracking your okra plant for 100 days provides insight into its development:
- Days 1–10: Seeds germinate, and seedlings emerge.
- Days 11–30: Seedlings grow true leaves and develop stronger stems.
- Days 31–50: Vegetative growth accelerates, with robust leaves and a taller plant.
- Days 51–70: Flower buds appear, signaling the start of fruiting.
- Days 71–100: Continuous flowering and pod production; plants may produce 10–15 pods per plant, depending on care.
Documenting growth helps plan fertilization, watering, and harvesting for maximum yield.
12. Common Pests and Diseases
Pot-grown okra may face some challenges:
- Pests: Aphids, whiteflies, jassids, and caterpillars. Treat organically with neem oil or insecticidal soap.
- Diseases: Powdery mildew, root rot, and leaf spots can occur. Ensure good airflow and proper watering.
- Preventive care: Rotate pots, maintain clean soil, and monitor plants regularly.
Early intervention prevents crop loss and maintains healthy, productive plants.

13. Tips for Maximum Yield
- Provide full sunlight: Okra thrives in bright, warm conditions.
- Use large pots: Ensure enough space for root growth.
- Regular fertilization: Boosts flowering and pod production.
- Frequent harvesting: Encourages continuous growth.
- Mulching: Helps retain moisture and reduces weeds.
Following these tips ensures your pot-grown okra produces abundant, tender, and delicious pods.
Conclusion
Growing okra in pots is a rewarding and practical solution for home gardeners with limited space. With proper care, balanced fertilization, and timely harvesting, you can enjoy fresh, organic okra straight from your balcony or terrace. Following this complete guide with 100-day updates ensures even beginners can cultivate healthy plants that yield tender, flavorful pods. Start today and transform your pot garden into a productive okra paradise!
Leave A Comment