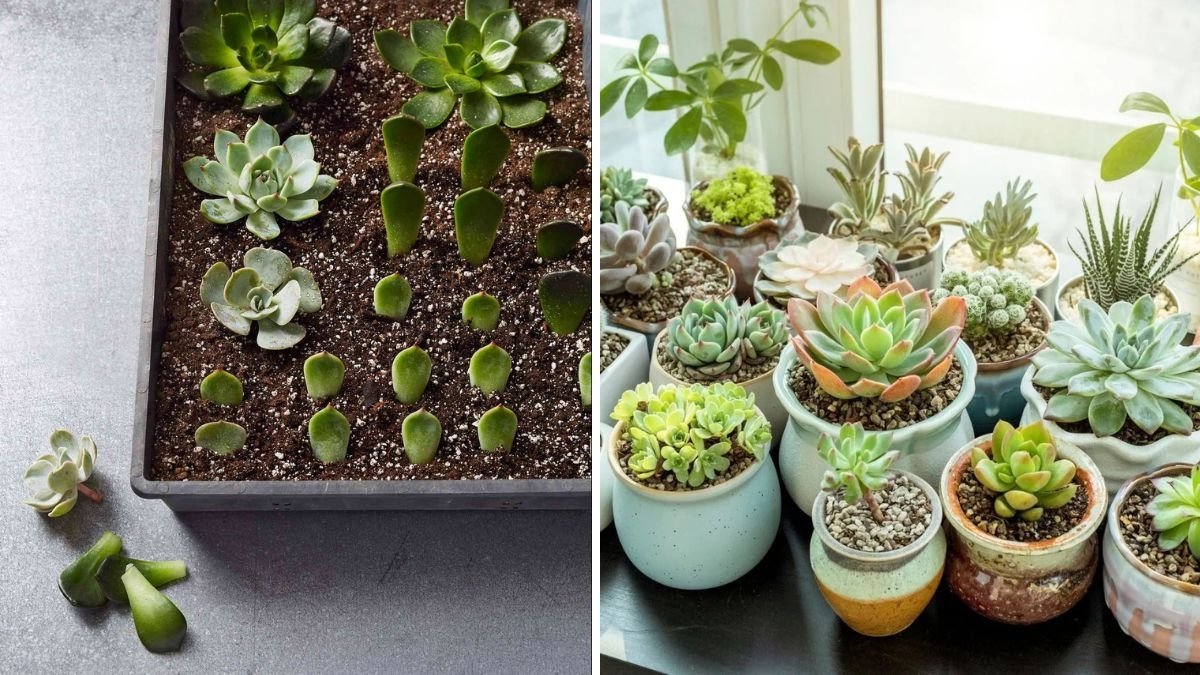
Succulents are among the most loved plants in the world—easy to care for, visually stunning, and perfect for small or large spaces. But what makes them even more exciting is how incredibly easy they are to propagate. Whether you have a single succulent or a full collection, you can multiply your plants endlessly using simple cuttings!
In this complete guide, you’ll learn how to grow succulents from leaf cuttings, stem cuttings, and offsets—with full updates on what to expect at every stage. No links, no complications—just clean, clear, friendly instructions to help you grow a whole garden of new succulents for free.
Let’s begin!
Why Propagate Succulents From Cuttings?

Succulent propagation is perfect for gardeners because:
- It’s easy, even for beginners
- You get many new plants from a single parent
- You can save damaged or leggy succulents
- It’s free—no need to buy new plants
- Most cuttings root within weeks
If you’ve ever killed a plant or struggled with gardening, succulents will boost your confidence. They’re forgiving and grow quickly when propagated correctly.
Types of Succulent Cuttings You Can Use
There are three common ways to propagate succulents from cuttings:
1. Leaf Cuttings
Works well for succulents like:
- Echeveria
- Graptopetalum
- Sedum
- Pachyphytum
2. Stem Cuttings
Ideal for:

- Jade (Crassula)
- Aeonium
- Sedeveria
- Kalanchoe
- String succulents
3. Offsets / Pups
Best for:
- Aloe
- Haworthia
- Sempervivum
- Gasteria
Each method is simple—just follow the steps below.
Step-by-Step: How to Grow Succulents From Cuttings

Step 1: Choose a Healthy Mother Plant
Pick a plant that has:
- Firm leaves
- No pests (mealybugs/aphids)
- Good color
- Thick, healthy stems
A healthy cutting grows roots faster and becomes a stronger new plant.
Step 2: Take the Cutting
For Leaf Cuttings
- Gently twist the leaf sideways
- Remove the entire leaf (no tear at the base)
- A clean pull increases rooting success
For Stem Cuttings
- Use a clean scissor or knife
- Cut 3–4 inches of healthy stem
- Remove the bottom leaves
For Offsets
- Detach pups gently with fingers
- Make sure small roots remain attached
Step 3: Let the Cuttings Dry (Callus Formation)
This step is critical for success.
Let the cutting dry in shade for:
- 2–3 days for leaf cuttings
- 3–4 days for stem cuttings
- 1 day for offsets
When the cut end becomes dry and sealed, it’s ready for planting.
Skipping this step may cause rot, so don’t rush!

Step 4: Prepare the Perfect Soil Mix
Succulents demand fast-draining soil.
Best Succulent Soil Recipe:
- 40% garden soil
- 30% coarse sand
- 20% perlite or pumice
- 10% compost
Avoid clay or dense soil—succulents hate wet feet.
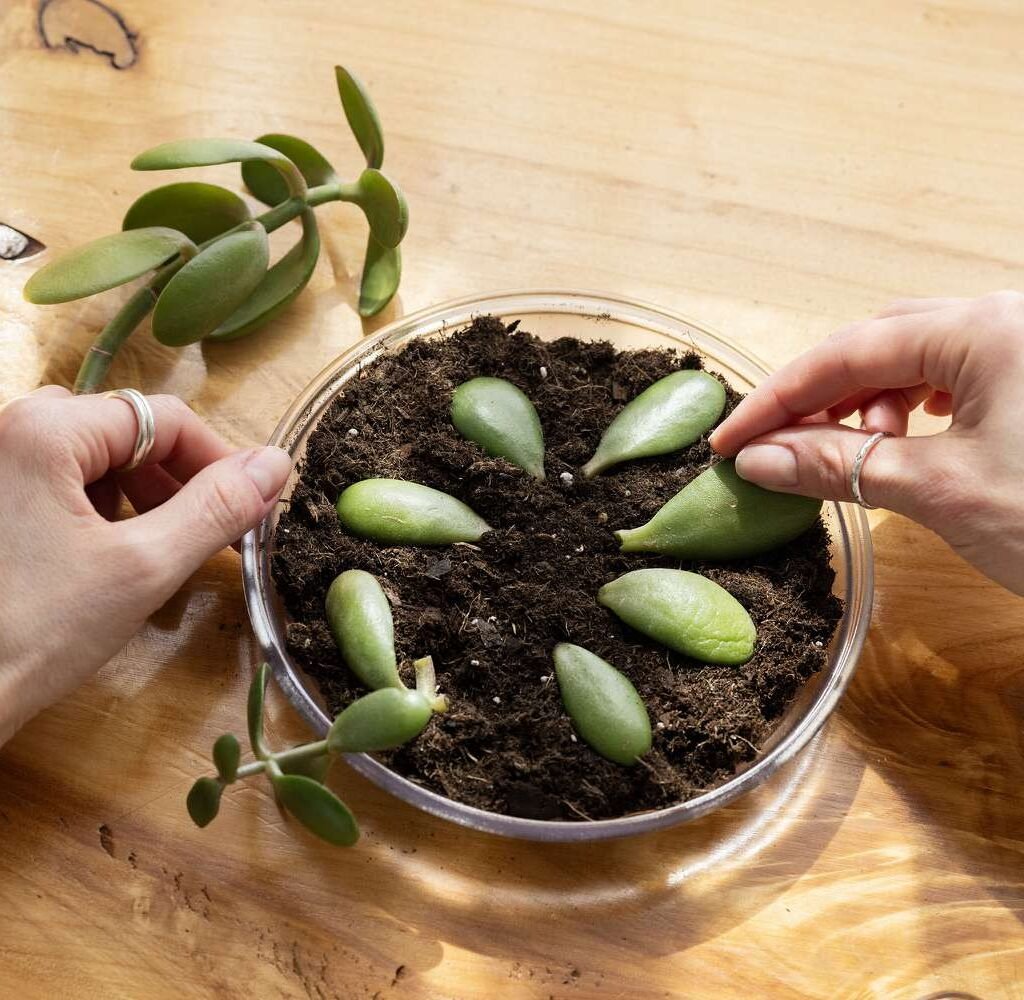
Step 5: Plant the Cuttings
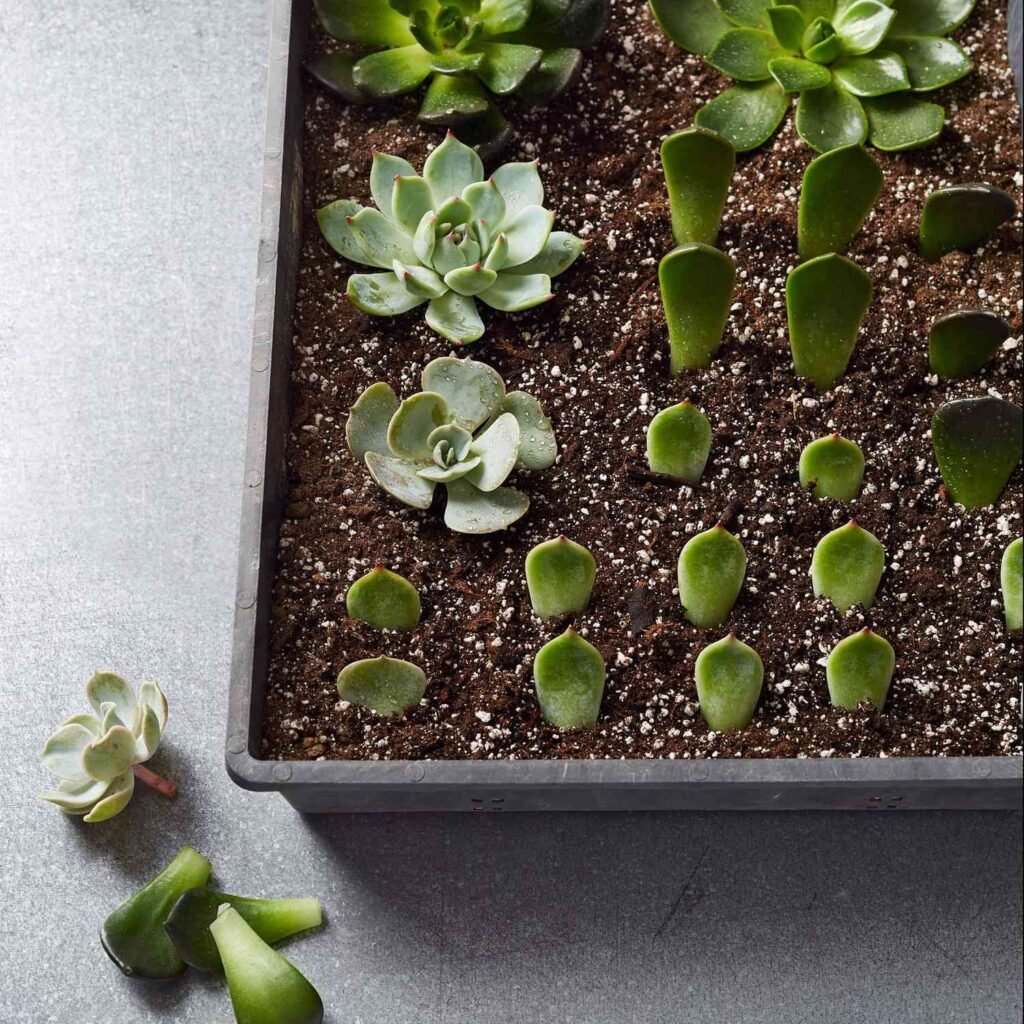
Leaf Cuttings
- Lay leaves flat on the soil
- Do NOT bury them
- Just place them gently on top
Stem Cuttings
- Insert cut end into soil
- Make sure it stands upright
Offsets
- Plant directly like a small succulent
- Keep roots covered lightly
Step 6: Watering the Right Way
Succulent cuttings require special watering care.
Watering Rules:
- Mist the soil lightly every 3–4 days
- Avoid heavy watering in the beginning
- Never water the cuttings directly on the cut end
Once roots appear, gradually shift to normal watering:
- Water only when the soil is fully dry
- Use bottom watering for smaller pots
Too much water = rot
Too little = slow growth
Find the balance!
Step 7: Provide Ideal Light
Succulent cuttings need:
- Bright, indirect light
- Avoid direct sun until roots develop
- Too much sunlight causes leaf burn
After 3–4 weeks, give them:

- Morning sunlight for 1–2 hours
This strengthens roots and encourages faster growth.
FULL UPDATES — What Happens After Planting?
Here’s the exciting part: the propagation journey!
Week 1: Callusing & Settling
- Cuttings stay the same
- Leaves may wrinkle slightly
- Soil must stay lightly moist
Don’t worry—this is normal.
Week 2–3: Root Formation Begins
You’ll notice:
- Tiny pink or white roots
- Leaf cuttings may show small bumps (sign of rooting)
- Stem cuttings become firm
This is the first success milestone!
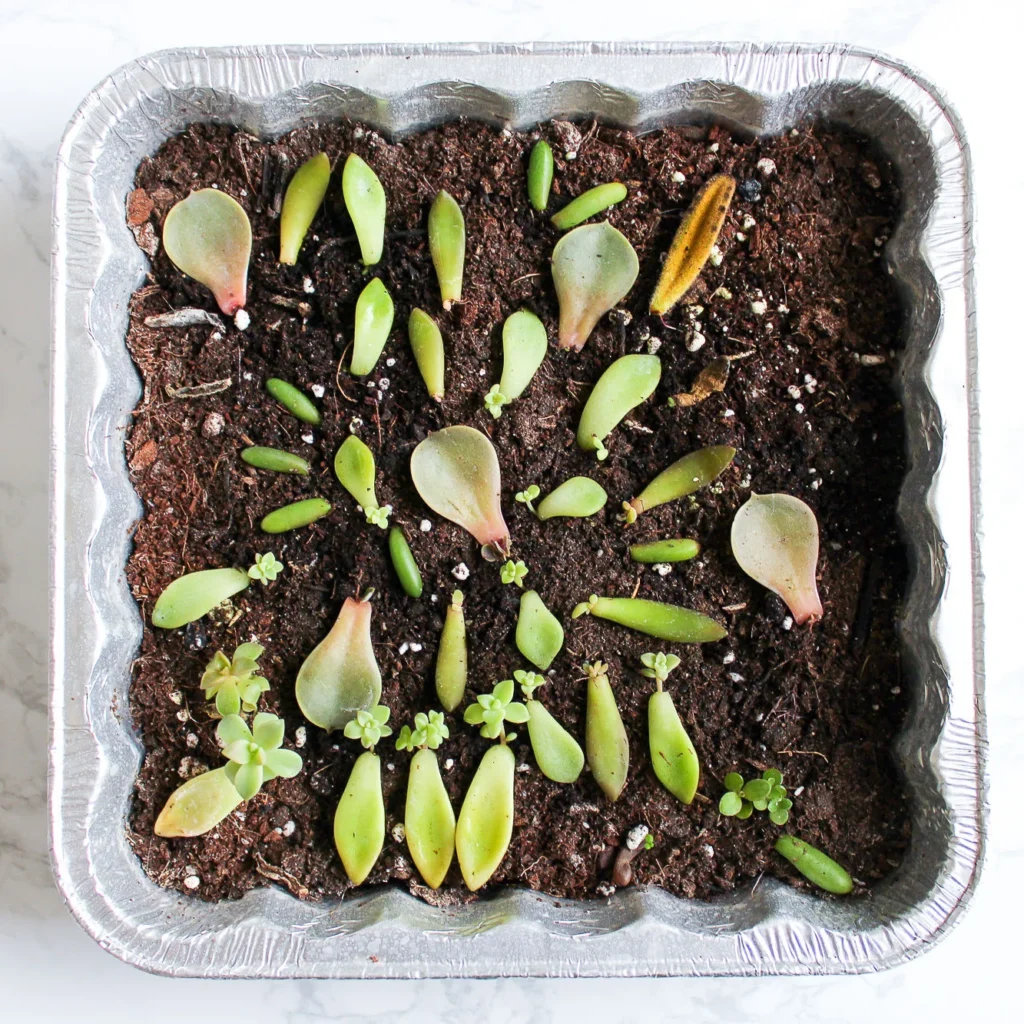
Week 4–5: Baby Plants Appear
Leaf cuttings now show:
- Tiny rosettes forming
- New green growth at the base
Stem cuttings:
- Start producing new leaves
- Stand firmly in soil
This is when the magic becomes visible.

Month 2–3: Fast Growth Stage
- Baby succulents grow bigger
- Old leaves begin drying out
- Plants look healthier and more colorful
Move them to brighter light for deeper coloration.
Month 4–6: Transplanting Stage
Now the new succulents are ready to move into:
- Individual pots
- A decorative succulent garden
- A mixed dish arrangement
Use small pots (3–4 inches) first for best growth.
Month 6–12: Mature Plant Stage
Your propagated succulents will now:
- Grow fuller
- Multiply again
- Develop stronger roots
- Grow colorful stress shades
- Produce pups of their own
By this stage, they behave exactly like fully mature plants.
Common Problems & Easy Solutions
Leaves shriveling
Underwatering
Mist lightly every 3–4 days
Leaves turning mushy
Overwatering
Reduce watering immediately
Cuttings not rooting
Low light
Move to a brighter place

Rot at cut end
Cut wasn’t callused properly
Always air-dry before planting
Expert Tips for Faster Success
- Use wide trays for leaf propagation
- Always disinfect tools before cutting
- Use bottom watering to avoid rot
- Provide gentle airflow
- Add perlite for extra drainage
- Keep out of rain during monsoon
- Do not move cuttings frequently
Succulents love stability.
Final Thoughts: Creating Your Own Succulent Garden
Propagating succulents from cuttings is like growing magic—tiny leaves transforming into brand-new plants right before your eyes. With patience and the simple steps above, you can fill your home with beautiful succulents at zero cost.
Whether you’re creating a mini succulent forest, gifting plants to friends, or expanding your collection, this guide will help you succeed at every stage.
Leave A Comment