Create a Stunning Succulent Planter in Just 5 Minutes: A Quick & Beautiful DIY Guide for All Garden Lovers

Create a Stunning Succulent Planter in Just 5 Minutes: A Quick & Beautiful DIY Guide for All Garden Lovers

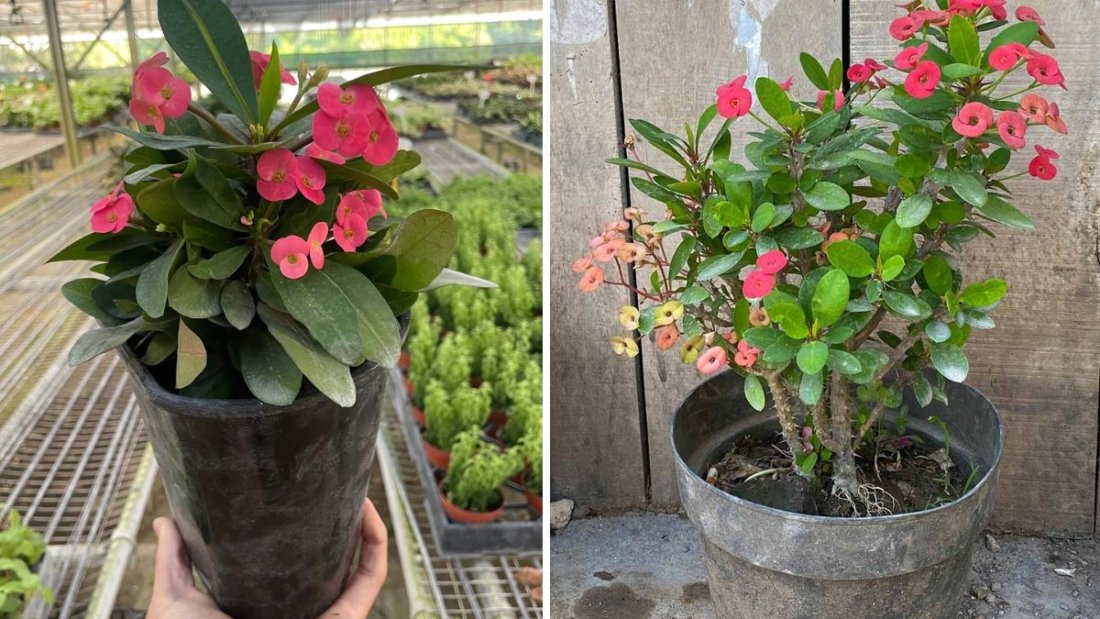
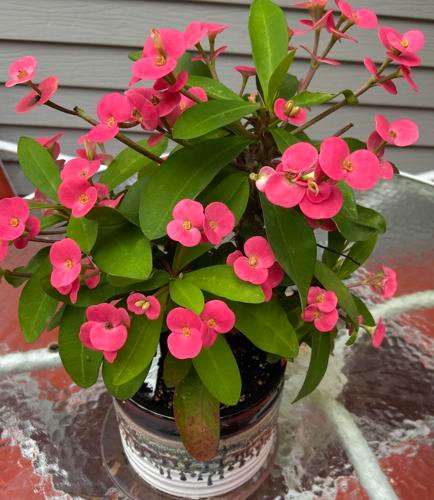
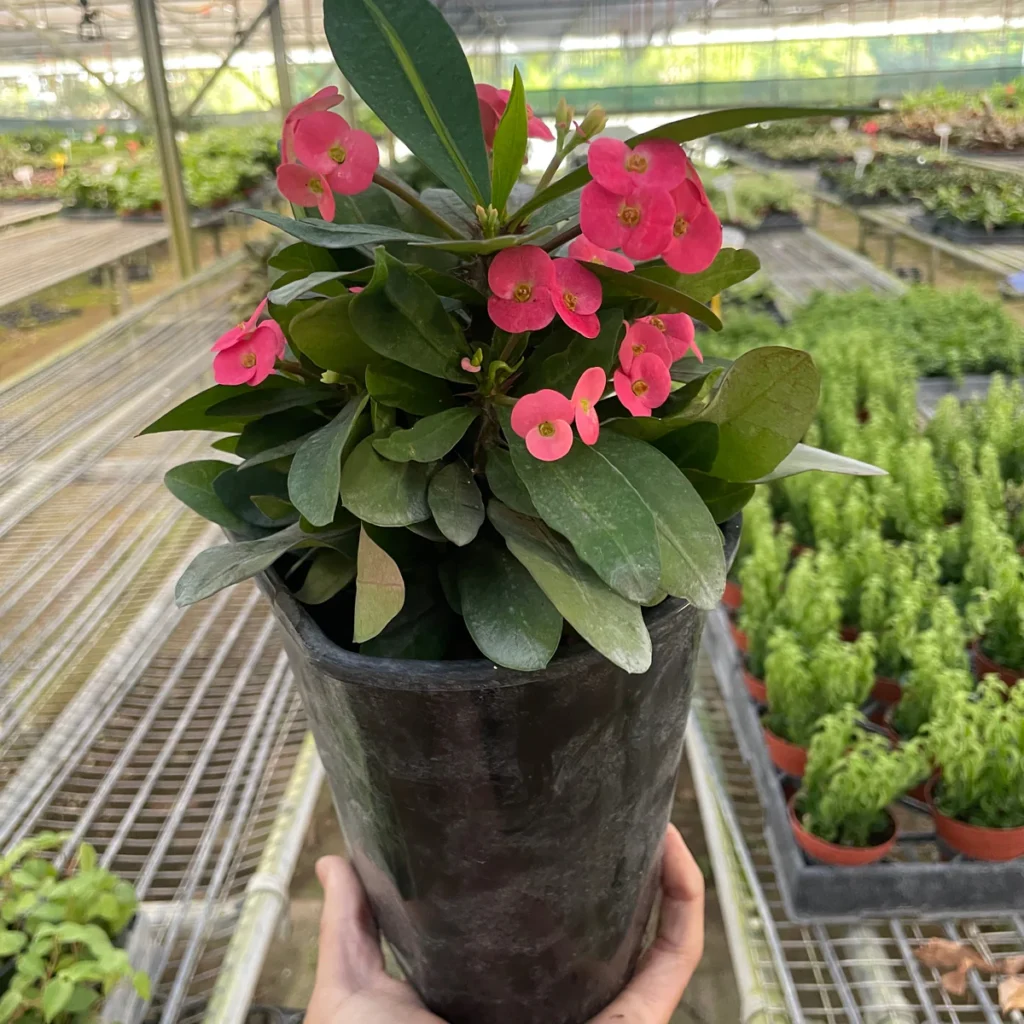
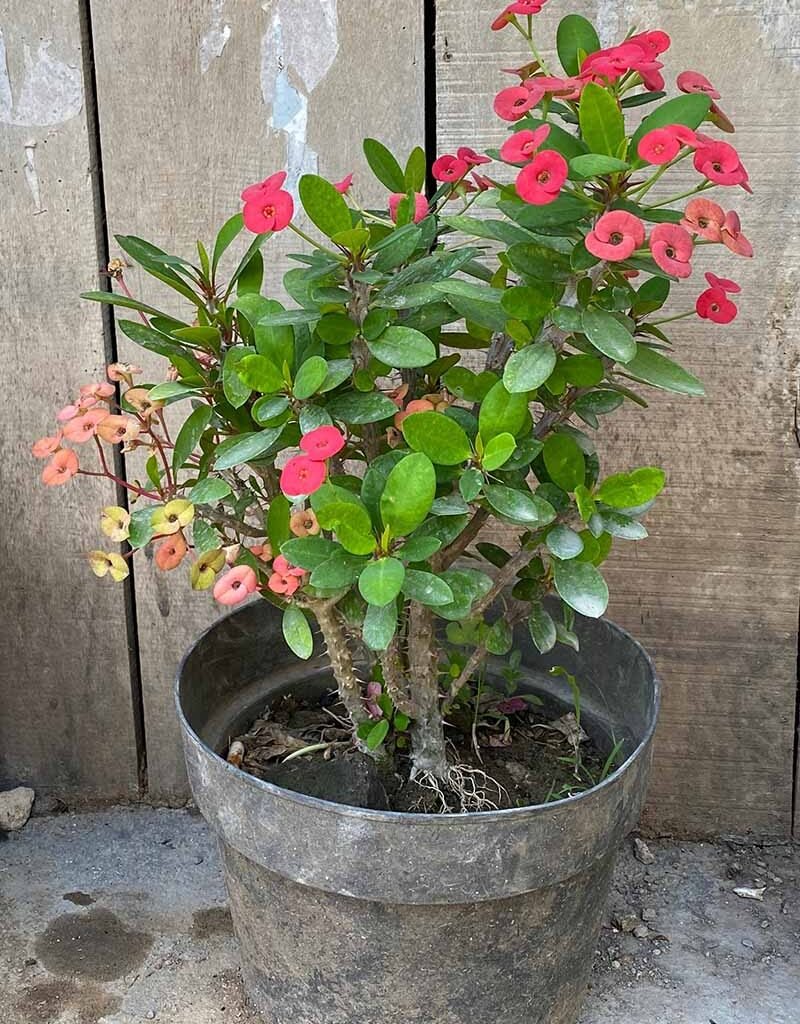
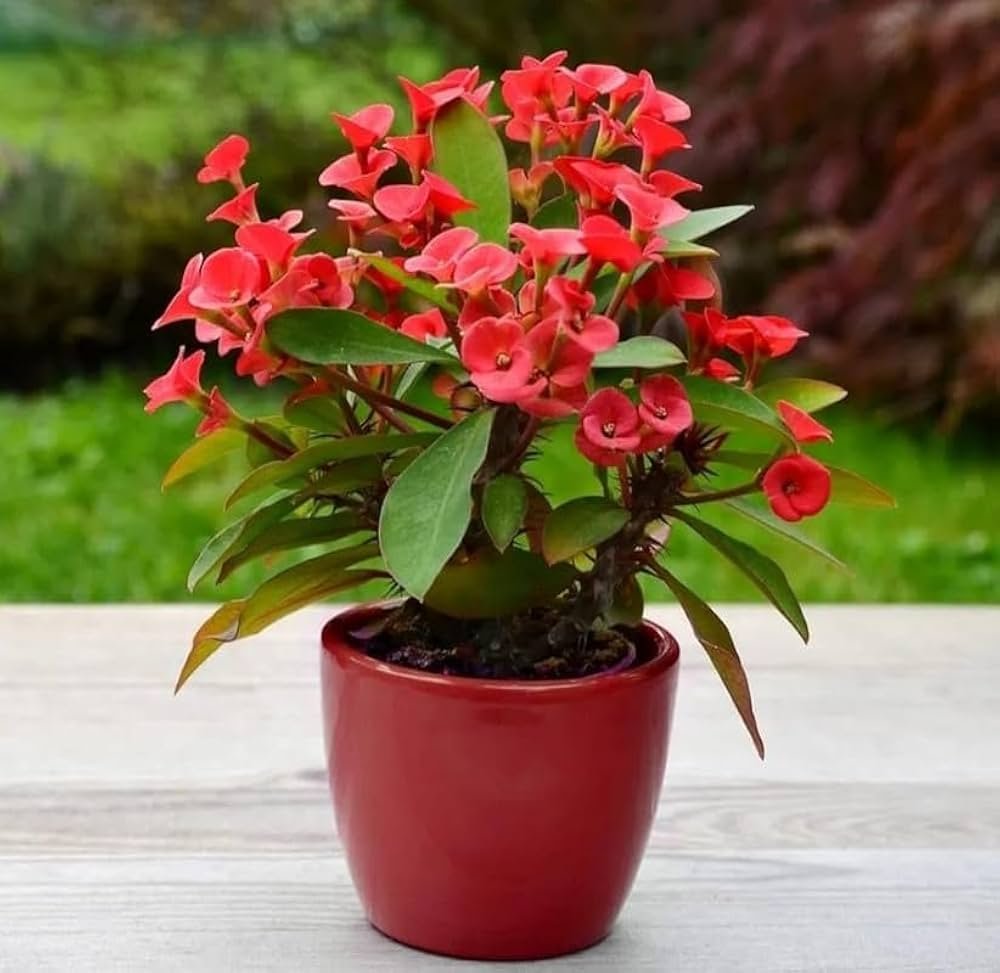
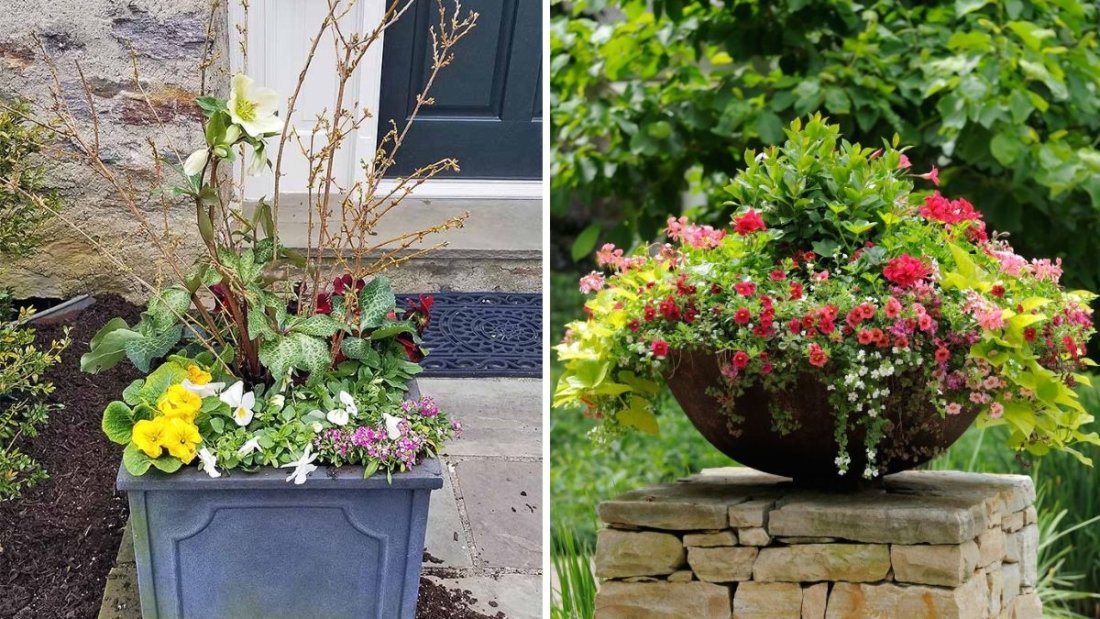
Succulents are one of the most popular indoor and outdoor plants today—not just because they look gorgeous, but because they thrive with very little care. Their unique shapes, vibrant colors, and easy-growing nature make them perfect for creating eye-catching decorative planters at home. The best part? You don’t need an hour… you don’t even need 20 minutes.

You can create a beautiful, aesthetic succulent planter in just 5 minutes!

In this step-by-step guide, you’ll learn how to design a stunning arrangement using only a few basic items. Whether you’re decorating your living room, gifting a plant, or simply upgrading your garden décor, this 5-minute project will instantly elevate any space.

Let’s begin!


Why Succulents Are Perfect for Quick Planters

Succulents are considered the kings of easy gardening. Here’s why they’re ideal for quick and beautiful planters:

  • They grow well in small containers
  • They require very little water
  • They come in endless shapes and colors
  • They thrive indoors and outdoors
  • They don’t need complicated care
  • They stay compact and neat for months

Their low-maintenance nature makes them perfect for instant planters or last-minute home décor ideas.


Materials You’ll Need (Simple & Easily Available)

You don’t need fancy gardening tools. A few items are enough to create a stunning arrangement:

A wide, shallow pot or bowl

Prefer ceramic, terracotta, or glass containers. Even small wooden or metal trays work beautifully.

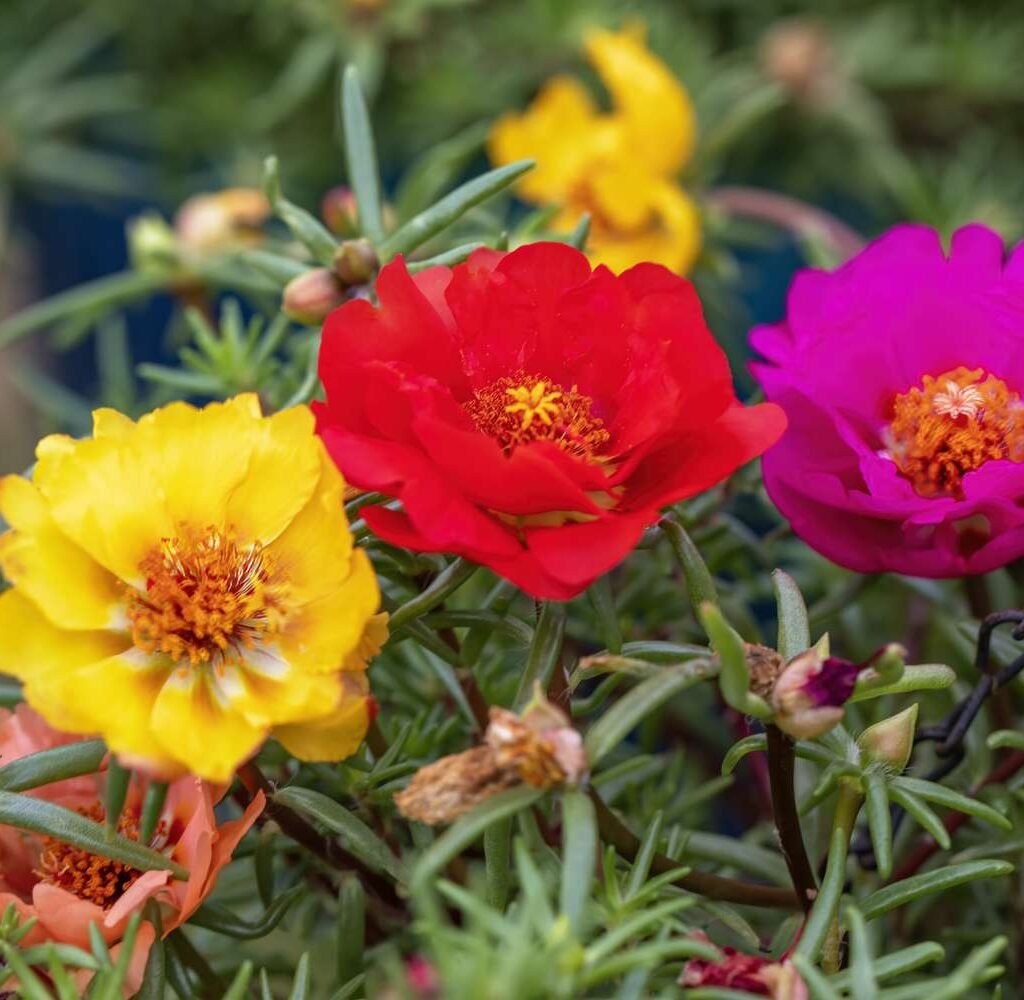
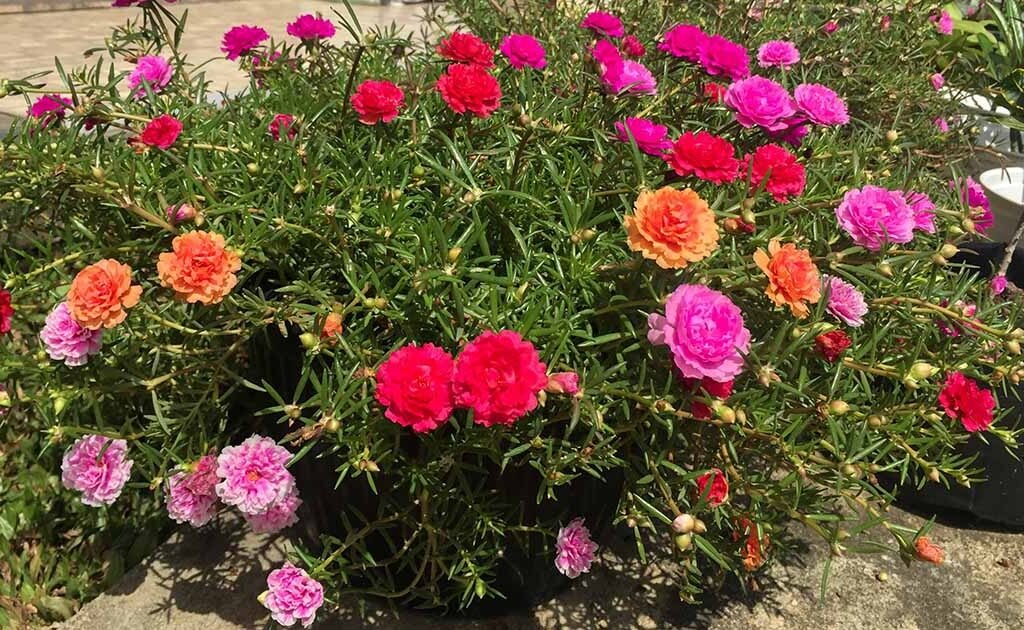
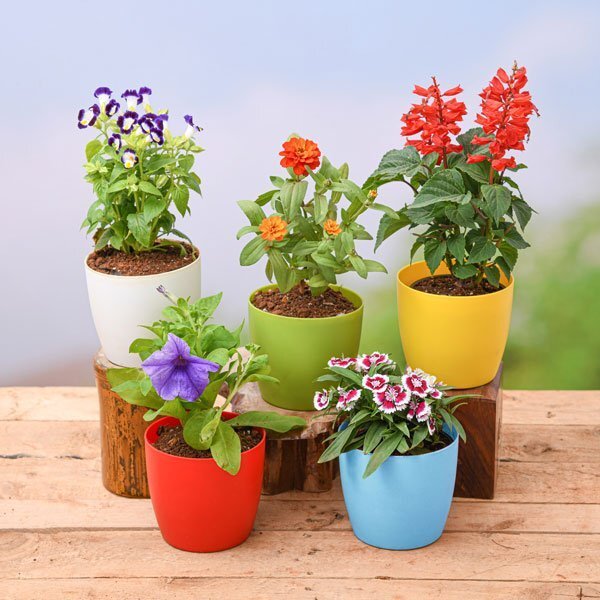
Succulents of different shapes and colors

Choose 3–7 varieties for a fuller look.
Examples:

  • Echeveria
  • Haworthia
  • Sedum
  • Jade plant (mini)
  • String of pearls
  • Crassula
  • Graptopetalum

Well-draining succulent soil

Essential for healthy growth.

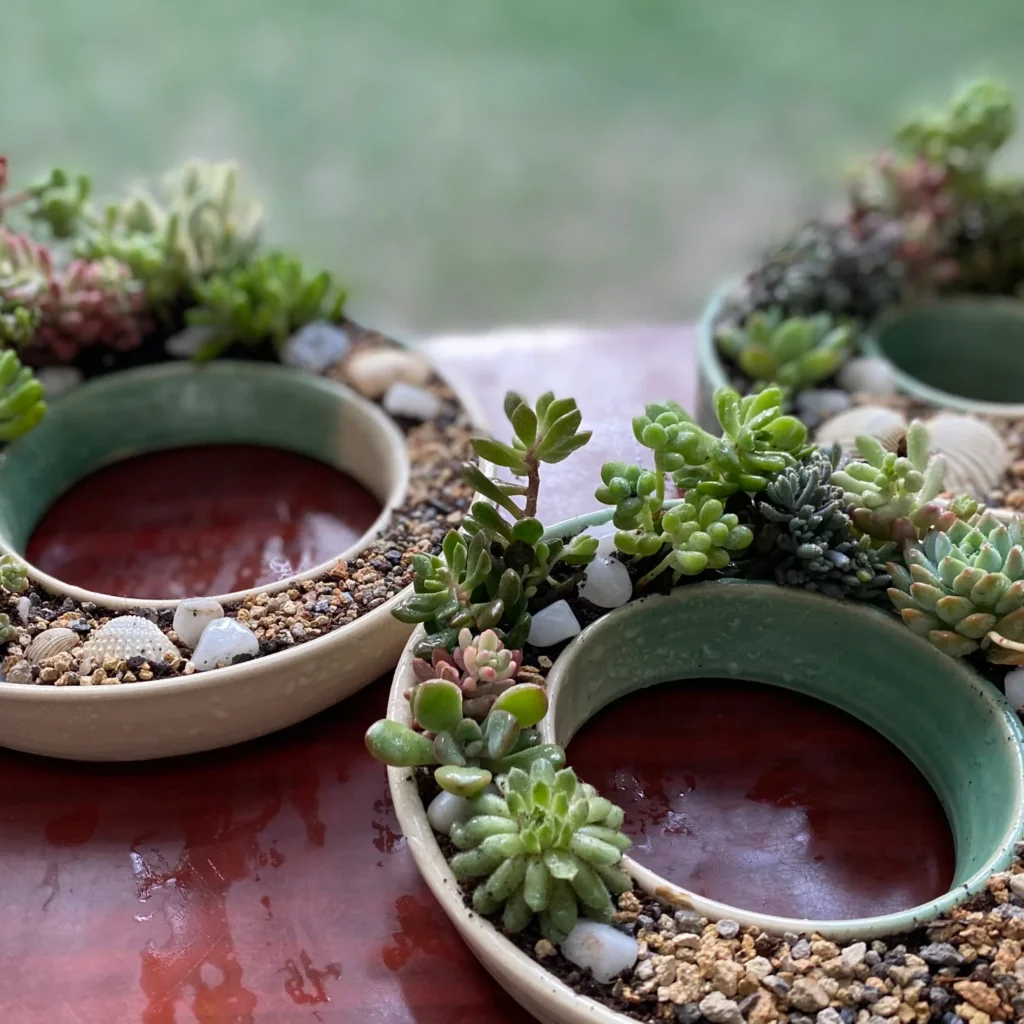
Decorative stones or pebbles

White stones, colored pebbles, gravel, or aquarium chips.

Activated charcoal (optional)

Useful if you’re using a non-draining container like glass bowls.

A small spoon or your hands

For quick planting.

That’s it—super simple!


Step-by-Step Guide: Make a Succulent Planter in Just 5 Minutes

Ready to create your masterpiece? Follow this quick and easy process.


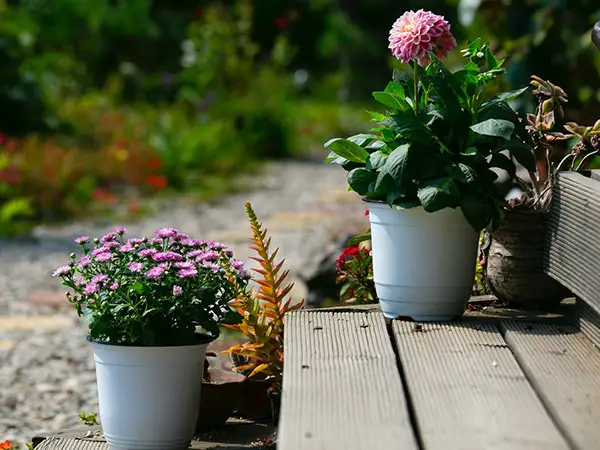
Step 1: Select the Perfect Container (30 seconds)

The container sets the theme of your planter. Shallow pots work best because succulents have short roots.

Choose a container that:

  • Matches your room décor
  • Has drainage holes (if not, read tips below)
  • Is wide enough for at least 3 succulents

A round bowl gives a soft, elegant look.
A rectangle tray gives a modern, minimalistic style.

If your container has no drainage holes, add a thin layer of:

  • Pebbles
  • Charcoal
  • Gravel

This prevents water from accumulating at the bottom.


Step 2: Fill with the Right Soil Mix (45 seconds)

Succulents hate wet soil. A well-draining mix is most important.

Use:

  • 50% succulent or cactus soil
  • 25% sand
  • 25% perlite

This ensures:

  • Fast drainage
  • No root rot
  • Healthy root growth

Fill the container ¾ full and gently level the surface.


Step 3: Position Your Succulents (1 minute)

This is where creativity comes in.

Arrange your plants before planting:

  • Place the biggest succulent in the center or backside
  • Add medium-sized plants around it
  • Add small trailing varieties like Sedum on the edges

This gives a balanced and visually appealing design.

Before planting, loosen the roots gently with your fingers. Succulents are hardy, so don’t worry—they won’t get damaged easily.


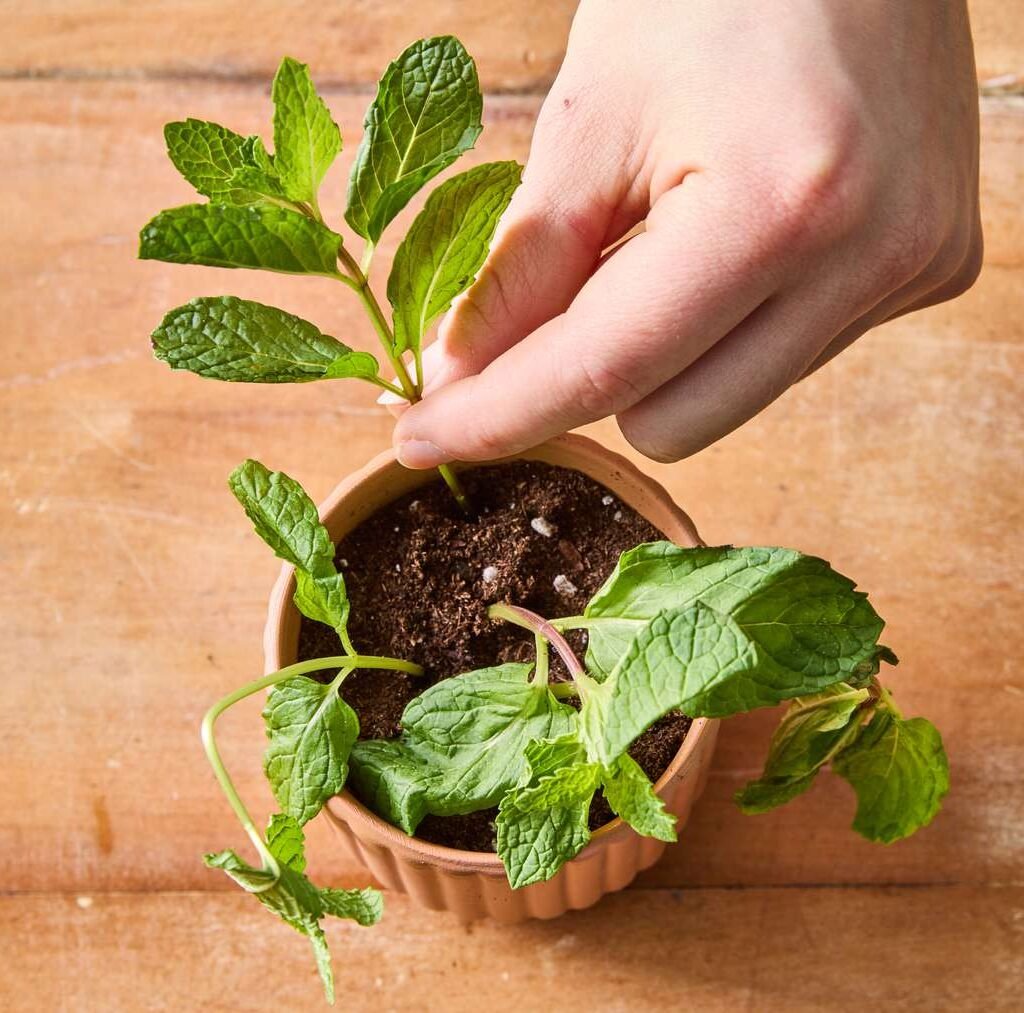
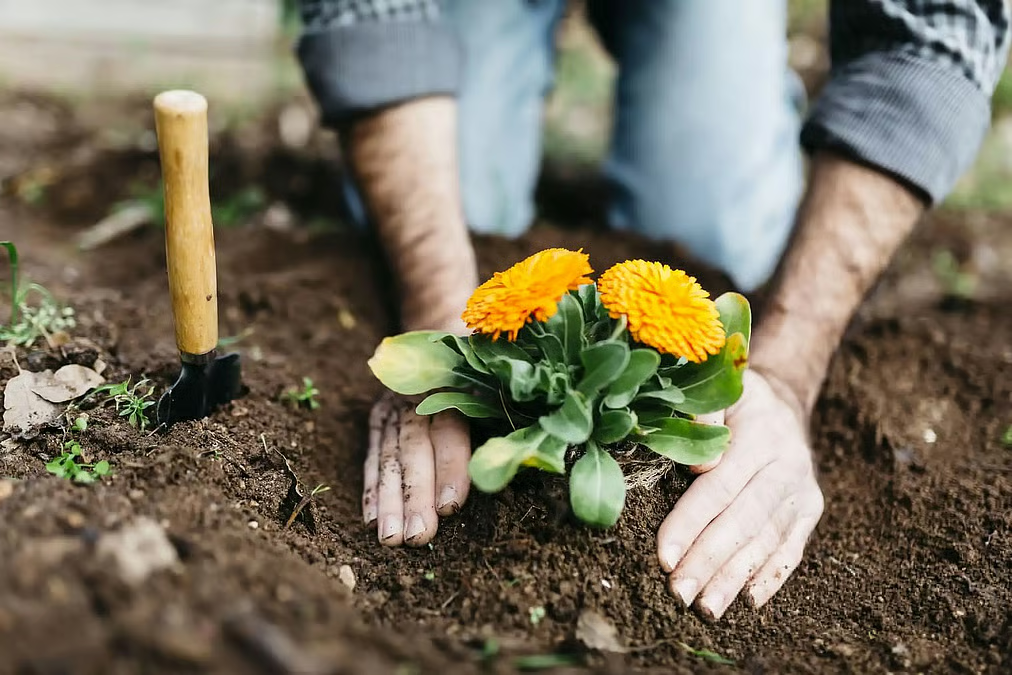
Step 4: Plant the Succulents (1 minute)

Use your fingers or a spoon to make small holes in the soil.

Place each succulent in its hole and press the soil gently around the base.

Tips:
Do NOT bury the stem too deep
Keep all plants at the same soil level
Leave small gaps between plants for growth

Within seconds, your planter starts taking shape!


Step 5: Add Decorative Layer on Top (45 seconds)

For the finishing touch:

Sprinkle:

  • White stones
  • Colored gravel
  • Black pebbles
  • Tiny shells
  • Wood pieces
  • Sand art

This not only makes your planter look professional, but also:

  • Prevents soil splashing
  • Reduces fungus gnats
  • Keeps the surface dry

Choose colors that match your interior.


Step 6: Final Touch & Placement (30 seconds)

You’re done!

Gently tap the container to settle the soil.
Do NOT water immediately—wait at least 24 hours.

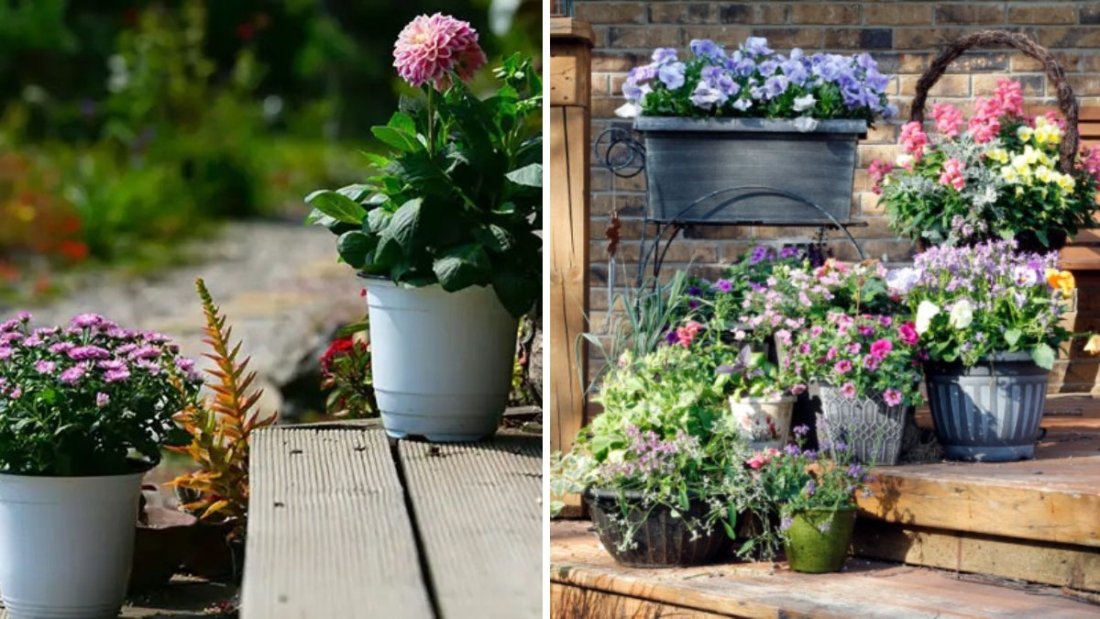
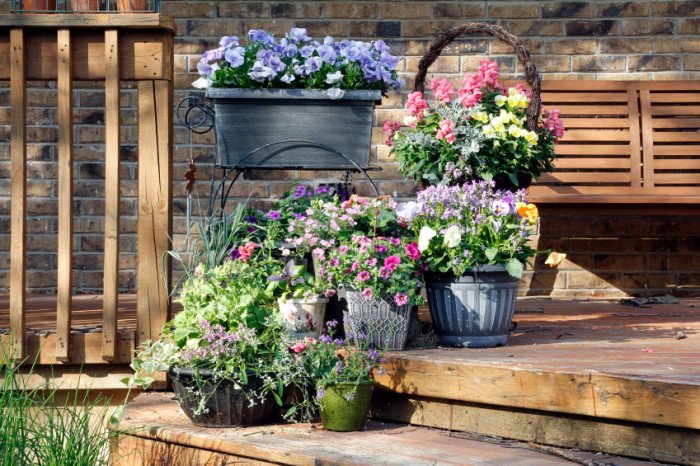
Now place your succulent planter in:

  • A bright windowsill
  • A desktop
  • A coffee table
  • Balcony railing
  • Study table
  • Bedroom corner

Avoid harsh direct sunlight for the first few days.


How to Care for Your Succulent Planter (Easy Maintenance)

After creating your planter, caring for it is just as simple.


Watering (Only When Needed!)

Succulents store water in their leaves. Overwatering kills them faster than underwatering.

Follow this rule:
Water only when the top 2 inches of soil are completely dry.

For indoor planters: Every 10–14 days
For outdoor planters: Every 7–10 days

Always water deeply but infrequently.


Sunlight Requirements

Place your planter in:

  • Bright light
  • Indirect sunlight
  • Near a window

If kept outdoors:

  • Give morning sunlight
  • Avoid afternoon harsh heat

Signs of too much sun:

  • Brown patches
  • Wrinkled leaves

Signs of too little sun:

  • Stretched, leggy growth
  • Pale color

Fertilizing

Succulents don’t need much feeding.
Use fertilizer only once every 45–60 days.

Best fertilizers:

  • Succulent fertilizer
  • Liquid seaweed
  • Diluted NPK 10-10-10
  • Vermicompost (very small amount)

Cleaning Your Succulents

Dust collects easily.
Blow gently or use a soft brush to keep the leaves clean and shiny.


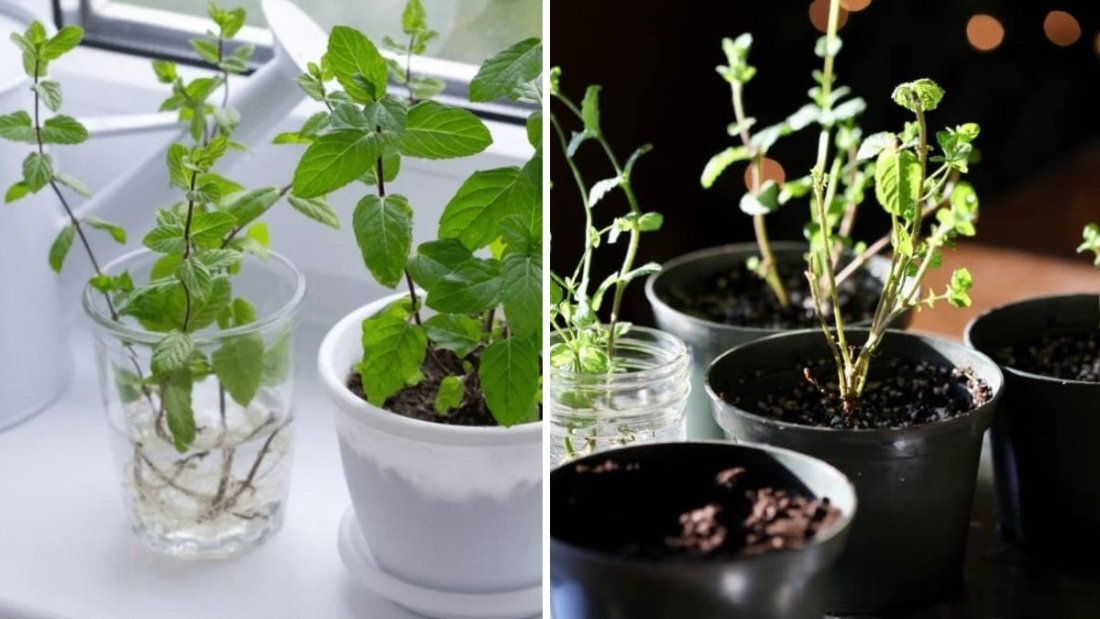
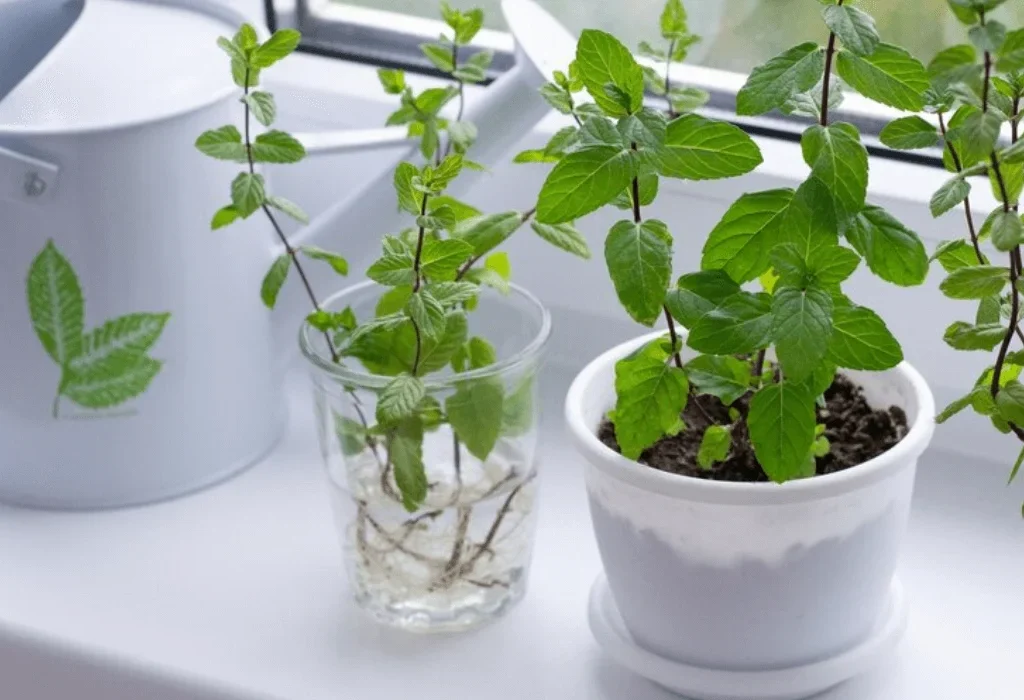
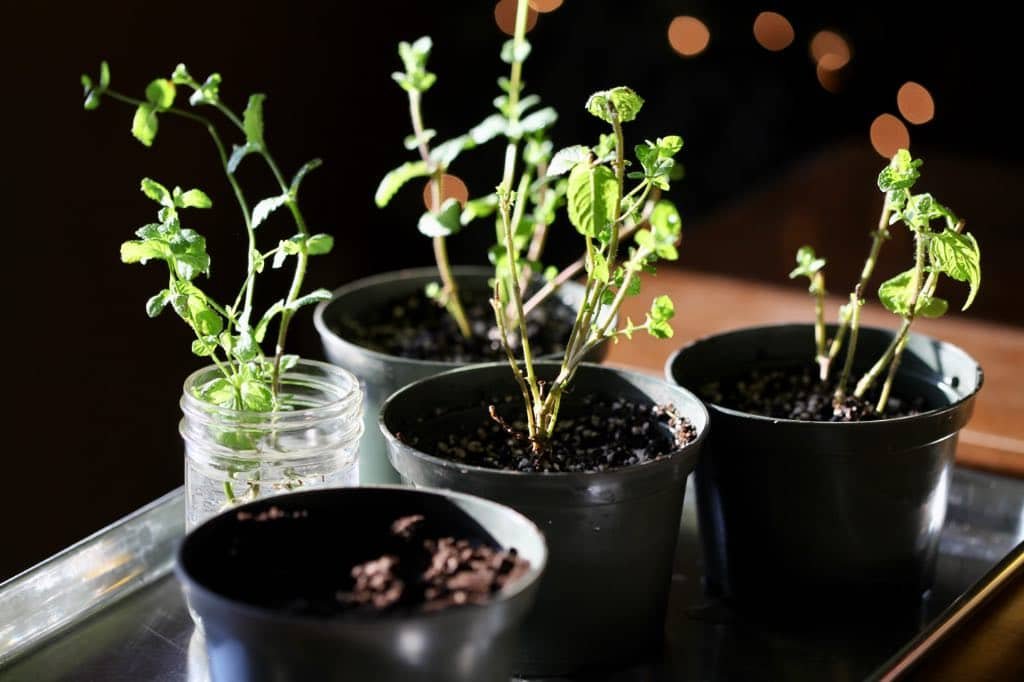
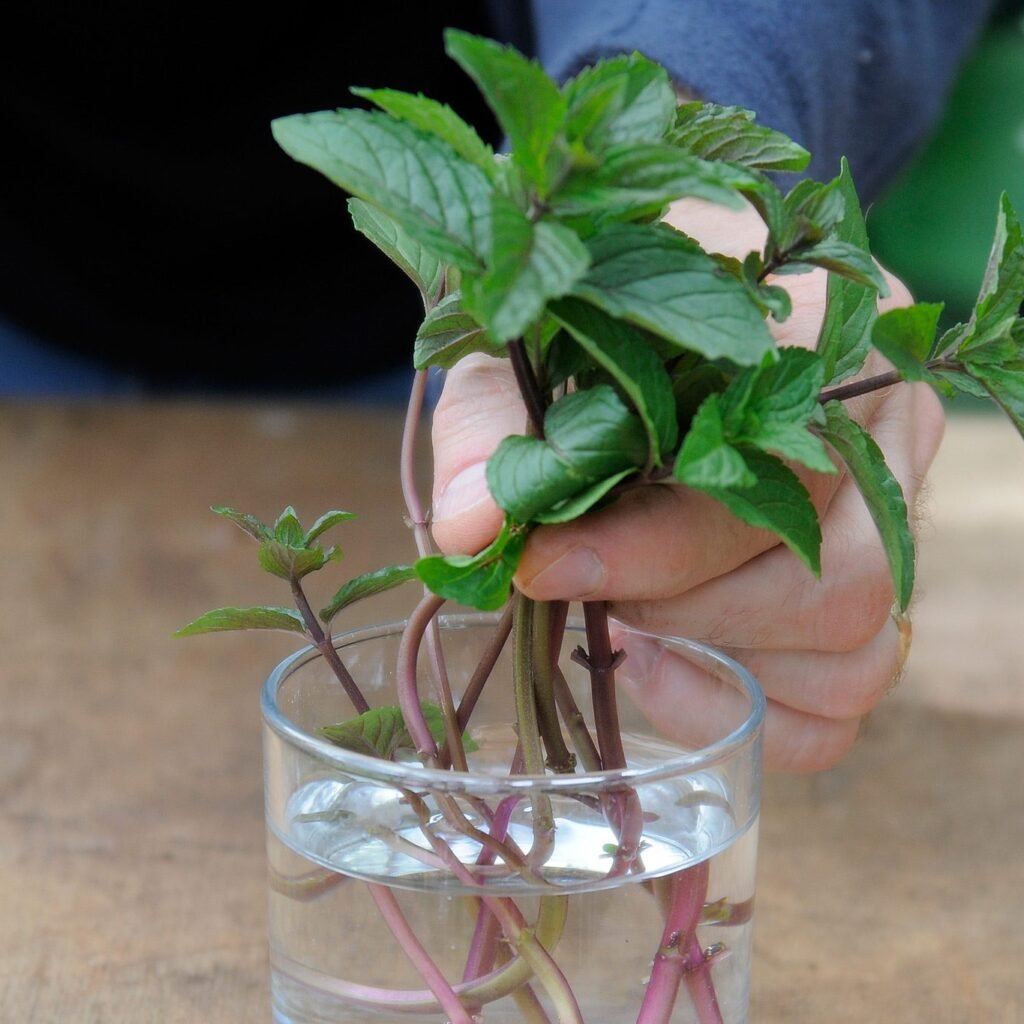
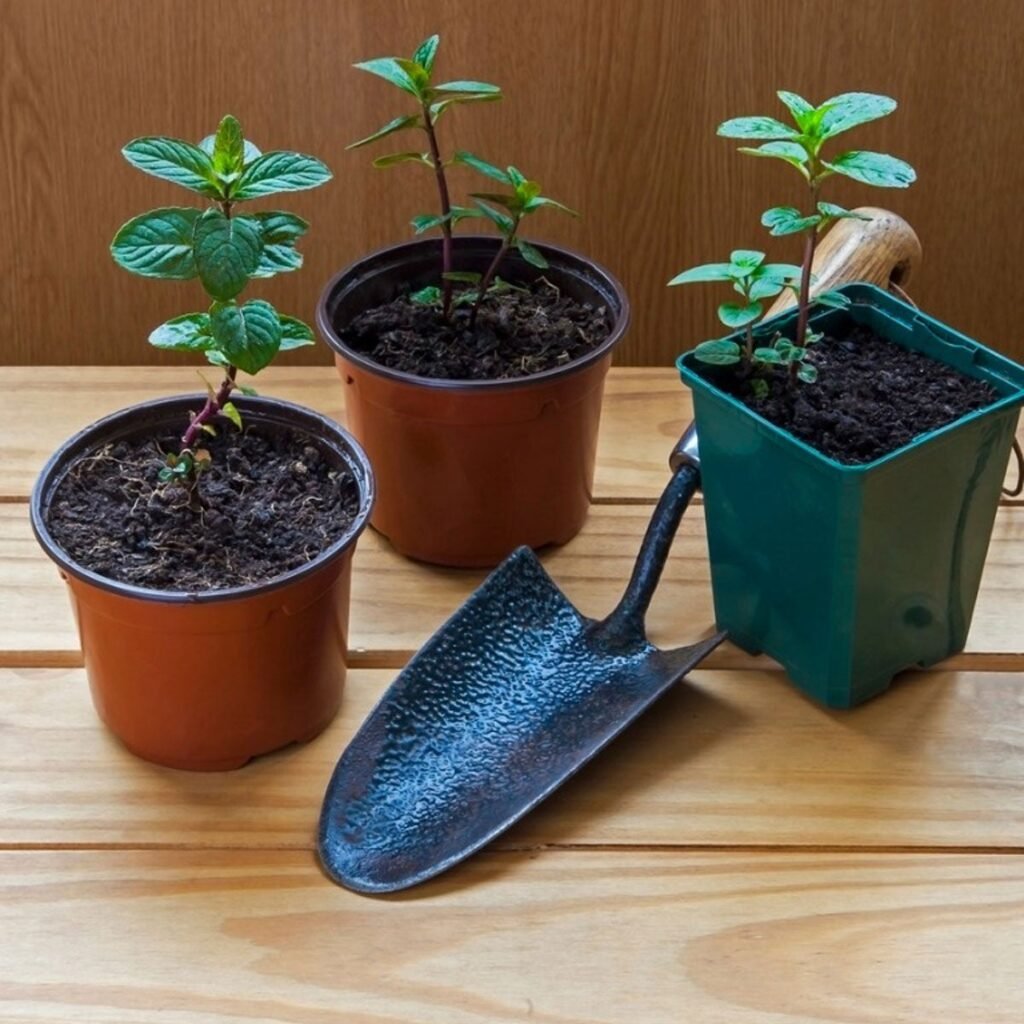
Propagation (Get More Plants for Free!)

Succulents multiply very easily. You can propagate them from:

  • Leaves
  • Stem cuttings
  • Offsets

Just place cut leaves on dry soil—they’ll root naturally in a few weeks.


Top Succulents to Use for Beautiful, Compact Planters

Here are some great options:

Echeveria

Rosette-shaped and perfect for the center.

Sedum

Great for edges; grows quickly.

Crassula

Thick leaves and beautiful color.

Haworthia

Ideal for low-light indoor areas.

Graptopetalum

Soft pastel shades make planters dreamy.

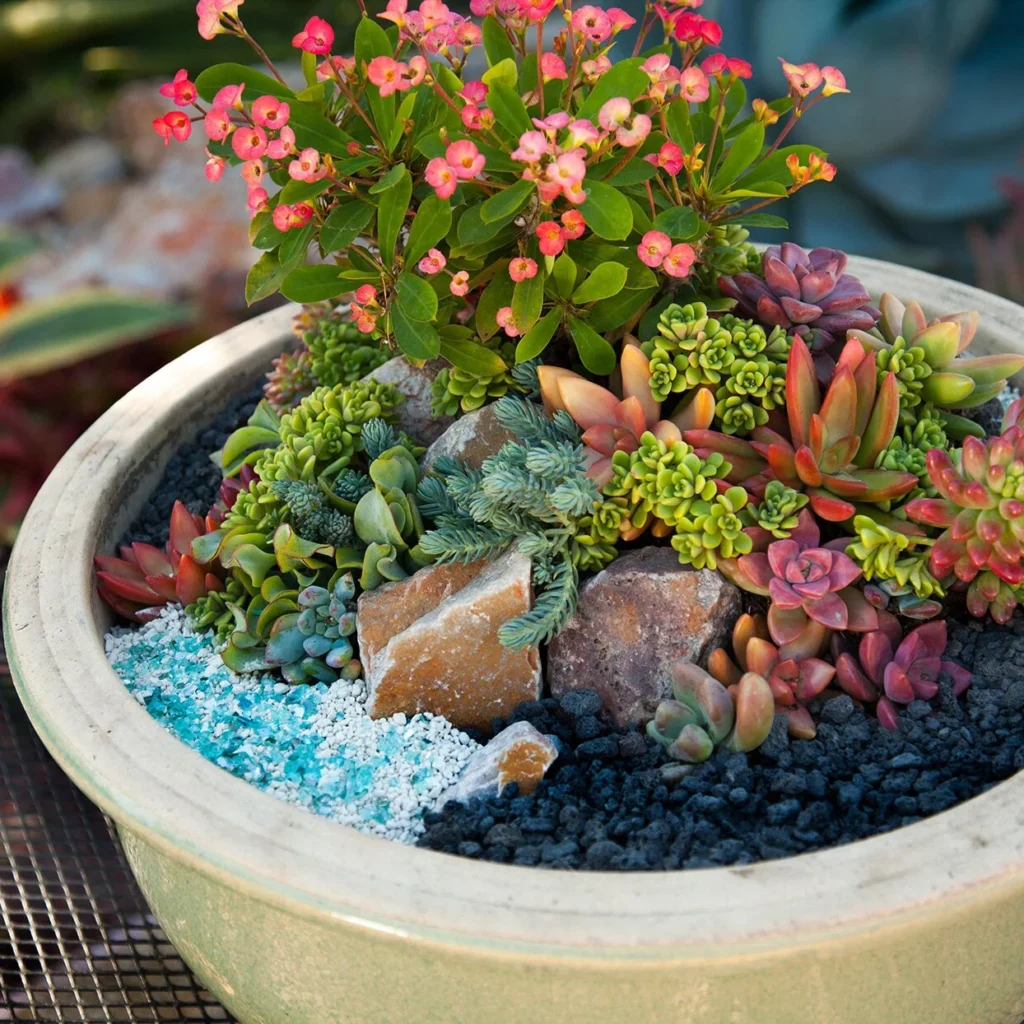
Mixing different textures makes your planter look more professional.


Creative Theme Ideas for Your 5-Minute Succulent Planter

Want to make your arrangement even more stylish? Try these creative themes:
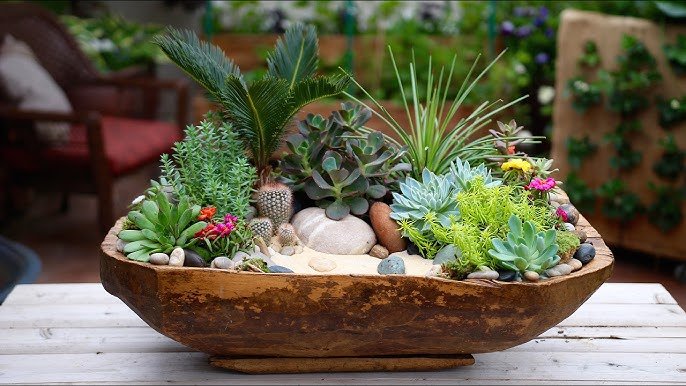
Desert Theme

Use sand, cactus, and brown stones.

Beach Theme

Add shells, blue stones, and white sand.

Minimalist Black & White Style

Black pot + white stones = elegant décor.

Fairy Garden Theme

Add tiny houses, bridges, or figurines.

Zen Garden

Use raked sand and smooth round stones.

These themes look perfect on tables, balconies, or office desks.


Why Succulent Planters Make the Best Gifts

Whether it’s a birthday, housewarming, anniversary, or office celebration, succulent planters are ideal gifts because:

  • They look premium
  • They last long
  • They require almost no care
  • They symbolize growth and harmony
  • They suit any décor

A handmade planter adds a personal touch that store-bought gifts can’t match.


Final Thoughts: A Beautiful Planter in Just Minutes

Making a succulent planter doesn’t require gardening experience, expensive materials, or a lot of time. In just 5 minutes, you can create something visually stunning, long-lasting, and incredibly easy to maintain.

Try this today and bring instant natural beauty into your home!

Bloom Explosion: The Simple Trick to Multiply Your Portulaca/Moss Rose Flowers Instantly!

Bloom Explosion: The Simple Trick to Multiply Your Portulaca/Moss Rose Flowers Instantly!

Portulaca, also known as Moss Rose, is one of the most colorful, low-maintenance, and sun-loving flowering plants you can grow at home. Whether you keep them on your balcony, terrace, or garden bed, Portulacas reward you with hundreds of bright, cheerful blooms throughout the summer. But what if your plant is producing only a few flowers, or blooming irregularly?

Good news! With one simple trick, you can dramatically increase the number of flowers on your Portulaca plants. This technique works for all varieties—single, double, grandiflora, hybrid, and even 9-o’clock varieties. In this article, you’ll learn exactly how this trick works, why it works, and how you can apply it to boost your plant’s flowering power like never before.

Let’s dive into the complete guide to unleash tons of blooms on your Portulaca with minimal effort!


Why Portulaca Is the Perfect Flower for Beginners

Before we talk about the trick, it’s important to understand why Portulaca is such a popular choice:

  • Thrives in extreme heat
  • Needs very little water
  • Grows well in poor soil
  • Flowers almost daily in summer
  • Spreads beautifully and fills pots quickly
  • Ideal for hanging baskets and borders

Because Portulaca is a succulent-type plant, it stores water in its leaves and stems. This makes it extremely resistant to drought and sunlight.

But even the strongest plants need the right technique to push out more flowers.


The Simple Trick: Pinching and Pruning!

The number one method to increase Portulaca flowers is:

Pinching off the growing tips to force branching.

This single action multiplies the number of branches—and each branch produces multiple blooms. More branches = more flowers every single day.

Let’s break down how this trick works.


How Pinching Works (And Why It Boosts Blooming)

A Portulaca plant naturally grows slightly upright with a central main stem. As long as this main stem is intact, the plant focuses its energy on growing length—not flowers.

When you pinch the top:

  • The apical dominance is removed
  • The plant starts producing side shoots
  • These side shoots carry new buds
  • Flower density increases 3–5 times

Within 10–15 days, you’ll see new growth emerging from the nodes—and within 20–30 days, the plant becomes fuller and more flower-loaded.


How to Pinch or Prune Portulaca Properly

The method is quick, safe, and extremely simple.

Step-by-Step Instructions

Step 1: Identify the growing tip

Look at the end of each branch—you’ll see a tender, soft tip.

Step 2: Use fingers or small scissors

Pinching is best done by hand, but clean scissors also work.

Step 3: Remove ½ to 1 inch of the tip

Do not cut too deeply. Only the top soft part should be removed.

Step 4: Repeat for all long branches

Pinch every branch that is stretching too long and has fewer blooms.

Step 5: Allow it to rest

Wait 7–10 days, and you will see multiple branches sprouting.

Within a month, your Portulaca will transform from a thin, leggy plant into a dense, bushy, flower-loaded beauty.


When Should You Apply This Trick?

The best time to pinch Portulaca:

  • When the plant is 5–6 inches tall
  • When it looks leggy and stretched
  • After the first major wave of flowering
  • During spring and early summer

Avoid pinching just before monsoon because excess moisture may cause stem rot.


Additional Tips to Boost Flower Production Even More

Pinching alone works wonders, but if you combine it with these simple care tips, you’ll see maximum flowering in minimum time.


Give Your Portulaca Full Sunlight

Portulaca is a sun worshipper. The more sunlight it gets, the more it blooms.

Perfect Sunlight Condition:

  • 6–8 hours of direct sunlight: Ideal
  • 4 hours: Minimum for flowering
  • Less than 4 hours: Very few or no flowers

Place them on a terrace, sunny balcony, or anywhere they receive maximum heat.


Use the Right Soil Mix (Very Important)

The biggest mistake beginners make is using heavy soil. Portulaca hates wet, soggy soil.

Best Soil Mix for Massive Flowering:

  • 40% garden soil
  • 40% sand or perlite
  • 20% compost

This sandy, fast-draining mix helps roots stay healthy and encourages more blooms.


Water Only When Needed

Portulaca is a succulent. Overwatering stops blooming and causes rot.

Watering Rule:

Water only when the soil is completely dry.

In summers, watering every 2–3 days is enough. In monsoon, almost no watering is required.


Feed Them With a Bloom Booster

A small dose of fertilizer boosts flowering dramatically.

Best Fertilizers for Portulaca:

  • Banana peel fertilizer
  • Bone meal
  • Mustard cake (well-fermented)
  • NPK 0-52-34 (once a month for heavy bloom)

Avoid too much nitrogen—this grows leaves, not flowers.


Remove Dead Flowers (Deadheading)

Portulaca flowers bloom for one day only. Removing the dried blooms encourages the plant to produce more.

Deadheading Benefits:

  • Cleaner appearance
  • No energy wasted on seed formation
  • Faster blooming cycle

Just gently pluck off the dried flower heads every few days.


Avoid Crowded Pots

Portulaca spreads horizontally. If your pot is overloaded, the blooming reduces.

Ideal Pot Size:

  • 8–12 inch pot for 3–4 plants
  • Hanging baskets give excellent results
  • Wide containers work best

Spacing ensures each branch gets enough light and airflow.


What Results Can You Expect?

If you follow:

  • Pinching
  • Sunlight
  • Correct soil
  • Controlled watering
  • Occasional fertilizers

Your Portulaca will:

Produce double or triple the flowers
Grow thicker, healthier stems
Show daily blooming throughout summer
Spread beautifully and fill the pot
Look brighter and more vibrant

Expect a dramatic bloom increase within 20–30 days.


Common Mistakes to Avoid

Even though Portulaca is a hardy plant, these mistakes reduce flowering:

Overwatering
Heavy garden soil
No pruning
Keeping plants in shade
Too much nitrogen
Growing too many plants in one pot
Pinching during rainy season

Just avoid these, and your plant will reward you endlessly.


Why This Trick Works Every Time

Pinching redirects the plant’s energy from growing tall to growing wide—and a wider plant always produces more blooms.

This method is used by:

  • Professional gardeners
  • Nurseries
  • Commercial flower growers

And now you can use it too—without any tools or extra cost.


Final Thoughts: Boost Your Portulaca Flowers the Easy Way

If you want a bloom explosion in your garden, Portulaca is your best friend. With this simple pinching trick, you can transform even a weak plant into a flowering superstar. This method is so effective that you’ll see visible results in just a few weeks.

Try this today, and soon your terrace or balcony will look like a colorful carpet of blooms—bright, bold, and absolutely stunning!

Grow Mussaenda Plant Easily – Complete Care Tips for a Vibrant Blooming Garden

Grow Mussaenda Plant Easily – Complete Care Tips for a Vibrant Blooming Garden

Mussaenda, also known as Queen Sirikit or Bangkok Rose, is a stunning flowering shrub admired for its bright, showy bracts and long-lasting blooms. Its colorful flowers, ranging from pink, red, to white, make it a favorite choice for gardens, patios, and landscape decoration. Whether you want a bushy hedge, a potted beauty, or a vibrant garden centerpiece, Mussaenda is perfect for every gardener.

In this guide, you’ll learn how to grow Mussaenda step by step, including soil selection, watering, sunlight requirements, propagation, fertilization, pruning, and pest control. This comprehensive care guide ensures your Mussaenda thrives beautifully.


Why Grow Mussaenda?

Mussaenda is a versatile plant that offers multiple benefits:

  • Produces large, colorful bracts that resemble flowers
  • Flowers bloom year-round in tropical climates
  • Attracts butterflies, bees, and birds
  • Suitable for garden beds, borders, hedges, and pots
  • Low maintenance if proper care is given

Whether you’re a beginner or an experienced gardener, Mussaenda adds color and elegance to any space.


Best Time to Plant Mussaenda

  • The ideal time to plant is during spring or early summer when temperatures are warm.
  • Avoid planting during heavy rainfall or extreme cold, as young plants are sensitive to waterlogging and frost.

Choosing the Right Variety

Mussaenda comes in several popular varieties:

  1. Mussaenda erythrophylla – Bright red bracts, tropical favorite
  2. Mussaenda philippica – Pink or white bracts, medium-sized shrub
  3. Mussaenda macrophylla – Larger leaves, bushy growth, white flowers

Tip: Select a variety based on your garden space, climate, and preferred color.


Planting Mussaenda: Step-by-Step

Step 1: Prepare the Soil

  • Mussaenda thrives in well-draining, fertile soil.
  • Mix garden soil with compost or organic manure for better fertility.
  • Slightly acidic to neutral soil (pH 6–7) works best.
  • Avoid heavy clay soil that retains water.

Step 2: Select a Healthy Plant or Cutting

  • Mussaenda can be grown from nursery saplings, stem cuttings, or seeds.
  • Stem cuttings are ideal for beginners—they root quickly and flower faster.

Step 3: Planting

  • Dig a hole twice the size of the root ball.
  • Place the plant and fill the hole with soil, pressing gently to remove air pockets.
  • Water immediately to help settle the soil.

Watering Mussaenda

  • Water regularly during the growing season (spring–summer) to keep the soil moist.
  • Reduce watering in winter when the plant’s growth slows.
  • Avoid waterlogging, as it can lead to root rot.
  • Tip: Mulch around the base to retain moisture and reduce weeds.

Sunlight Requirements

  • Mussaenda prefers full sunlight for 5–6 hours daily.
  • Partial shade is acceptable but may result in fewer blooms.
  • Indoors or balcony planting should ensure bright, indirect sunlight.

Fertilizing Your Mussaenda

Proper nutrition ensures vibrant blooms:

  • Organic Fertilizers: Use compost, vermicompost, or cow dung monthly
  • Chemical Fertilizers: NPK 10-10-10 or 20-20-20 every 20–25 days during active growth
  • Bloom Booster: High phosphorus fertilizer (0-52-34) once a month encourages flowering

Tip: Avoid over-fertilization to prevent excessive leaf growth at the expense of flowers.


Pruning and Training

Pruning keeps Mussaenda healthy and bushy:

  • Remove dead or weak branches regularly
  • Prune after flowering to maintain shape
  • For climbing or sprawling varieties, provide trellises or support structures
  • Pinch tips to encourage bushy, dense growth

Common Pests and Diseases

Pests:

  • Aphids, mealybugs, whiteflies
  • Spray neem oil or mild insecticidal soap
  • Regular inspection prevents infestations

Diseases:

  • Leaf spot – fungal disease in humid conditions
  • Root rot – caused by waterlogged soil
  • Ensure well-draining soil and avoid overwatering

Propagation of Mussaenda

1. From Stem Cuttings (Fastest Method)

  • Take a 6–8 inch semi-hardwood cutting from a healthy plant
  • Remove lower leaves and dip the end in rooting hormone
  • Plant in well-draining soil or place in water until roots develop

2. From Seeds

  • Plant seeds in a light, sandy soil mix
  • Keep soil moist and warm
  • Seeds germinate slowly, usually taking 2–3 weeks, but flowering may take longer

Tip: Beginners prefer cuttings for faster flowering and easier care.


Step-by-Step Growth & Care Timeline (With Updates)

Week 1–2 – Planting Stage

  • Roots settle in soil
  • Water lightly, keep soil moist
  • Avoid direct harsh sunlight for young plants

Week 3–4 – Early Growth

  • New leaves appear
  • Stem strengthens and grows taller
  • Fertilize lightly with organic compost

Week 5–6 – Active Growth

  • Branching begins
  • Plant grows bushier
  • Continue sunlight care and regular watering

Week 8–10 – Flower Bud Formation

  • Small buds appear at branch tips
  • Ensure full sunlight for vibrant blooms

Month 3–4 – First Blooms

  • Bright, colorful bracts open
  • Regular pruning encourages more buds

Month 5+ – Established Plant

  • Full, bushy shrub with multiple flowers
  • Year-round flowering possible in tropical climates

Pro Tips for Fast & Easy Mussaenda Growth

  1. Ensure full sunlight for abundant blooms
  2. Use semi-hardwood cuttings for faster flowering
  3. Keep soil well-draining and fertile
  4. Prune regularly to maintain bushy growth
  5. Mulch to retain soil moisture and reduce weeds
  6. Monitor pests early and treat promptly

Conclusion

Mussaenda is a vibrant, easy-to-grow flowering shrub that brings color, life, and elegance to any garden. With the right soil, watering routine, sunlight, pruning, and fertilization, even beginners can enjoy lush foliage and stunning blooms year-round.

Following this guide with step-by-step care tips, propagation methods, and growth updates ensures your Mussaenda grows fast, healthy, and flowering abundantly, making your garden a beautiful, lively paradise.

Grow Allamanda Plant Fast & Easy – Complete Care Tips for a Blooming Paradise!

Grow Allamanda Plant Fast & Easy – Complete Care Tips for a Blooming Paradise!

Allamanda, popularly known as Golden Trumpet, is a stunning flowering plant admired for its vibrant yellow blooms and glossy green foliage. Whether you want to grow it in your garden, balcony, or as a decorative hedge, Allamanda is one of the easiest flowering plants to cultivate—fast, easy, and highly rewarding.

In this detailed guide, you’ll learn how to grow Allamanda step by step, with tips on soil, watering, sunlight, pruning, fertilizing, pest management, and everything needed to maintain a healthy, flowering plant.


Why Grow Allamanda?

Allamanda is a popular choice for gardeners because:

  • It produces bright, trumpet-shaped yellow flowers almost all year round in tropical climates.
  • It is low-maintenance and adapts well to different growing conditions.
  • It can be grown as a bush, climber, or hedge.
  • It attracts butterflies and bees, enhancing your garden ecosystem.

Whether you are a beginner or an experienced gardener, Allamanda is a must-have plant for its aesthetic appeal and easy care.


Best Time to Plant Allamanda

  • The ideal time to plant Allamanda is during spring or early summer, when the weather is warm.
  • Avoid planting during heavy rains or frost, as young plants are sensitive to waterlogging and cold.

Choosing the Right Variety

Allamanda comes in a few varieties:

  1. Allamanda cathartica – Classic golden trumpet, large yellow flowers
  2. Allamanda blanchetii – Violet or pinkish trumpet blooms
  3. Allamanda neriifolia – Compact variety, suitable for pots

Tip: Choose the variety based on space and desired aesthetics.


Planting Allamanda: Step by Step

Step 1: Prepare the Soil

  • Allamanda prefers well-draining, slightly acidic to neutral soil (pH 6–7).
  • Mix garden soil with compost and sand for optimum drainage.
  • Avoid clay-heavy soils that retain water.

Step 2: Select a Healthy Plant or Cutting

  • You can grow Allamanda from seeds, cuttings, or nursery saplings.
  • Stem cuttings are faster for flowering and easier for beginners.

Step 3: Planting

  • Dig a hole twice the size of the pot or root ball.
  • Place the plant and backfill with soil, ensuring roots are well-covered.
  • Water immediately to help settle the soil.

Watering Allamanda

  • Water regularly during the growing season (spring–summer).
  • Reduce watering in winter when the plant’s growth slows.
  • Avoid overwatering to prevent root rot.
  • Tip: Keep the soil slightly moist, not soggy.

Sunlight Requirements

  • Allamanda thrives in full sunlight (6–8 hours daily).
  • Partial shade is acceptable but may reduce flowering.
  • Indoors or balcony planting should be near a sunny window or balcony.

Fertilizing Allamanda

Proper nutrition boosts flower production:

  • Organic Fertilizers: Compost, vermicompost, or cow dung every 2–3 weeks
  • Chemical Fertilizers: NPK 10-10-10 or 19-19-19 diluted every 20 days during growing season
  • Bloom Booster: High-phosphorus fertilizer (e.g., 0-52-34) once a month for prolific flowering

Tip: Avoid over-fertilization, which may lead to more leaves and fewer flowers.


Pruning and Training

Pruning keeps Allamanda healthy and encourages bushy growth:

  • Remove dead, diseased, or weak branches regularly
  • Prune after flowering to maintain shape
  • For climbing varieties, provide trellises or supports
  • Pinching tips encourages dense, bushy growth

Common Pests and Diseases

Pests:

  • Aphids, mealybugs, and spider mites
  • Spray neem oil or mild insecticidal soap regularly

Diseases:

  • Root rot – caused by waterlogged soil
  • Leaf spots – fungal infection in humid conditions
  • Use well-draining soil and avoid overhead watering

Propagation of Allamanda

1. From Cuttings (Fastest Method)

  • Take a 6–8 inch semi-hardwood cutting from a healthy plant
  • Remove lower leaves and dip the end in rooting hormone
  • Plant in well-draining soil or place in water until roots develop

2. From Seeds

  • Plant seeds in a light, sandy soil mix
  • Keep soil moist and warm
  • Seeds germinate in 2–3 weeks but take longer to flower

Tip: Beginners prefer cuttings for faster flowering and easier care.


Step-by-Step Growth & Care Timeline (With Updates)

Week 1–2 – Planting Stage

  • Roots settle in soil
  • Keep soil moist
  • Avoid direct harsh sunlight for young plants

Week 3–4 – Early Growth

  • New leaves appear
  • Stem becomes firm and strong
  • Fertilize lightly with organic compost

Week 5–6 – Active Growth

  • Plant grows taller
  • Branching begins
  • Continue watering and sunlight care

Week 8–10 – Flower Bud Formation

  • Small buds appear at branch tips
  • Ensure full sunlight for vibrant blooms

Month 3–4 – First Blooms

  • Bright yellow flowers open
  • Regular pruning encourages more buds

Month 5+ – Established Plant

  • Full, bushy plant with multiple flowers
  • Regular care ensures year-round flowering

Pro Tips for Fast & Easy Allamanda Growth

  1. Sunlight is crucial – full sun ensures abundant blooms
  2. Prune regularly to keep plant shape and health
  3. Use semi-hardwood cuttings for fast flowering
  4. Avoid waterlogging – proper drainage is key
  5. Fertilize moderately for bushy growth and vibrant flowers
  6. Monitor pests early and treat with neem or insecticidal soap

Conclusion

Allamanda is not just a plant—it’s a vibrant addition to any garden. With simple care steps, proper soil, regular watering, sunlight, and pruning, even beginners can enjoy lush green foliage and radiant yellow blooms all year round.

Whether grown in pots, hanging baskets, or as a climbing shrub, Allamanda brings color, life, and joy to your outdoor or indoor space. Following this guide with care tips, propagation methods, and an update timeline ensures your plant grows fast, healthy, and flowering abundantly.

Nani Maa’s Beautiful Garden Tour – A Heartwarming Walk Through Nature’s Paradise

Nani Maa’s Beautiful Garden Tour – A Heartwarming Walk Through Nature’s Paradise

There’s something magical about stepping into Nani Maa’s garden. It’s not just a garden—it’s a living tapestry of colors, scents, and memories. Every corner tells a story, from the flowering marigolds along the pathway to the aromatic herbs growing in neatly lined pots.

Today, let’s take a virtual garden tour and explore the beauty, charm, and warmth of Nani Maa’s beloved outdoor sanctuary.


The Entrance: A Blooming Welcome

As you step in, you’re greeted by vibrant flower beds. Roses in shades of red, pink, and yellow line the pathway, complemented by cheerful marigolds and sunflowers. The air is rich with fragrance, and the gentle sound of a small water fountain adds a calming touch.

Tip from Nani Maa: “Always plant flowers that make you smile every morning.”


Herb and Vegetable Corner

Nani Maa loves homegrown herbs and vegetables. Fresh mint, coriander, and basil grow alongside chilies and tomatoes. This corner is both practical and beautiful—aromatic leaves and colorful veggies create a feast for the eyes as well as the taste buds.

Pro Tip: Growing herbs in small pots allows easy access for daily cooking.


Shady Retreat: The Old Trees

Large, leafy trees offer shade and a sense of peace. This area is perfect for morning tea or evening storytelling. Birds often visit, adding natural music to the serene ambiance.

Nani Maa’s Advice: “A garden is not just flowers—it’s a home for birds, butterflies, and bees too.”


Flower Beds and Seasonal Blooms

Every season, the garden transforms. In spring, tulips and daisies bloom. Summer brings hibiscus and marigolds. Monsoon showers awaken lilies and lotuses in the pond area. Nani Maa carefully plans her garden to ensure colorful blooms throughout the year.

Fun fact: She keeps a journal of bloom schedules to track which flowers thrive best.


The Cozy Sitting Area

A quaint wooden bench under a pergola adorned with climbing roses is perfect for relaxation. This is where family gathers for tea, and Nani Maa often shares gardening tips. The sitting area is surrounded by flowering vines and hanging baskets, making it a picture-perfect nook.


Pollinator Paradise

Nani Maa’s garden is alive with bees, butterflies, and hummingbirds. She encourages pollinators by planting nectar-rich flowers and avoiding chemical pesticides. This not only helps the garden flourish but also teaches a valuable lesson about coexisting with nature.


Tips from Nani Maa for Your Garden

  1. Plant with love: Choose plants that make you happy.
  2. Mix colors: Combine flowers, herbs, and vegetables for visual appeal.
  3. Careful watering: Avoid overwatering; observe plant needs.
  4. Invite nature: Birds and butterflies enhance beauty.
  5. Patience is key: Gardens grow with time, care, and love.

Conclusion

Nani Maa’s garden is more than just a collection of plants—it’s a living story of love, care, and creativity. Every corner reflects her warmth, patience, and connection to nature. Walking through her garden is a reminder that gardening is not just about plants—it’s about nurturing life and creating memories.

If you ever get a chance, take a leisurely stroll through her garden. You’ll leave feeling refreshed, inspired, and connected to nature—just like a beautiful morning spent with Nani Maa herself.

Grow Fresh Mint From Cuttings – Easiest Method for Beginners With Step-by-Step Updates!

Grow Fresh Mint From Cuttings – Easiest Method for Beginners With Step-by-Step Updates!

Mint, also known as Pudina, is one of the most versatile and aromatic herbs you can grow at home. Whether it’s for refreshing beverages, chutneys, salads, or garnishing dishes, having fresh mint at your fingertips is a delight. The best part? You don’t need seeds or complicated techniques—growing mint from cuttings is fast, easy, and highly effective, even for beginners.

In this complete guide, you’ll learn how to grow mint from cuttings, step-by-step care tips, watering routine, soil and sunlight requirements, common problems, and a week-by-week update timeline, so you can see your mint thrive.


Why Grow Mint From Cuttings?

Mint is a perennial herb that spreads quickly. While you can grow it from seeds, propagation through cuttings offers several advantages:

  • Faster growth compared to seeds
  • Guaranteed plant identity (same flavor as the parent plant)
  • High success rate
  • Cost-effective – no need to buy multiple plants
  • Year-round propagation

Even a small stem cutting can become a full, lush mint plant in just a few weeks.


Best Time to Take Mint Cuttings

The ideal time for propagation is:

  • Spring or early summer (March–June) for fastest growth
  • Anytime you have a healthy mint plant at hand

Choose healthy, green, non-woody stems for the best results.


Step 1: Choosing and Preparing Your Mint Cutting

  1. Select a healthy stem with 4–6 inches in length.
  2. Cut the stem just below a node (where leaves meet the stem).
  3. Remove the lower leaves, leaving 2–3 leaves at the top.
  4. If the stem has flowers, pinch them off—this directs energy to root growth.
  5. Optional: Dip the cut end in rooting hormone for faster results.

Pro Tip: Use clean scissors or pruning shears to avoid spreading diseases.


Step 2: Rooting Mint in Water (Easiest Beginner Method)

Mint is one of the easiest herbs to root in water. Here’s how:

  1. Fill a small glass or jar with clean water.
  2. Place the mint cutting in water, ensuring nodes are submerged.
  3. Keep the jar in bright, indirect sunlight.
  4. Change the water every 2–3 days to prevent bacterial growth.

Within 7–10 days, you’ll notice tiny roots forming at the nodes.


Step 3: Planting in Soil

Once roots reach 2–3 inches:

  1. Fill a small pot with well-draining soil:
    • 50% garden soil
    • 30% compost or cocopeat
    • 20% sand (for drainage)
  2. Make a small hole and gently plant the rooted cutting.
  3. Firm the soil around the stem to secure it.
  4. Water lightly, keeping the soil moist but not soggy.

Step 4: Light and Temperature

Mint grows best in:

  • Bright, indirect sunlight (4–6 hours daily)
  • Warm temperatures between 20–28°C
  • Avoid exposing young cuttings to harsh afternoon sun initially

Once established, mint is hardy and can handle full sun.


Step 5: Watering Routine

  • Water whenever the top inch of soil feels dry.
  • Keep soil consistently moist but not waterlogged.
  • Avoid overhead watering to prevent fungal infections.

Tip: Mulch around the base with dried leaves or straw to retain moisture.


Step 6: Fertilizing Your Mint

Mint is a fast-growing herb that thrives with light feeding:

  • Use organic compost every 2–3 weeks
  • For faster growth, apply liquid fertilizer diluted 1:4 every month
  • Avoid over-fertilization—it can make leaves taste bitter

Step 7: Common Problems and Solutions

1. Yellowing Leaves

  • Cause: Overwatering or nutrient deficiency
  • Solution: Reduce watering, add compost

2. Slow Growth

  • Cause: Low sunlight or weak soil
  • Solution: Move to brighter location, use nutrient-rich soil

3. Pests (Aphids or Spider Mites)

  • Spray neem oil or mild insecticidal soap
  • Maintain airflow around the plant

4. Stem Rot

  • Cause: Waterlogged soil
  • Solution: Repot in well-draining soil and avoid excess watering

Step-by-Step Update Timeline (Perfect for Videos)

Week 1 – Initial Stage

  • Cuttings placed in water
  • Tiny root nodes start forming

Week 2 – Visible Roots

  • 1–2 inch roots appear
  • Leaves remain fresh and green
  • Keep in indirect sunlight

Week 3 – Transplant to Soil

  • Roots 2–3 inches long
  • Plant in well-draining soil
  • Water lightly, avoid soggy soil

Week 4 – Early Growth in Soil

  • Roots anchor in soil
  • New leaves start growing from top nodes
  • Plant looks healthy and upright

Week 5–6 – Lush Growth Begins

  • Multiple shoots emerge
  • Leaves become larger and aromatic
  • Fertilize lightly with compost

Week 8 – Established Mint Plant

  • Plant is bushy and ready for harvesting
  • Can pinch tips regularly to encourage more branching
  • Continue watering and sunlight care

Week 10+ – Regular Harvesting

  • Start harvesting fresh leaves
  • Pinch top leaves regularly to keep plant bushy
  • Plant continues thriving and multiplying

Pro Tips for Beginners

  • Always use clean tools to prevent disease
  • Pinch top leaves to encourage bushy growth
  • Harvest leaves regularly to promote new growth
  • Avoid letting mint flower early; it reduces leaf production
  • Use well-draining soil and moderate sunlight

Conclusion

Growing mint from cuttings is fast, easy, and perfect for beginners. With just a few steps—selecting a healthy stem, rooting in water, planting in soil, and proper care—you can enjoy lush, aromatic mint in just a few weeks.

Following the update timeline, you can track progress for your gardening journal, YouTube videos, or social media posts. Once established, mint will keep providing fresh leaves year-round, making it a must-have herb for every kitchen garden.

Save Your Rotting or Dying Cactus – 100% Sure Method to Bring It Back to Life!

Save Your Rotting or Dying Cactus – 100% Sure Method to Bring It Back to Life!

Cacti are resilient, low-maintenance plants, but even the hardiest succulent can fall prey to rotting, wilting, or dying if neglected, overwatered, or attacked by pests. Seeing your cactus shrivel or turn black can be heartbreaking, but don’t worry! With the right techniques, you can revive a rotting cactus and save it completely.

In this detailed guide, you will learn why cacti rot, step-by-step recovery methods, soil tips, care updates, and long-term prevention, ensuring your cactus thrives again.


Why Do Cacti Rot or Die?

Understanding the root cause is essential to save your plant. Common reasons include:

  1. Overwatering
    • Most cactus rot comes from waterlogged soil.
    • Roots cannot breathe and start decaying.
  2. Poor Drainage
    • Heavy soil or non-draining pots trap water.
  3. Pests and Fungal Infections
    • Mealybugs, root mealybugs, or fungal pathogens weaken the plant.
  4. Sunburn or Cold Damage
    • Sudden temperature changes or harsh sunlight can stress the plant.
  5. Age and Natural Decline
    • Older plants may rot at the base if nutrients are insufficient.

Materials You’ll Need

To save your cactus, gather:

  • Clean, sharp knife or scissors
  • Rubbing alcohol for sterilization
  • Sandpaper (optional, for hard rot removal)
  • Well-draining cactus soil mix
  • Small pots with drainage holes
  • Cinnamon powder or fungicide
  • Gloves (cacti are spiky!)

Step 1: Identify the Rot

Rotting can appear as:

  • Soft, mushy tissue
  • Brown or black discoloration
  • Foul smell

Tip:

  • Healthy tissue is firm and green.
  • Cut away any mushy, soft parts before they spread.

Step 2: Remove the Rot

  1. Remove the cactus from its pot gently.
  2. Inspect roots and stem carefully.
  3. Using a sterilized knife, cut away all soft, black, or brown tissue.
  4. If the rot is at the base, cut the cactus above the rotted area to save the healthy part.
  5. Optional: Lightly sand the cut area to remove remaining decay.

Pro Tip:

  • Dip the cut areas in cinnamon powder or fungicide. Cinnamon acts as a natural antifungal agent.

Step 3: Allow the Cuts to Heal (Callusing)

  • Place the cactus in a dry, shaded area for 3–7 days.
  • Avoid watering during this time.
  • Let the cut ends form a callus to prevent future rot.

Tip: For large cacti, allow up to 2 weeks for full callus formation.


Step 4: Repot in Well-Draining Soil

Choose a pot with drainage holes.

Recommended Soil Mix:

  • 50% coarse sand or perlite
  • 30% garden soil or cocopeat
  • 20% small gravel or pumice

Tip: Avoid dense garden soil—it retains water and promotes rot.


Step 5: Watering Routine

  • Do not water immediately after repotting.
  • Wait 5–7 days until the cactus settles.
  • Then, water sparingly, only when soil is fully dry.
  • Water slowly at the base; avoid wetting the stem.

Rule of Thumb: Cacti need less water in winter and slightly more in the growing season (spring-summer).


Step 6: Light and Temperature Requirements

  • Place your cactus in bright, indirect sunlight initially.
  • Gradually expose it to direct morning sunlight.
  • Avoid intense afternoon sun for 2–3 weeks.
  • Ideal temperature: 20–30°C; avoid frost.

Step 7: Prevent Pests and Fungal Infection

  • Check regularly for mealybugs, aphids, and fungal growth.
  • Treat pests with insecticidal soap or neem oil spray.
  • Sprinkle cinnamon powder around the base as a natural antifungal barrier.
  • Ensure good air circulation around the cactus.

Step 8: Fertilizing Your Cactus

  • Avoid fertilizing a recovering cactus for 1 month.
  • After 4 weeks, feed lightly with cactus fertilizer or a diluted NPK 10-10-10.
  • Fertilize only during the active growing season (spring-summer).

Tip: Over-fertilizing stressed cacti can cause more damage.


Step 9: Propagation From Healthy Parts (Optional)

If the rot has destroyed the base but some healthy tissue remains:

  • Take offsets or cuttings from healthy parts.
  • Allow them to callus for 3–5 days.
  • Plant in well-draining soil.
  • This ensures the plant survives even if the original stem fails.

Week-by-Week Update Timeline (For Recovery Videos)

Week 1 – Rot Removal & Callusing

  • Cut out all rotting tissue
  • Cactus placed in dry shade to callus
  • Soil remains dry

Week 2 – First Signs of Recovery

  • Stem feels firm at cut areas
  • No mushiness
  • Roots adjusting to new soil

Week 3–4 – Root Growth

  • Roots anchor in soil
  • Tiny root hairs may appear
  • Stem looks plump and healthy

Week 5–6 – Active Growth Begins

  • New offsets or small shoots may appear
  • Stem color improves
  • Watering lightly starts

Week 8–10 – Full Recovery

  • Cactus fully anchored
  • Stem firm and healthy
  • Ready for gradual sun exposure

Extra Tips for Long-Term Success

  • Avoid overwatering; check soil moisture first
  • Keep cactus in bright, indirect light initially
  • Ensure good air circulation
  • Repot every 2–3 years
  • Watch for pests regularly

Signs of a Fully Recovered Cactus

  • Firm, plump stem
  • No soft or black spots
  • Healthy roots anchoring well in soil
  • New growth or offsets appearing

A properly saved cactus can live for decades with minimal care!


Conclusion

Saving a rotting or dying cactus is absolutely possible with careful inspection, rot removal, proper callusing, well-draining soil, and controlled watering. By following this step-by-step guide and update timeline, your cactus can recover fully, become strong, and continue thriving in your garden or home.

Even if it seems hopeless, a little patience and correct care can revive almost any cactus, turning your sad plant into a healthy, vibrant one.

Grow Crown of Thorns (Euphorbia Milii) from Cuttings: Fast, Easy, and 100% Success

Grow Crown of Thorns (Euphorbia Milii) from Cuttings: Fast, Easy, and 100% Success

The Crown of Thorns (Euphorbia Milii) is a remarkable plant admired for its vibrant flowers, thorny stems, and ability to thrive in tough conditions. Native to Madagascar, this succulent is not only drought-tolerant but also highly ornamental, making it a favorite among indoor and outdoor gardeners. One of the easiest ways to multiply this stunning plant is by propagating it from cuttings. With the right approach, you can grow healthy Crown of Thorns plants quickly and easily, even if you’re a beginner.

In this guide, we’ll explore a step-by-step method to propagate Euphorbia Milii from cuttings, including soil preparation, cutting techniques, care tips, and common troubleshooting—ensuring fast and successful growth.


Why Propagate Crown of Thorns from Cuttings?

Crown of Thorns is best propagated from cuttings for several reasons:

  1. Fast Growth: Cuttings establish quicker than seeds, producing flowers within months.
  2. Cost-Effective: Multiply your plants without buying new ones.
  3. Preserve Characteristics: Cuttings retain the parent plant’s traits, including flower color and shape.
  4. Easy for Beginners: Minimal tools and effort are required.
  5. Drought-Tolerant: Euphorbia Milii cuttings are hardy and survive under minimal care.

By propagating from cuttings, you can expand your garden or share plants with friends and family.


Materials Needed

Before starting, gather the following materials:

  • Healthy Crown of Thorns plant for cuttings
  • Sharp, sterilized pruning shears or knife
  • Gloves (to protect from thorns and latex sap)
  • Well-draining soil mix (cactus or succulent mix works best)
  • Small pots or containers with drainage holes
  • Optional rooting hormone (to encourage faster root development)
  • Water spray bottle

Having all materials ready ensures a smooth propagation process and higher success rate.


Step 1: Selecting the Right Cutting

Choosing the right cutting is crucial for successful propagation:

  • Select a healthy stem that is mature but not too woody.
  • Avoid stems with diseases, pests, or damage.
  • Cut a 4–6 inch section just below a node (the point where a leaf attaches).
  • Make sure the cutting has at least 2–3 leaves for photosynthesis.

Pro Tip: Always wear gloves. Euphorbia Milii exudes a milky sap that can irritate skin and eyes.


Step 2: Preparing the Cutting

Proper preparation helps prevent infection and encourages rooting:

  1. Remove lower leaves from the cutting, leaving 1–2 leaves at the top.
  2. Allow the cutting to dry and callus for 2–3 days in a shaded, dry area.
  3. If desired, dip the cut end in rooting hormone to promote faster root growth.

Callusing prevents sap from oozing excessively and protects the cutting from rot.


Step 3: Preparing the Potting Mix and Container

Crown of Thorns thrives in well-draining soil:

  • Use a succulent or cactus mix or create your own mix:
    • 2 parts garden soil
    • 1 part sand or perlite
    • 1 part compost
  • Fill a pot with the mix, leaving space for the cutting.
  • Ensure the pot has drainage holes to prevent waterlogging, which can cause root rot.

Healthy soil ensures strong roots and faster growth.


Step 4: Planting the Cutting

Plant the prepared cutting properly for the best results:

  1. Make a small hole in the soil using a stick or your finger.
  2. Insert the cut end 2–3 inches deep.
  3. Gently press soil around the cutting to secure it.
  4. Water lightly—enough to moisten the soil but not saturate it.

Pro Tip: Avoid direct sunlight for the first 1–2 weeks to prevent stress.


Step 5: Caring for the Cuttings

Proper care ensures quick rooting and healthy growth:

  • Watering: Spray lightly every few days to keep soil slightly moist. Avoid overwatering.
  • Light: Place in bright, indirect sunlight until roots establish. Once rooted, it can handle full sun.
  • Temperature: Euphorbia Milii prefers 20–30°C (68–86°F). Avoid frost or extreme cold.
  • Air Circulation: Good airflow prevents fungal infections and promotes healthy growth.

With consistent care, roots typically develop within 3–4 weeks.


Step 6: Transplanting the Rooted Cuttings

Once the cutting has developed roots, it can be transplanted:

  • Gently remove the cutting from the propagation pot.
  • Check for well-formed roots (white or light-colored roots indicate healthy development).
  • Transplant into a larger pot with a well-draining succulent mix.
  • Gradually acclimate the plant to direct sunlight over a week.

Rooted plants will start producing new leaves and eventually flower.


Step 7: Fertilization for Fast Growth

To encourage rapid growth and flowering:

  • Use a balanced liquid fertilizer (NPK 10:10:10) every 3–4 weeks during the growing season.
  • Switch to a phosphorus-rich fertilizer (high middle number) when buds appear to stimulate flowering.
  • Avoid over-fertilizing, which can damage roots or cause excessive leafy growth without flowers.

Proper nutrition ensures healthy, flowering plants.


Step 8: Flowering and Maintenance Tips

Crown of Thorns produces vibrant blooms with the right care:

  • Sunlight: Full sun encourages continuous flowering. At least 6 hours daily is ideal.
  • Pruning: Trim old or leggy stems to stimulate new growth.
  • Watering: Allow soil to dry between waterings; overwatering reduces flowers.
  • Pest Control: Watch for aphids, mealybugs, and spider mites. Neem oil works well for treatment.

Following these steps ensures that your propagated plants bloom abundantly.


Step 9: Seasonal Care Updates

  • Spring/Summer: Actively water, fertilize, and prune to maximize flowers.
  • Autumn: Reduce watering slightly; continue deadheading spent blooms.
  • Winter: Protect from frost; water sparingly, as the plant goes semi-dormant.

Seasonal adjustments help your Crown of Thorns thrive year-round.


Tips for Fast and Easy Propagation Success

  1. Use Healthy Parent Plants: Strong plants produce stronger cuttings.
  2. Avoid Excess Watering: Too much water leads to rot.
  3. Use Sharp, Clean Tools: Prevents infections and ensures clean cuts.
  4. Patience: Roots take a few weeks; avoid disturbing the cutting prematurely.
  5. Experiment: Try different cutting lengths and soil mixes to see what works best in your climate.

With these tips, even beginners can propagate Euphorbia Milii with 100% success.


Conclusion

Propagating Crown of Thorns (Euphorbia Milii) from cuttings is fast, easy, and rewarding. By following this step-by-step guide, you can multiply your plants quickly, maintain vibrant blooms, and expand your garden effortlessly. With proper care, attention, and patience, your propagated cuttings will grow into strong, flowering plants that brighten your home or garden.

Start today, and enjoy the satisfaction of watching your Crown of Thorns thrive and bloom year-round, all thanks to the simplicity of propagation from cuttings.

Proven Method to Get 900% More Flowers on Your Plants: 100% Success Guide

Proven Method to Get 900% More Flowers on Your Plants: 100% Success Guide

Every gardener dreams of a plant bursting with flowers—vibrant, abundant, and continuous. Yet, many plants produce far fewer blooms than they are capable of, leaving gardeners frustrated. What if you could transform any flowering plant into a flowering powerhouse, producing up to 900% more flowers? Yes, with the right techniques, care, and attention, it’s entirely possible—and this guide will show you how to achieve 100% success.

This article covers step-by-step strategies, expert tips, and practical advice to multiply the flowers on your plants, whether they are roses, petunias, hibiscus, or any other flowering species.


Understanding Why Plants Underperform

Before diving into the methods, it’s essential to understand why plants sometimes produce fewer flowers:

  1. Improper Pruning: Old, weak, or crowded branches reduce flower production.
  2. Nutrient Deficiency: Plants need the right balance of nutrients to produce blooms.
  3. Incorrect Watering: Overwatering or underwatering can stress plants and limit flowering.
  4. Insufficient Sunlight: Most flowering plants require 6–8 hours of sunlight daily.
  5. Pest and Disease Stress: Aphids, mites, and fungal infections divert energy from flowering to survival.
  6. Environmental Stress: Extreme temperatures, wind, or sudden changes can reduce blooms.

Once these issues are addressed, your plants are ready to respond with prolific flowering.


Step 1: Choose the Right Flowering Varieties

While any plant can produce more flowers with proper care, some varieties naturally respond better:

  • Roses: Hybrid teas, floribundas, and climbers respond well to pruning and feeding.
  • Hibiscus: Tropical hibiscus produces multiple blooms with regular pruning and fertilization.
  • Petunias: Known for continuous flowering in clusters.
  • Bougainvillea: Thrives in warm climates and produces flowers year-round with correct care.
  • Geraniums: Compact plants that bloom abundantly when regularly deadheaded.

Choosing plants with high flowering potential maximizes the effectiveness of these methods.


Step 2: Soil and Planting Preparation

Healthy soil is the foundation of prolific flowering:

  1. Well-Draining Soil: Prevents root rot and promotes strong root systems.
  2. Nutrient-Rich Medium: Mix compost, well-rotted manure, or organic fertilizer with garden soil.
  3. pH Balance: Slightly acidic to neutral soil (pH 6–7) is ideal for most flowering plants.
  4. Correct Planting Depth: Planting too deep or too shallow can stress the plant and reduce flowers.

Healthy soil ensures plants have the energy to produce multiple blooms.


Step 3: Pruning for Maximum Flower Production

Pruning is one of the most effective ways to increase flowering:

  • Remove Dead and Weak Stems: Encourages new growth and stronger flowering shoots.
  • Shape the Plant: Direct energy to flower-producing branches.
  • Timing: Prune after flowering or during early growth to stimulate branching.
  • Technique: Cut above an outward-facing bud at a 45-degree angle.

Regular pruning not only increases flowers but also maintains plant health and aesthetics.


Step 4: Fertilization for Explosive Blooms

Fertilization is key to multiplying flowers by hundreds of percent:

  • Balanced Fertilizer: NPK 10:10:10 supports overall growth.
  • Bloom Booster Fertilizer: High phosphorus (middle number in NPK, e.g., 10:30:10) promotes flower formation.
  • Frequency: Feed every 2–3 weeks during active growth and flowering seasons.
  • Organic Alternatives: Compost, bone meal, or liquid seaweed extracts provide additional nutrients and improve soil health.

Proper feeding ensures your plant has energy for rapid growth and abundant flower production.


Step 5: Watering Techniques

Watering plays a crucial role in flower development:

  • Consistent Moisture: Keep soil evenly moist but not soggy.
  • Deep Watering: Encourage deep roots that support vigorous flowering.
  • Avoid Leaf Wetting: Wet leaves can lead to fungal diseases that reduce blooms.
  • Mulching: A layer of mulch retains moisture, regulates temperature, and prevents weeds.

Plants that are well-watered and stress-free produce more flowers than those struggling for hydration.


Step 6: Sunlight and Environmental Conditions

Most flowering plants require full sun for maximum bloom production:

  • Daily Light: Ensure at least 6–8 hours of sunlight.
  • Positioning: Rotate pots or plants to expose all sides to sunlight evenly.
  • Protection: Shield plants from harsh wind or frost to prevent bud drop.

Optimal light conditions give your plant the energy it needs to create hundreds of blooms.


Step 7: Deadheading and Flower Maintenance

Deadheading—removing spent flowers—is crucial for continuous blooming:

  • Encourages New Buds: Prevents the plant from directing energy into seed production.
  • Improves Appearance: Keeps the plant tidy and vibrant.
  • Technique: Snip faded flowers just above the first set of healthy leaves.

Regular deadheading can dramatically increase the number of flowers produced over a season.


Step 8: Pest and Disease Management

Healthy plants flower abundantly, while stressed plants rarely bloom.

  • Common Pests: Aphids, spider mites, and thrips. Control with neem oil, insecticidal soap, or natural predators like ladybugs.
  • Common Diseases: Powdery mildew, black spot, rust. Remove affected leaves and improve airflow.
  • Preventive Care: Avoid overhead watering, space plants properly, and maintain cleanliness.

Consistently managing pests and diseases ensures that your plants can focus energy on flowers, not survival.


Step 9: Advanced Flower-Boosting Techniques

For gardeners seeking maximum results:

  1. Pinching Tips: Pinch growing tips to encourage branching and multiple flowering shoots.
  2. Foliar Feeding: Spray diluted fertilizer on leaves to provide quick nutrient absorption.
  3. Layered Planting: Combine early- and late-blooming varieties to extend flowering periods.
  4. Regular Observation: Quickly address stress, nutrient deficiency, or pest problems.

These advanced techniques can push flowering potential to 900% more blooms compared to basic care.


Step 10: Seasonal Care Updates

  • Spring: Focus on pruning, fertilization, and preparing plants for active growth.
  • Summer: Deadhead, maintain watering, and feed regularly for continuous blooms.
  • Autumn: Reduce fertilization slightly but maintain sunlight and hydration.
  • Winter: Protect sensitive plants from frost, reduce watering, and allow dormant periods for perennials.

Following seasonal updates ensures sustained flowering and long-term plant health.


Conclusion

Getting 900% more flowers on your plants is achievable with consistent care, proper pruning, fertilization, watering, sunlight, and pest management. By following this 100% success guide, you can transform ordinary plants into floral powerhouses that bloom prolifically.

Whether you’re growing roses, hibiscus, petunias, or bougainvillea, these strategies work for all flowering plants. The key is understanding the plant’s needs, addressing deficiencies, and giving it the conditions to thrive.

By implementing these steps, you’ll enjoy a garden full of vibrant, abundant flowers that will impress family,

Create a Stunning Flower Planter in Just 3 Minutes: Fast, Easy, and Beautiful!

Create a Stunning Flower Planter in Just 3 Minutes: Fast, Easy, and Beautiful!

A beautiful flower planter can instantly uplift the look of your home, balcony, or garden. But many people shy away from creating planters because they assume it takes hours, expensive materials, or expert skills. What if you could make a stunning flower planter in just 3 minutes? Yes, it’s fast, easy, and incredibly rewarding! With minimal effort and a few simple materials, you can craft planters that are not only functional but also eye-catching. This guide will walk you through step-by-step instructions, tips, and creative ideas to make planters in minutes.


Why Make Your Own Flower Planter?

DIY flower planters are more than just decorative containers. They offer several advantages:

  1. Personalization: Choose colors, shapes, and designs that match your home décor.
  2. Cost-Effective: Save money compared to buying expensive store-bought planters.
  3. Eco-Friendly: Repurpose old containers, jars, or bottles to create planters, reducing waste.
  4. Creative Expression: DIY planters let you explore your creativity while adding charm to any space.
  5. Fast and Easy: With the right techniques, you can have a planter ready in just a few minutes.

Whether you have a tiny balcony, a windowsill, or a spacious garden, DIY planters allow you to add color and life instantly.


Materials You’ll Need

The best part about fast and easy planters is that you don’t need fancy tools. Here’s what you’ll need:

  • Container: Any small pot, jar, cup, tin can, or recycled bottle works perfectly.
  • Soil: Use potting soil suitable for your chosen plant.
  • Plants or Bulbs: Flowers like marigolds, petunias, pansies, or small succulents are ideal for quick planters.
  • Optional Decorative Items: Pebbles, sand, paint, or ribbons for decoration.
  • Basic Tools: Spoon for filling soil, small scissors, or craft knife (optional).

These materials are easy to find at home or in your local garden store, making this DIY project accessible to everyone.


Step 1: Choose the Right Container

Your container is the foundation of the planter. Here are some tips:

  • Repurposed Items: Old mugs, tins, jars, or even coconut shells can become stylish planters.
  • Drainage: Ensure there is a hole at the bottom for water to drain. If not, add a layer of pebbles to prevent waterlogging.
  • Size: Choose a size suitable for your plant. Small flowers or succulents do well in smaller containers, while larger blooms need more space.
  • Shape and Style: Round, square, or rectangular containers can each create a different aesthetic. Be creative!

Selecting a container sets the tone for your planter and can be done in seconds.


Step 2: Prepare the Container

Preparation ensures your planter is functional and ready to support healthy plant growth:

  1. Clean the Container: Wash thoroughly to remove dust or residues.
  2. Add Drainage Layer: If there’s no drainage hole, place a 1–2 inch layer of pebbles at the bottom. This prevents root rot.
  3. Decorate (Optional): Paint, wrap with fabric, or tie a ribbon around the container for instant beauty.

This step takes just a minute and ensures your planter is both practical and visually appealing.


Step 3: Fill with Soil

The right soil mix supports healthy roots and abundant blooms:

  • Use potting soil suitable for flowers.
  • Fill the container about 3/4 full, leaving space for your plant.
  • Lightly pat the soil to remove air pockets, ensuring the plant has stable support.

Using quality soil accelerates growth and makes your planter ready for planting in seconds.


Step 4: Plant Your Flowers

Now comes the exciting part—planting your flowers:

  1. Make a small hole in the soil slightly larger than the plant’s root ball.
  2. Gently place the plant into the hole and cover the roots with soil.
  3. Press lightly around the base to secure the plant.
  4. Water lightly to settle the soil and hydrate the roots.

Within a minute or two, your planter transforms from a simple container into a blooming beauty.


Step 5: Add Finishing Touches

Small details make your planter look professional and polished:

  • Top Layer Decoration: Add pebbles, colored sand, or mulch to enhance appearance.
  • Grouping Planters: Place multiple planters together for a striking display.
  • Indoor Display: Put the planter on windowsills, tables, or shelves to brighten any room.
  • Outdoor Placement: Arrange on balconies, patios, or garden edges for a vibrant floral accent.

Finishing touches take less than a minute but dramatically improve the overall look.


Tips for Fast-Growing Flowers in Containers

To maximize blooms and enjoy quick results:

  1. Choose Fast-Blooming Plants: Marigolds, petunias, pansies, and nasturtiums grow quickly and flower abundantly.
  2. Sunlight: Most flowering plants need 4–6 hours of sunlight daily. Place your planter in a bright spot.
  3. Watering: Keep the soil moist but not soggy. Container plants dry out faster than garden soil.
  4. Fertilization: Use a liquid fertilizer every 2–3 weeks to encourage rapid flowering.
  5. Pruning and Deadheading: Remove faded flowers to stimulate new blooms.

Following these tips ensures your planter looks beautiful in record time.


Creative Ideas for Unique Planters

  • Hanging Planters: Use old tins, jars, or bottles to create hanging displays.
  • Tiered Planters: Stack multiple containers for a cascading floral effect.
  • Recycled Planters: Transform teapots, kettles, or wooden boxes into charming flower homes.
  • Themed Planters: Paint the container to match holidays, seasons, or personal décor style.

With a little imagination, your 3-minute planter can become a centerpiece of creativity and charm.


Maintenance for Long-Lasting Beauty

Even though your planter is easy to make, a few simple maintenance steps keep it flourishing:

  • Regular Watering: Adjust according to plant type and container size.
  • Fertilize Monthly: Use slow-release or liquid fertilizer to support healthy growth.
  • Check for Pests: Inspect leaves for aphids or mites and treat promptly.
  • Rotate Containers: Ensure even sunlight exposure for balanced growth.
  • Replant or Refresh Soil: After a few months, refresh the soil to keep your flowers healthy.

Minimal care ensures that your planter stays vibrant and attractive for weeks or months.


Why This Method is the Fastest and Easiest

  • Uses simple household containers—no expensive pots required.
  • Takes only 3 minutes from start to finish.
  • Minimal tools and materials needed.
  • Works for indoors, balconies, patios, and small gardens.
  • Immediate gratification—you can see your flowers planted and flourishing in minutes.

It’s an ideal project for beginners, busy individuals, or anyone looking to quickly brighten their space.


Conclusion

Creating a beautiful flower planter doesn’t have to be complicated or time-consuming. With this fast and easy 3-minute method, you can transform simple containers into blooming works of art. By choosing the right plants, preparing containers, adding soil, planting, and adding finishing touches, you can have planters that bring joy, color, and life to any space.

Whether for indoor décor, balcony gardening, or gifting purposes, these quick planters are a perfect blend of creativity, convenience, and beauty. Start today, and watch your space bloom in just minutes!