Grow Lavender at Home Effortlessly: A Complete Quick & Easy Guide

Grow Lavender at Home Effortlessly: A Complete Quick & Easy Guide

Lavender is one of the most beloved herbs in the world, cherished for its enchanting fragrance, calming properties, and stunning purple blooms. Whether you want to add a touch of beauty to your garden, create homemade essential oils, or simply enjoy the soothing aroma indoors, growing lavender at home is easier than you might think. This guide will walk you step by step through the process of planting, caring for, and harvesting lavender—quickly and efficiently.


Why Grow Lavender at Home?

Lavender isn’t just a pretty plant. It brings numerous benefits:

  1. Aromatic Delight: Lavender’s sweet, calming scent makes it perfect for relaxation, stress relief, and aromatherapy.
  2. Versatile Uses: You can use lavender in teas, cooking, homemade skincare, essential oils, and dried floral arrangements.
  3. Low Maintenance: Once established, lavender is drought-tolerant and requires minimal care, making it ideal for beginners.
  4. Pest Deterrent: Its fragrance naturally repels mosquitoes, moths, and other pests, helping protect your home and garden.

With so many benefits, growing lavender at home is a rewarding experience for gardeners of all skill levels.


Step 1: Choosing the Right Lavender Variety

Before planting, it’s important to choose the lavender variety that suits your climate and space. Some popular options include:

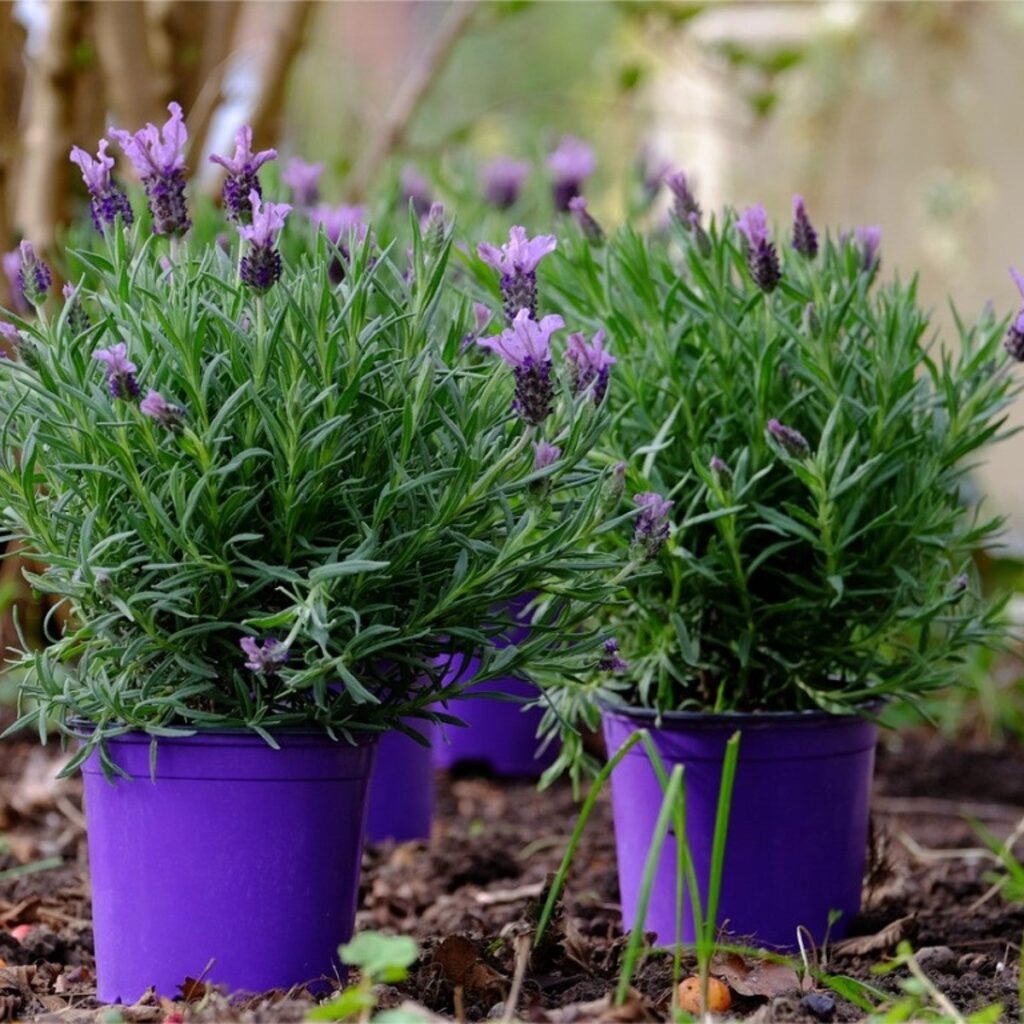
  • English Lavender (Lavandula angustifolia): Known for its sweet fragrance and compact size, ideal for pots and borders.
  • French Lavender (Lavandula dentata): Larger blooms and a stronger aroma, suitable for outdoor gardens.
  • Spanish Lavender (Lavandula stoechas): Unique butterfly-shaped flowers, perfect for decorative purposes.

For beginners, English lavender is often the easiest to grow indoors or in small gardens.


Step 2: Selecting the Perfect Location

Lavender loves sunshine and well-draining soil. Here’s what to keep in mind:

  • Sunlight: Lavender requires at least 6–8 hours of direct sunlight each day. A sunny balcony, window sill, or garden bed is ideal.
  • Soil: Use sandy, well-draining soil. Lavender dislikes waterlogged soil, which can lead to root rot. You can mix garden soil with sand or perlite to improve drainage.
  • Air Circulation: Ensure good airflow around your plant to prevent fungal diseases. Avoid crowded spaces or areas with stagnant air.

If growing indoors, place your lavender near a south-facing window and rotate the pot occasionally to ensure even light exposure.


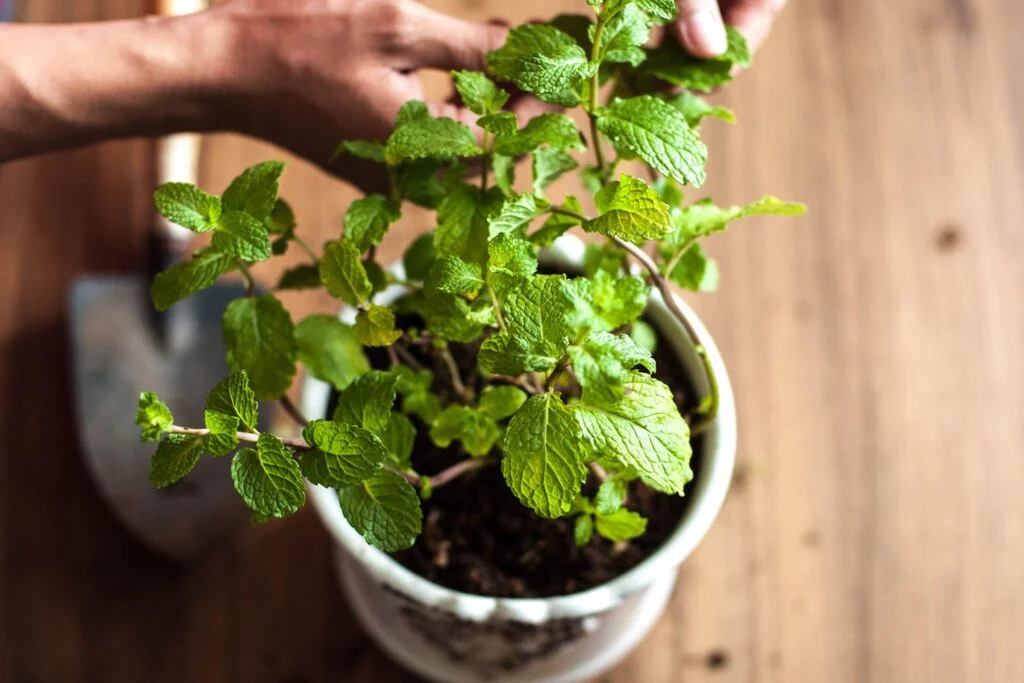
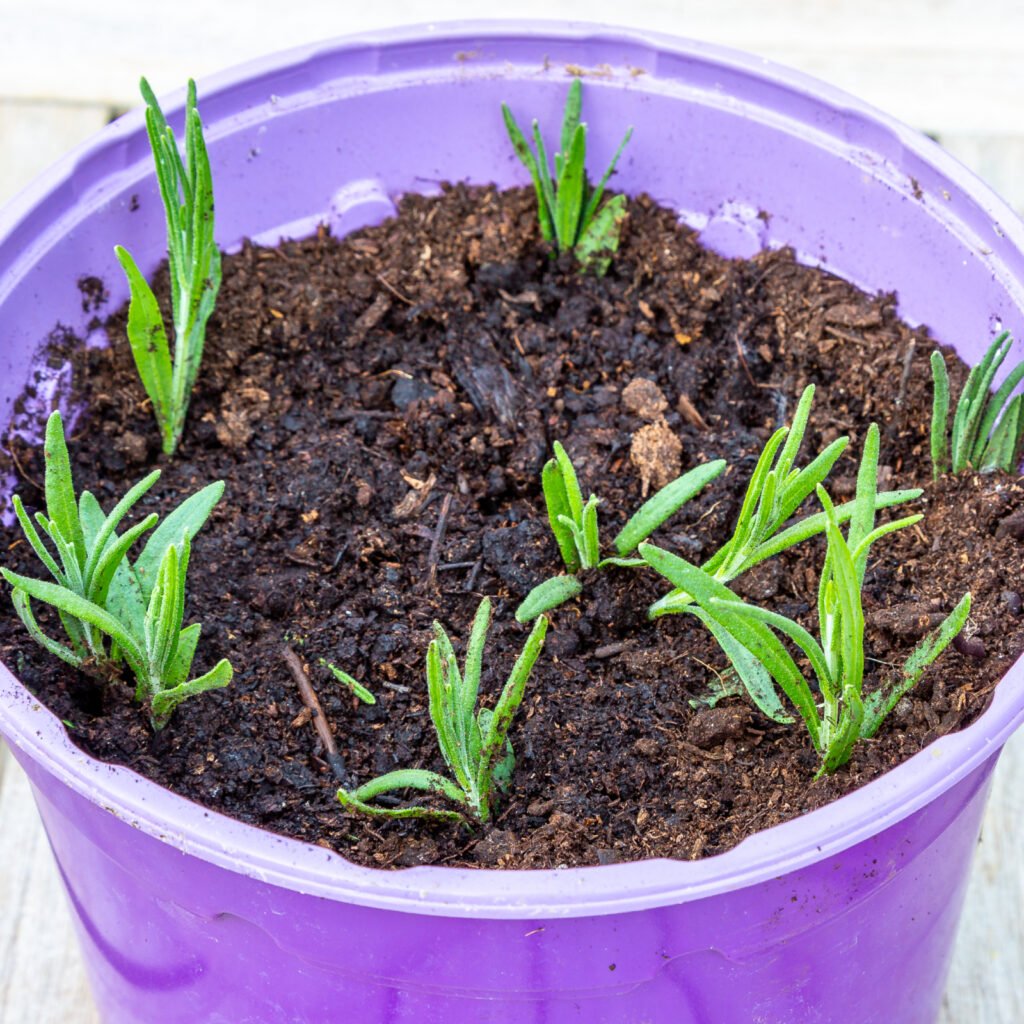
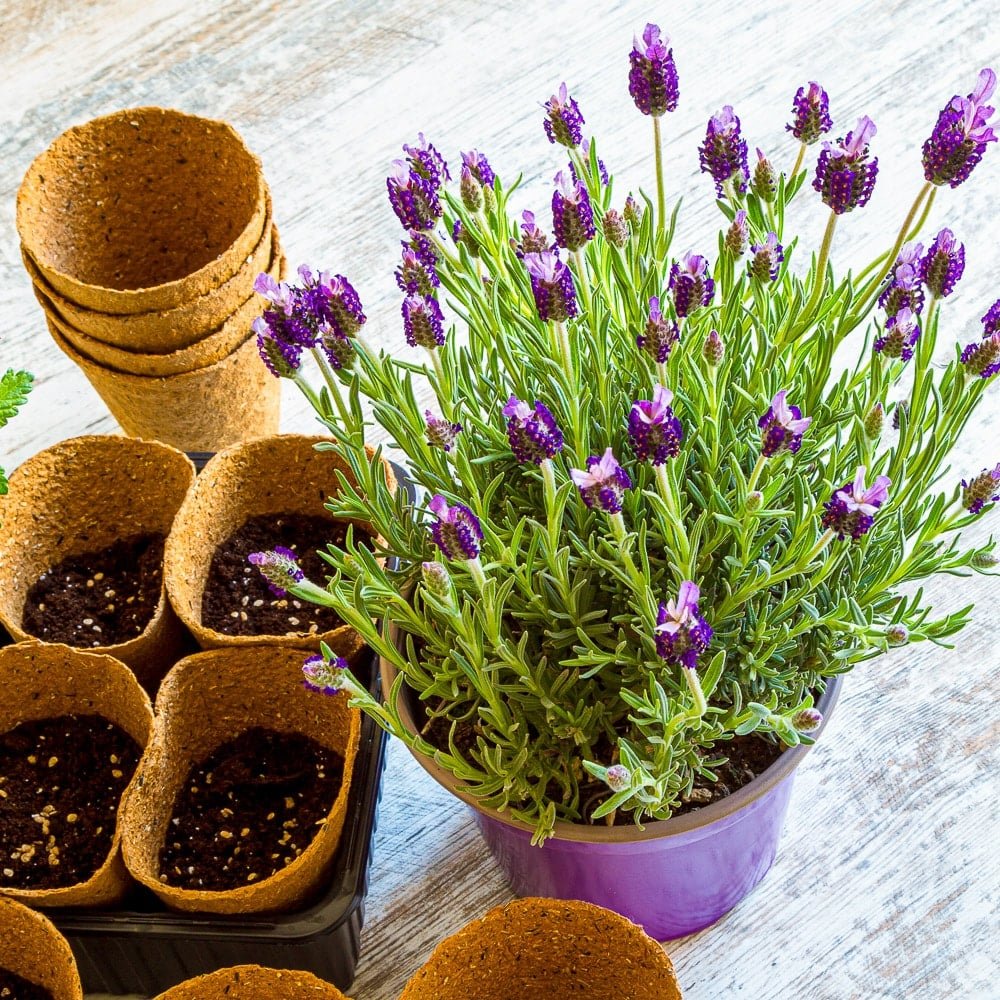
Step 3: Planting Lavender

Lavender can be grown from seeds, cuttings, or nursery-bought plants. Here’s a quick guide for each method:

  • From Seeds:
    1. Soak seeds in water for 24 hours before planting.
    2. Fill a seed tray with well-draining soil.
    3. Sow seeds on the surface and lightly cover with soil.
    4. Keep the soil moist and warm (65–70°F).
    5. Germination may take 2–4 weeks.
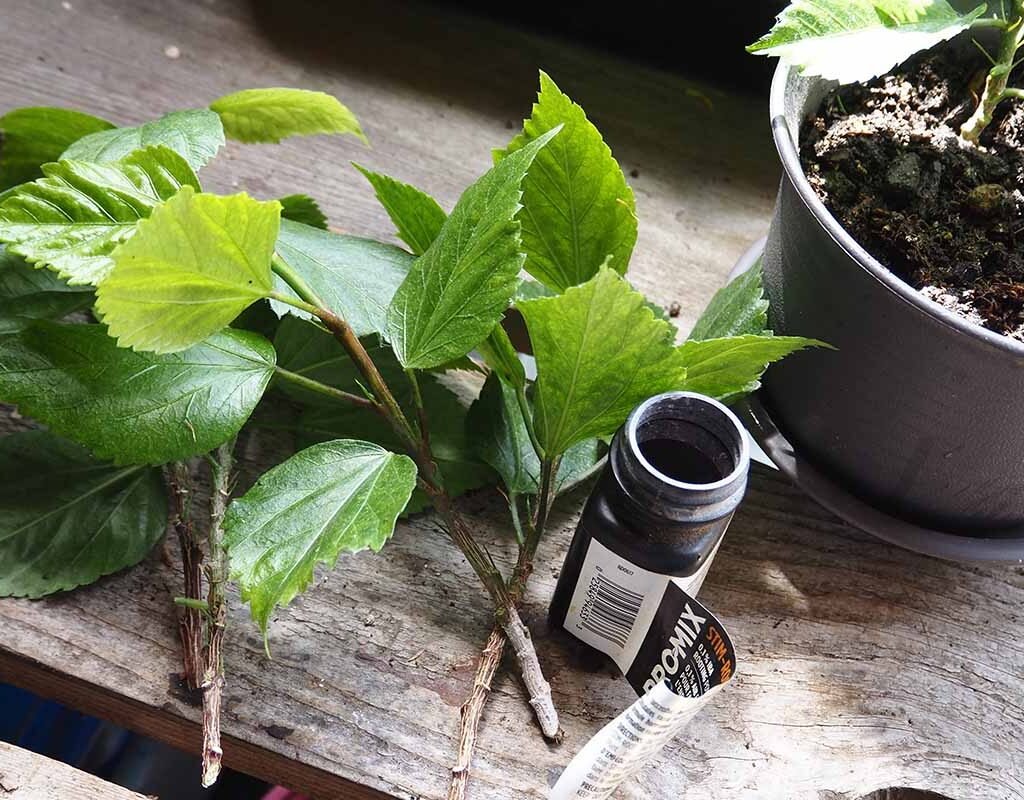
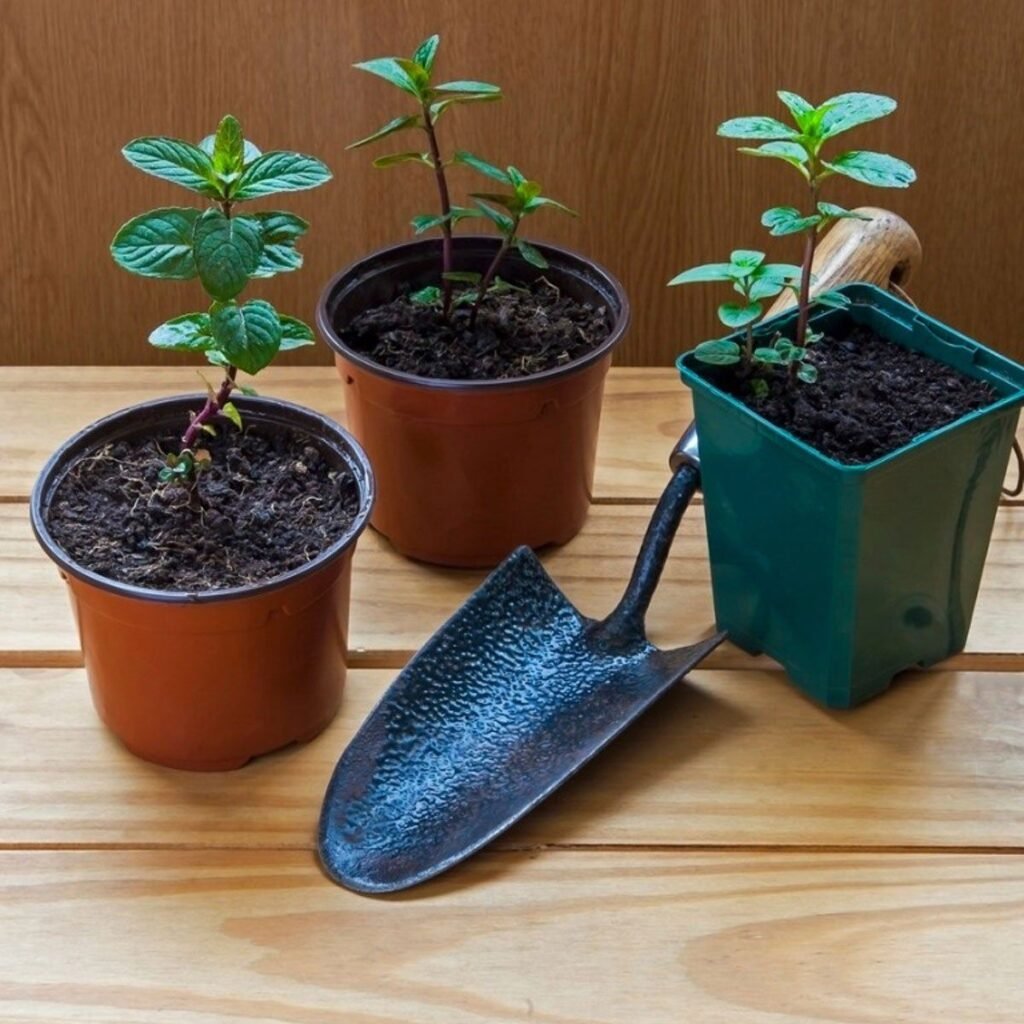
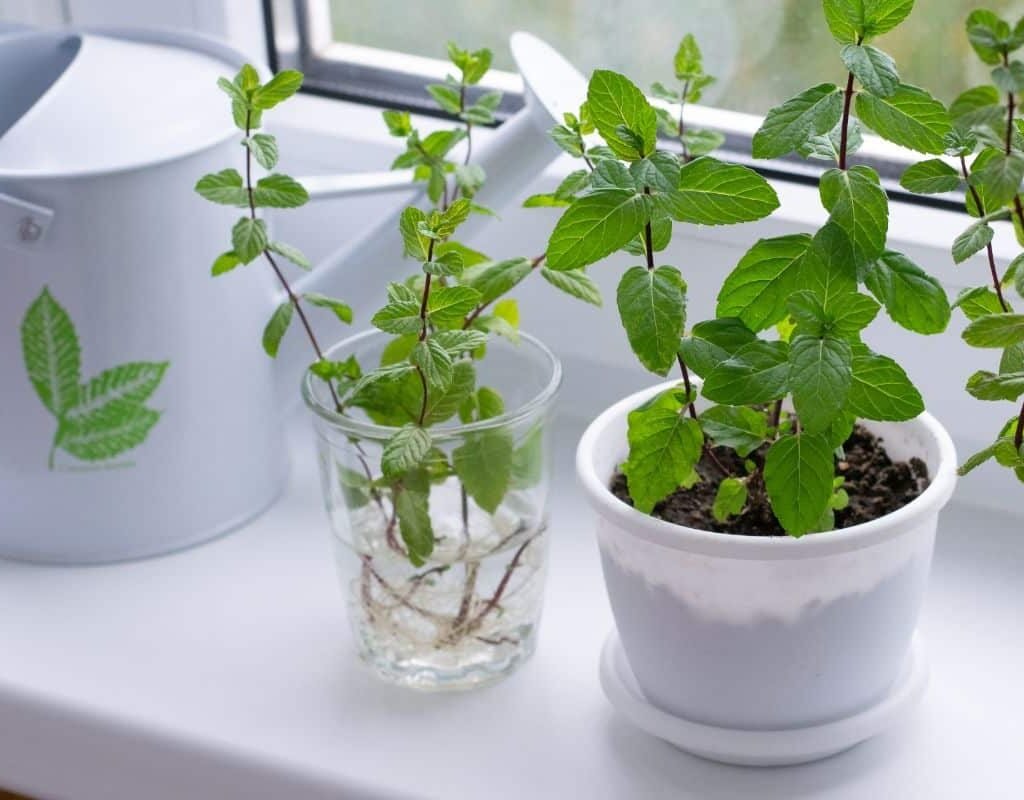
  • From Cuttings:
    1. Take a 3–4 inch cutting from a healthy lavender plant.
    2. Remove lower leaves and dip the cut end in rooting hormone.
    3. Plant in a pot with sandy soil and water lightly.
    4. Keep the cutting in a sunny spot with indirect light. Roots typically develop in 3–6 weeks.
  • From Nursery Plants:
    1. Choose healthy, young plants with no signs of disease.
    2. Dig a hole slightly larger than the plant’s root ball.
    3. Place the plant in the hole and fill with soil, gently pressing to remove air pockets.
    4. Water lightly to settle the soil.

Step 4: Watering and Care

Lavender is drought-tolerant and prefers slightly dry soil. Overwatering is the most common mistake gardeners make. Follow these tips:

  • Watering Schedule: Water newly planted lavender regularly until established. Afterward, water only when the soil feels dry, typically once every 1–2 weeks.
  • Mulching: Add a thin layer of gravel or sand around the base to improve drainage and prevent moisture buildup.
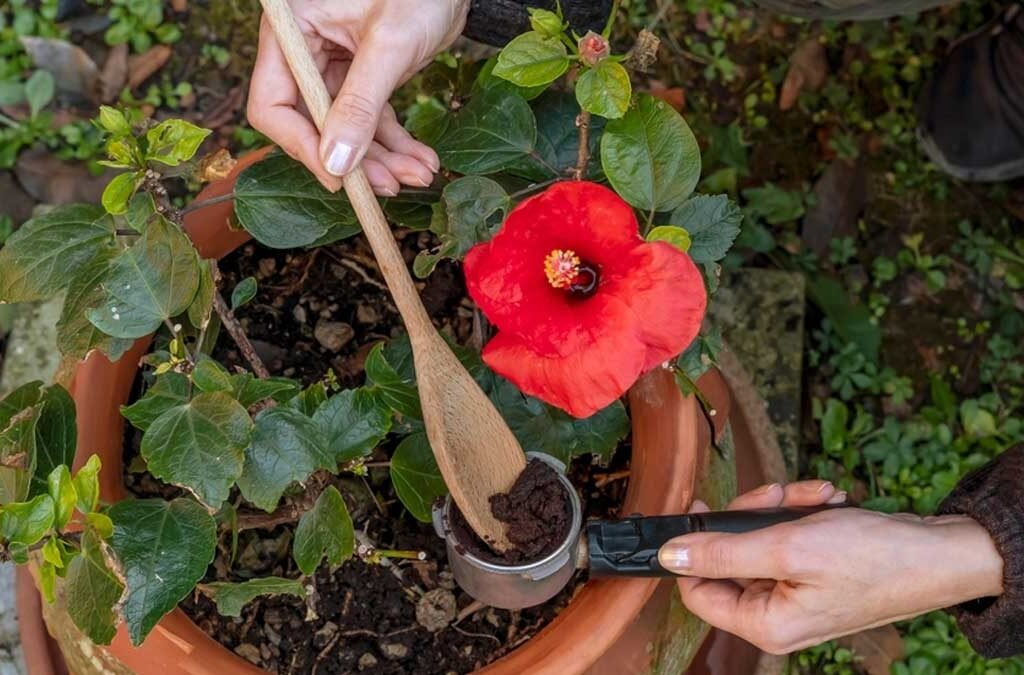
  • Fertilization: Lavender doesn’t require heavy feeding. A light application of compost or slow-release fertilizer once in spring is sufficient.

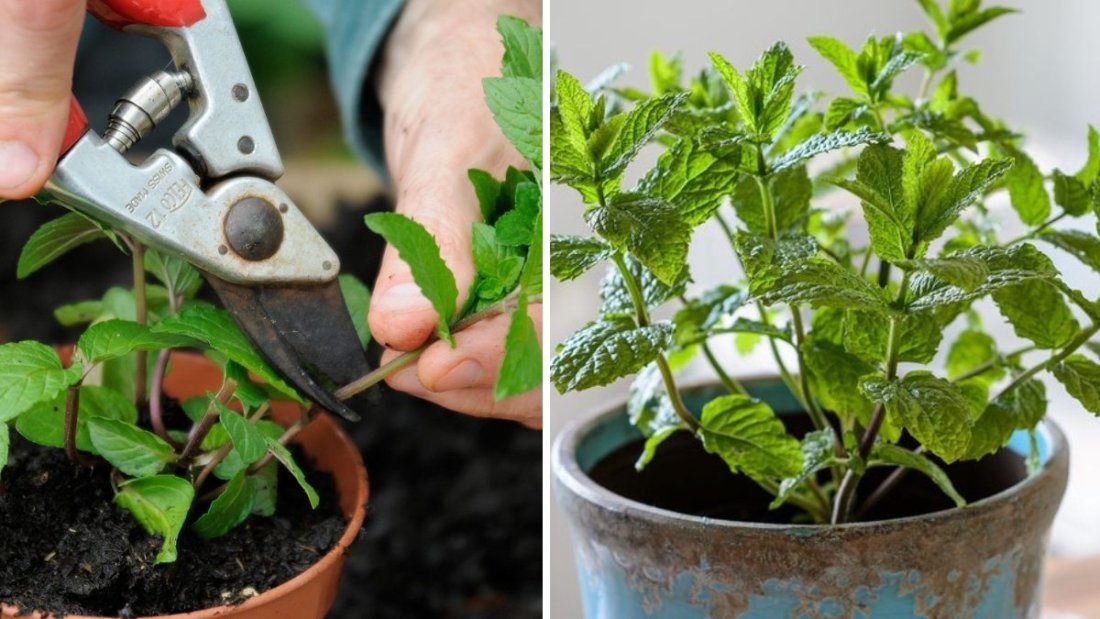
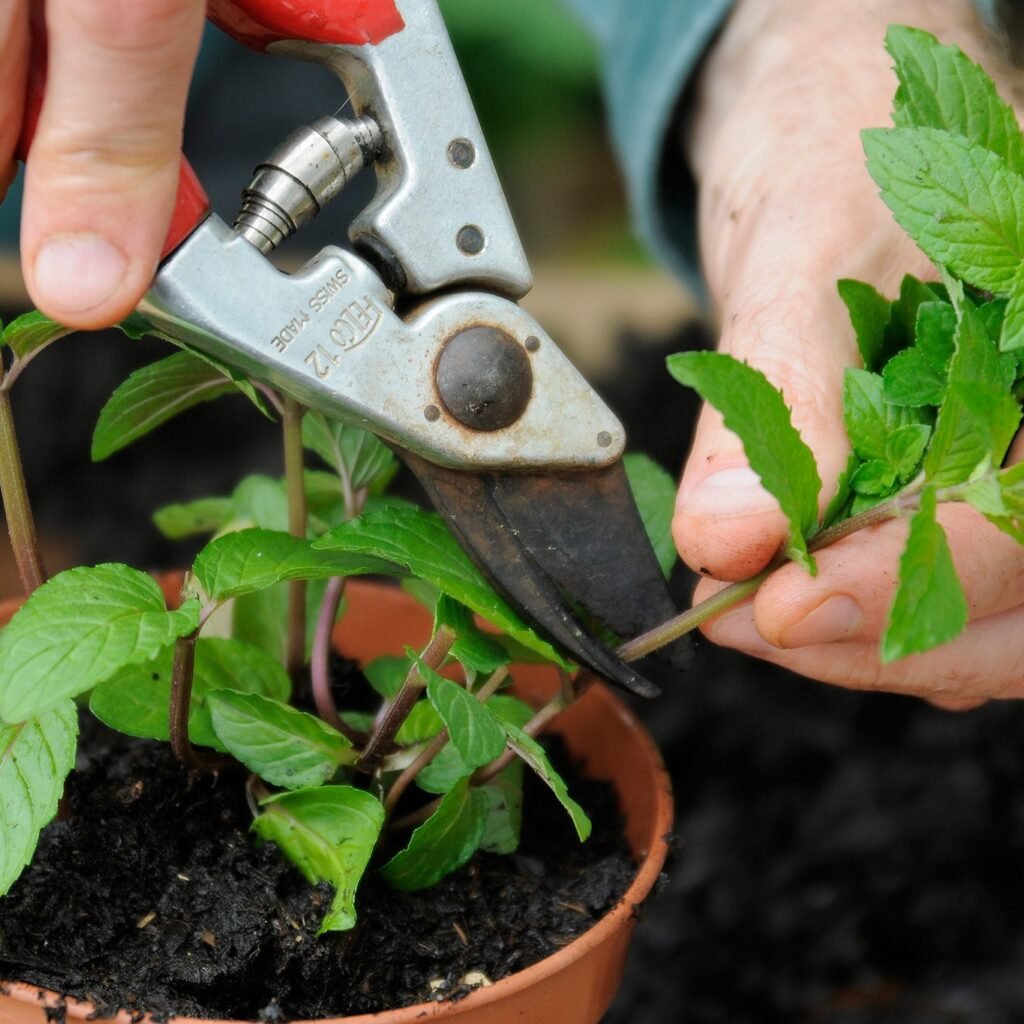
Step 5: Pruning Lavender

Pruning encourages bushy growth and more flowers.

  • Timing: Prune after flowering, typically in late summer or early fall.
  • Method: Remove dead or woody stems and trim back one-third of the plant’s height. Avoid cutting into old wood, as it may not regrow.
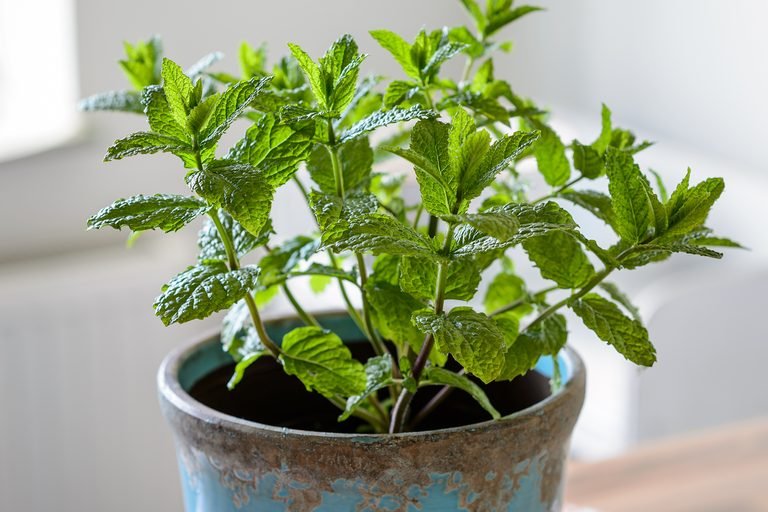
  • Benefits: Regular pruning keeps your lavender healthy, prevents legginess, and enhances flower production.

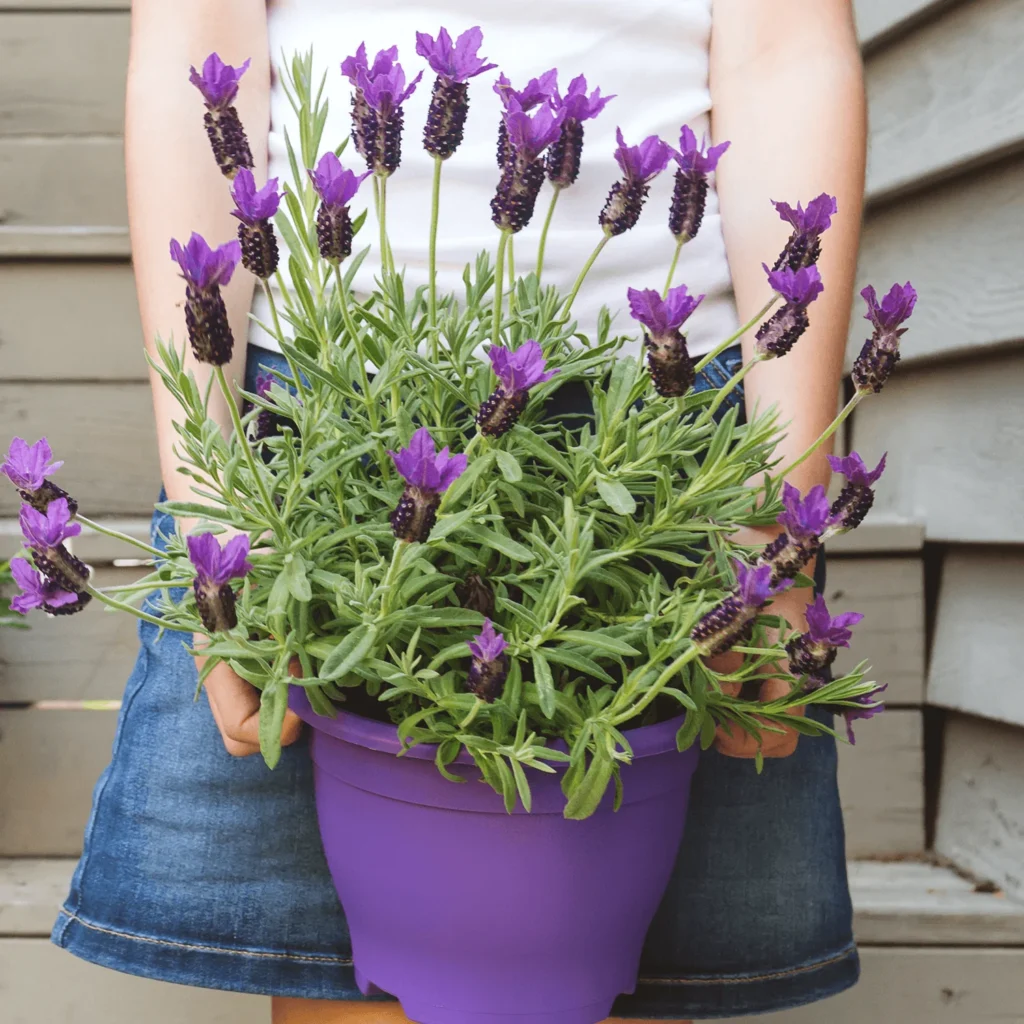
Step 6: Harvesting Lavender

Harvest lavender when the flowers are in full bloom for maximum fragrance.

  • Tools: Use clean, sharp scissors or pruning shears.
  • Method: Cut flower stems just above the leaves, leaving some green growth for regrowth.
  • Drying: Bundle stems together and hang upside down in a cool, dark, and dry place for 1–2 weeks. Once dried, store in airtight containers for later use.

Step 7: Common Problems and Solutions

Even hardy plants like lavender can face some issues. Here’s how to tackle them:

  • Root Rot: Caused by overwatering or poor drainage. Solution: Ensure pots have drainage holes and soil is sandy.
  • Yellowing Leaves: Often due to excess water or nutrient imbalance. Solution: Reduce watering and add light fertilizer if needed.
  • Pests: Aphids and whiteflies can occasionally appear. Solution: Use neem oil or insecticidal soap to protect plants.

Step 8: Creative Uses for Homegrown Lavender

Once your lavender is thriving, there are countless ways to use it:

  • Aromatherapy: Make sachets, essential oils, or candles to enjoy the calming scent.
  • Culinary: Add dried flowers to teas, desserts, or baked goods.
  • Decor: Use in flower arrangements, wreaths, or potpourri for a touch of natural beauty.
  • Health: Lavender is known to relieve stress, improve sleep, and promote relaxation.

Quick Tips for Success

  1. Always choose well-draining soil to prevent root rot.
  2. Ensure your lavender gets enough sunlight—6–8 hours daily.
  3. Don’t overwater; let the soil dry between waterings.
  4. Regular pruning keeps plants healthy and blooming.
  5. Protect young plants from frost in colder climates.

Conclusion

Growing lavender at home doesn’t have to be complicated. With the right variety, sunlight, soil, and a little care, you can enjoy the beauty and benefits of this magical herb year-round. Whether you choose to grow it in pots, garden beds, or indoors on a sunny windowsill, lavender offers endless joy, fragrance, and versatility. Start today, and in a few months, you’ll be rewarded with stunning blooms and the calming aroma of your very own homegrown lavender.

Lavender is not just a plant—it’s an experience. With this quick and easy guide, anyone can become a successful lavender gardener and enjoy the fragrant, peaceful charm it brings into everyday life.

Grow Juicy Strawberries at Home: Complete Guide to Planting, Care & Heavy Harvests

Grow Juicy Strawberries at Home: Complete Guide to Planting, Care & Heavy Harvests

Strawberries are among the sweetest, most delightful fruits you can grow at home. Their bright red color, refreshing flavor, and beautiful leaves make them perfect for gardens, balconies, and even small pots. But many gardeners struggle with slow growth, small fruits, or plants that don’t produce well. The secret is understanding the right planting techniques and care tips that strawberries need to thrive.

This complete 1200-word guide will teach you how to grow strawberries successfully, whether you’re planting them in soil beds, raised beds, hanging baskets, or containers. With the right care, your strawberry plants can produce big, juicy fruits for months—every year!


Understanding Strawberries: Why They Are Easy Yet Sensitive

Strawberries are perennial plants, meaning they grow year after year. However, they need the right:

  • Soil type
  • Sunlight
  • Moisture
  • Fertilizers
  • Winter care

Since strawberries have shallow roots, they are sensitive to water levels and soil quality. But once you create the right environment, they grow fast and yield heavily.


1. Choosing the Right Strawberry Variety

The first step to successful strawberry growing is selecting the right type.

Main Strawberry Types

1. June-bearing varieties

Produce one large harvest in spring or early summer.
Great if you want lots of strawberries at once.

2. Ever-bearing varieties

Produce fruits multiple times a year, usually in spring and fall.
Perfect for backyard gardeners.

3. Day-neutral varieties

Fruit continuously throughout the growing season.
Best for container growers.

For beginners, day-neutral or ever-bearing varieties are the easiest and most productive.


2. Best Time to Plant Strawberries

You can plant strawberries in:

Spring (February–April) — Ideal planting time

Fall (September–November) — Perfect for cooler regions

Early planting helps plants build strong roots and produce more fruits.


3. Best Soil Mix for Strawberry Growth

Strawberries love loose, well-draining, slightly acidic soil.

Perfect Soil Mix

  • 40% garden soil
  • 30% compost or vermicompost
  • 20% cocopeat
  • 10% sand

Additional Add-ons:

  • A handful of bone meal (for root growth)
  • A handful of neem cake (prevents pests)

Ideal Soil pH:

6.0 – 6.5 (slightly acidic)

If your soil is too alkaline, add coffee grounds or pine needle mulch to make it acidic.


4. Planting Strawberries the Right Way

Spacing

  • In beds: 12–18 inches apart
  • In pots: use 8–10 inch pots per plant
  • Hanging baskets: 1–2 plants per basket

Planting Technique

The planting depth is crucial:

  • Do not bury the crown (the central growing bud).
  • Keep the crown at soil level.
  • Only roots should be covered with soil.

Why this matters:

Burying the crown causes rot, while planting too shallow dries out the roots.


5. Provide 6–8 Hours of Sunlight

Strawberries need full sun to produce sweet, high-quality fruits.

Tips:

  • Choose the sunniest location
  • Avoid planting near walls that block morning sunlight
  • If indoors, place near a bright south-facing window

More sunlight = sweeter strawberries.


6. Watering Requirements

Strawberries have shallow roots and need consistent moisture.

Watering Rule

  • Keep soil moist but not soggy
  • Water when top 1 inch of soil feels dry

Summer: daily or alternate day watering

Winter: 2–3 times a week

Avoid overhead watering to reduce fungal infections.

Mulching is essential

Use:

  • Straw
  • Dry leaves
  • Coco chips
  • Pine needles

Benefits of mulching:

  • Prevents soil drying
  • Stops fruit from touching soil
  • Keeps fruits clean
  • Controls weeds

7. Feeding Your Strawberry Plants

Strawberries are heavy feeders and respond well to regular nutrition.

Best Fertilizers for Faster Growth

1. Nitrogen-rich fertilizers (for foliage)

  • Vermicompost
  • Cow dung compost
    Use once every 30 days.

2. Flower and fruit boosters

  • Wood ash
  • Banana peel fertilizer
  • Bone meal
    Apply every 45 days.

3. Liquid fertilizers

  • Compost tea
  • Seaweed extract
  • Fish emulsion

Liquid feeds once every 15 days result in faster fruiting.


8. Encouraging More Flowers and Fruits

To get heavy yields, use these expert strategies:

✔ Remove early runners

Strawberries send out runners (baby plants).
In the first season, cut them off so the plant focuses on fruits.

✔ Trim old leaves

Remove yellowing or damaged leaves to improve air circulation.

✔ Use a phosphorus-rich fertilizer

Bone meal → boosts flowering.
Wood ash → improves fruit sweetness.

✔ Keep the plant pest-free

Healthy plants produce more fruits.


9. Pest and Disease Management

Strawberries can attract pests, especially in warm climates.

Common Pests

  • Aphids
  • Spider mites
  • Thrips
  • Slugs
  • Whiteflies

Organic Pest Control Spray

  • 1 liter water
  • 1 tsp neem oil
  • 1 tsp liquid soap

Spray every 7–10 days.

Fungal Issues (very common)

  • Powdery mildew
  • Gray mold

Prevention:

  • Avoid overhead watering
  • Improve air circulation
  • Use sulfur powder lightly if needed

10. Training & Supporting Strawberry Plants

Strawberries grown in pots or hanging baskets tend to droop.

Support your plants by:

  • Using a wire frame
  • Using hanging baskets with trailing support
  • Adding straw mulch so fruits stay clean

Hanging baskets are great for strawberries because they:

  • Keep plants pest-free
  • Provide good air circulation
  • Make fruits hang beautifully
  • Reduce soil-borne diseases

11. Harvesting Strawberries the Right Way

When to Harvest?

  • Strawberries turn completely red
  • Fruits should be slightly soft
  • Harvest early morning for best flavor

Do NOT pull the fruit off

Always cut with a small stem attached.

Why?

Pulling can damage the crown and reduce future fruiting.


12. Post-Harvest Care (Very Important)

After fruiting:

  • Remove old leaves
  • Remove dried stems
  • Cut off runners you don’t need
  • Give a light organic fertilizer
  • Mulch again

This ensures the next round of fruiting is even better.


13. How to Grow Strawberries in Pots or Containers

Strawberries grow exceptionally well in containers.

Best Containers:

  • 8–10 inch pots
  • Grow bags
  • Hanging baskets
  • Strawberry towers
  • Vertical planters

Container Tips:

  • Use well-draining soil
  • Ensure drainage holes are open
  • Don’t let soil dry out completely

Container-grown strawberries may need more frequent feeding.


14. Winter Care for Strawberries

Strawberries love cold weather, but extreme frost can damage plants.

Winter protection:

  • Mulch heavily
  • Keep soil moist
  • Cover plants with shade net or frost cloth during extremely cold nights

Winter is when plants store energy for next season’s fruiting.


15. How Long Do Strawberry Plants Live?

A strawberry plant can live up to 3–5 years, but fruit production decreases after 2–3 years.

Solution:

  • Use runners to grow new plants
  • Replace old plants with new ones every 3 years

This ensures fresh, healthy, and high-yielding strawberry beds.


Conclusion

Growing strawberries at home is rewarding and surprisingly easy when you follow the correct planting and care tips. With the right variety, soil, sunlight, watering habits, fertilizers, and pest control, your strawberry plants will thrive and produce sweet, juicy fruits for months.

Whether you grow them in pots, raised beds, or hanging baskets, these tips will help you enjoy bigger harvests, healthier plants, and sweeter strawberries right at home.

Grow Sweet Pineapples at Home: The Ultimate Step-by-Step Guide for Beginners (Fast & Easy Method)

Grow Sweet Pineapples at Home: The Ultimate Step-by-Step Guide for Beginners (Fast & Easy Method)

Growing a pineapple at home may sound unusual, but it’s surprisingly simple—and extremely rewarding! With just a pineapple crown and a little patience, you can grow your own plant that not only looks beautiful but also produces a delicious fruit. Pineapples grow well in pots, balconies, terraces, and even indoors near a bright window.

This complete 1200-word guide will walk you through every step—from choosing the right pineapple, preparing the crown, planting, caring, and all the way to harvesting. If you’ve ever dreamed of growing your own pineapple, this is the perfect place to start.


Why Grow Pineapples at Home?

Pineapples are tropical plants that adapt extremely well to containers. They don’t require much space, water, or maintenance. This makes them ideal for home gardeners, even beginners.

Benefits of Growing Pineapples

  • Low maintenance and drought-tolerant
  • Grows well in pots
  • Beautiful ornamental foliage
  • Free plant from a store-bought pineapple
  • Fun gardening project for kids and beginners
  • Produces sweet homegrown fruit

If you have a sunny spot at home, you can easily grow a pineapple plant that will reward you with a beautiful fruit in 18–24 months.


Step 1: Selecting the Perfect Pineapple

Your journey begins with choosing a healthy, ripe pineapple from the market.

Choose a Pineapple With:

  • Fresh green leaves at the crown
  • No signs of rot
  • No wrinkles or soft spots
  • Sweet aroma
  • Firm body

Avoid: pineapples with dry, brown, or brittle crown leaves—they won’t grow.


Step 2: Preparing the Pineapple Crown

Once you have your pineapple, it’s time to prepare the top for planting.

How to Prepare the Crown:

  1. Twist the Crown Off:
    Hold the pineapple body in one hand, and twist the leafy crown using your other hand. It will separate cleanly.
  2. Remove Excess Fruit Flesh:
    Using a knife, carefully trim any remaining fruit flesh from the base of the crown.
    Important: Leaving flesh attracts rot.
  3. Pull Off the Bottom Leaves:
    Peel about 1–2 inches of the lower leaves to expose small brown root buds.
  4. Dry the Crown:
    Keep the crown aside for 2–3 days in a shaded place.
    This drying helps prevent fungal infections.

Now your pineapple crown is ready for rooting.


Step 3: Rooting the Pineapple Crown

You can root pineapple crowns in water or soil.
But soil rooting is more natural and gives better results.

Soil Rooting Method (Recommended):

  1. Choose a small pot (6 inches).
  2. Fill it with a well-draining mix:
    • 50% garden soil
    • 30% sand
    • 20% compost
  3. Insert the crown 1–2 inches deep into the soil.
  4. Press soil firmly around it.
  5. Water lightly.
  6. Keep in bright, indirect sunlight.

What Happens Next (Rooting Updates):

  • Week 1: Leaves stay green and upright.
  • Week 2: Small roots begin forming underground.
  • Week 3–4: Roots strengthen; new leaves begin to grow from the center.

If you see new leaves emerging, that means your pineapple crown has rooted successfully!


Step 4: Transplanting the Pineapple Plant

After 30–40 days, your rooted crown is ready to be shifted to a bigger pot.

Best Pot Size:

Use a 12–14 inch pot for best results.

Ideal Soil Mix:

  • 40% garden soil
  • 30% compost
  • 20% river sand
  • 10% cocopeat

Mix should be well-draining because pineapples hate soggy soil.

How to Transplant:

  1. Fill the pot with the soil mix.
  2. Make a small hole in the center.
  3. Gently remove the crown from the previous pot.
  4. Place it in the new pot.
  5. Press soil lightly and water well.
  6. Shift to bright sunlight gradually.

Step 5: Pineapple Plant Care Guide

Caring for pineapples is simple if you follow a few important rules.


1. Sunlight

Pineapples love the sun!
They require 6–8 hours of direct sunlight daily.

Perfect locations include:

  • Sunny terrace
  • South-facing balcony
  • Garden area with full sun

More sunlight = faster growth and sweeter fruit.


2. Watering

Pineapples are drought-tolerant and do not like standing water.

Watering Tips:

  • Water once every 3–4 days in summer.
  • Water once a week in winter.
  • Always let the top soil dry before watering again.
  • Avoid waterlogging at all costs.

3. Feeding (Fertilizer)

Pineapples are heavy feeders during growth stages.

Best Fertilizers:

  • Vermicompost
  • Cow dung compost
  • Mustard cake liquid
  • Banana peel liquid fertilizer
  • Seaweed extract

Feed the plant every 30–40 days.

This ensures strong foliage growth and faster fruit development.


Step 6: Pineapple Growth Timeline (Month-by-Month Updates)

Here’s what you can expect as your plant grows:

Month 1–2:

Crown establishes roots and new leaves appear.

Month 3–6:

Leaves become longer; plant grows wider.

Month 7–10:

Plant strengthens and reaches maturity size (2–3 feet wide).

Month 12–16:

Center part of the plant becomes tight; prep for flowering begins.

Month 16–20:

A beautiful pinkish-red flower emerges.

Month 20–24:

Flower develops into a fruit.

Month 22–26:

Pineapple ripens fully and is ready for harvest.

Patience pays—homegrown pineapples are sweeter than store-bought ones!


Step 7: Encouraging Your Pineapple to Flower Faster

If your pineapple plant takes longer than expected:

Try This Natural Trick:

  1. Place a ripe apple inside a plastic bag along with the pineapple plant crown area.
  2. Tie the bag loosely for 3–4 days.
  3. Ethylene gas released by the apple encourages flowering.

This method is widely used by farmers to induce blooms naturally.


Step 8: Protecting Your Pineapple Plant

Common Problems & Solutions

1. Yellow Leaves

Cause: Overwatering
Solution: Reduce watering and improve sunlight.

2. Rotting Crown

Cause: Excess moisture
Solution: Use well-draining soil; avoid overhead watering.

3. Slow Growth

Cause: Low sunlight or poor soil
Solution: Shift to full sun; add compost monthly.

4. Insects on Leaves

Cause: Mealy bugs or aphids
Solution: Spray neem oil every 10–15 days.


Step 9: Harvesting Your Homegrown Pineapple

Your pineapple is ready to harvest when:

  • The skin turns golden yellow
  • It smells sweet
  • The fruit feels firm but not hard
  • The crown becomes loose

Cut the fruit with a sharp knife, leaving 2–3 inches of stem attached.


Step 10: How to Regrow Pineapples Forever

The crown of your harvested pineapple can be planted again to grow a new plant.

This means:
One pineapple = Infinite pineapple plants!

Just repeat the same steps and enjoy endless harvests.


Final Thoughts

Growing pineapples at home is a slow but extremely rewarding experience. With the right sunlight, good soil, and a little patience, you can enjoy your own sweet, juicy pineapple straight from your garden or balcony.

Whether you’re a beginner or an experienced gardener, this method is easy, reliable, and fun. Start with one plant, and soon you’ll have a mini pineapple garden of your own!

Grow Hibiscus from Cuttings in Water: The Easiest Step-By-Step Method for Fast Rooting (Full Guide + Updates)

Grow Hibiscus from Cuttings in Water: The Easiest Step-By-Step Method for Fast Rooting (Full Guide + Updates)

Hibiscus—known for its large, colorful flowers—is one of the most loved flowering plants for home gardens. The best part? You don’t need to buy new plants every time. Growing hibiscus from cuttings is incredibly easy, and rooting them in water is one of the fastest, most successful propagation methods.

Whether you’re a beginner or an experienced gardener, this complete guide will show you how to root hibiscus cuttings in water step-by-step with full growth updates, so you get healthy, strong plants ready for transplanting.


Why Propagate Hibiscus in Water?

Water rooting has become very popular because of how simple and reliable it is. Here’s why:

  • Fast root formation
  • Easy to monitor root growth
  • Less chance of soil diseases
  • Beginner-friendly method
  • Higher success rate than direct soil planting

If you want to multiply your hibiscus plants for free, this method is perfect.


Step 1: Choosing the Right Hibiscus Cutting

Not every stem works well for propagation. Selecting the right cutting increases your success rate significantly.

Features of a Good Cutting:

  • 6–8 inches long
  • From a healthy mother plant
  • Semi-hardwood stem (not too green, not too woody)
  • Contains 3–4 leaf nodes
  • Free from pests and disease

How to Prepare the Cutting:

  1. Remove the lower leaves completely.
  2. Keep only 2–3 leaves at the top to reduce water loss.
  3. If leaves are large, cut them in half.
  4. Trim the bottom part of the stem at a 45-degree angle for better water absorption.

Now your cutting is ready for water rooting.


Step 2: Selecting a Jar and Preparing Water

To root hibiscus cuttings in water, use:

  • A clear glass jar or bottle
  • Clean, chlorine-free water

Why use glass?
It allows you to clearly observe root growth and detect rot early.

Water Preparation Tips:

  • Use filtered or stored water (tap water kept overnight).
  • Fill the jar about 3–4 inches.
  • Ensure only the nodes (where leaves were removed) are submerged.

Step 3: Placing the Cutting in Water

Place the prepared cuttings carefully into the jar.

Important Conditions:

  • Keep the jar in bright, indirect sunlight (avoid direct sun).
  • Maintain a warm temperature (25–35°C).
  • Replace or top-up the water every 3 days.

Why Change Water?

Fresh water prevents fungal growth and oxygen depletion, which helps in faster root development.


Step 4: Rooting Timeline (Full Updates)

Here’s what happens at each stage:

Day 1–3:

  • Cutting stays hydrated
  • Leaves remain green
  • Some swelling around nodes starts

Day 4–7:

  • Hair-like small root bumps appear
  • These are the first signs of rooting

Day 10–14:

  • Thin white roots begin to grow longer
  • The cutting becomes more stable in water

Day 14–20:

  • Roots grow 1–2 inches
  • New leaf buds may start forming at the top

Day 21–30:

Your hibiscus cutting becomes fully rooted and ready for soil transplantation.

The ideal root length for planting is 2–3 inches.


Step 5: Preparing the Soil for Transplanting

Once the roots develop well, the next step is transplanting the cutting into soil.

Best Soil Mix for Hibiscus:

  • 40% garden soil
  • 30% compost or cow dung
  • 20% sand
  • 10% cocopeat

This mix ensures good drainage and keeps the hibiscus roots moist but not soggy.

Best Pot Size:

  • Start with an 8–10 inch pot
  • Make sure the pot has drainage holes

Step 6: Planting the Rooted Cutting

Follow these steps carefully to avoid transplant shock:

  1. Fill the pot with the soil mix.
  2. Make a small hole in the center.
  3. Gently remove the cutting from the water without damaging the roots.
  4. Place it inside the hole and cover the roots with soil.
  5. Press the soil gently to remove air pockets.
  6. Water immediately and deeply.

Important Tip:

Keep the plant in shade for 5–7 days after planting. This helps the cutting adjust to soil conditions.


Step 7: Post-Planting Care (First Month)

After the cutting has been transferred to soil, proper care will ensure healthy growth.

Week 1:

  • Leaves remain stable
  • Plant focuses on establishing its roots
  • Keep soil evenly moist (not soggy)

Week 2:

  • New leaves start growing
  • Slight upward growth noticeable

Week 3:

  • Stems strengthen
  • New branches appear

Week 4:

  • Plant becomes more vigorous
  • You can move it to a sunnier spot (morning sun only)

Step 8: Light, Water, and Fertilizer Requirements

Sunlight

Hibiscus needs plenty of sunlight once established.

  • Best: 4–6 hours of morning sunlight
  • Avoid strong afternoon sun for young cuttings

Watering

  • Keep soil moist but never waterlogged
  • Water every 2–3 days or when the top soil dries

Fertilizer

Start feeding after 30 days of transplanting.

Best fertilizers:

  • Vermicompost
  • Cow dung
  • Mustard cake liquid
  • Seaweed extract

Feed once every 20–25 days.


Step 9: Common Problems & Their Solutions

1. Leaves Turning Yellow

Cause: Overwatering or poor drainage
Solution: Improve soil aeration, reduce watering

2. Root Rot in Water

Cause: Dirty water or submerged leaves
Solution: Change water frequently, remove lower leaves

3. No Roots After 3 Weeks

Cause: Cutting too woody or low temperature
Solution: Use semi-hard cuttings and keep in warm place

4. Droopy Plant After Transplanting

Cause: Transplant shock
Solution: Keep in shade, mist leaves, maintain moisture


Step 10: When Will Your Hibiscus Flower?

A cutting-grown hibiscus plant will start producing flowers in:

  • 3–5 months, depending on variety and conditions

Once it matures, it can give year-round blooms if properly cared for.


Step 11: Tips for Bushy and Heavy Flowering Hibiscus

  • Pinch the growing tips to encourage branching
  • Keep the plant in full morning sunlight
  • Feed with potassium-rich fertilizers
  • Remove old yellow leaves regularly
  • Avoid overwatering

These small steps guarantee more blooms and a healthier plant.


Final Thoughts

Growing hibiscus from cuttings in water is one of the easiest and most satisfying gardening experiences. With just a jar of water, a healthy cutting, and simple care, you can create new hibiscus plants in less than a month.

This method is perfect for plant lovers who want to multiply their plants, gift them to friends, or fill their garden with vibrant hibiscus flowers.

Grow Endless Mint at Home: The Ultimate Step-By-Step Guide to Propagating Mint from Cuttings (With Full Updates)

Grow Endless Mint at Home: The Ultimate Step-By-Step Guide to Propagating Mint from Cuttings (With Full Updates)

Mint is one of the easiest and most rewarding herbs you can grow at home. Whether you love adding it to your tea, chutneys, smoothies, or salads, having a fresh supply at your doorstep is always a joy. The best part? You don’t need seeds! You can easily grow a lush, fragrant mint plant from just a simple cutting.

In this full guide—with updates on every stage—you will learn how to root mint cuttings, transplant them successfully, and keep them producing vigorously throughout the year.


Why Growing Mint from Cuttings Is the Best Method

Mint seeds take a long time to germinate and often fail to grow true to type. But mint cuttings grow fast, root quickly, and produce a healthy, cloned plant that retains all the qualities of the parent plant.

This method also guarantees:

  • Faster growth (roots appear in 5–7 days)
  • Higher success rate
  • True-to-variety plants
  • Quick bushy growth

So if you’re looking to grow mint the beginner-friendly way, stem cuttings are the perfect choice.


Step 1: Selecting the Perfect Mint Cutting

Healthy cuttings mean healthy plants. Choose cuttings that are:

  • 5–6 inches long
  • Bright green
  • Disease-free
  • Taken from new, soft stems (not woody)

Trim off the lower leaves, leaving only the top 2–3 pairs. This helps reduce water loss and allows the plant to focus on root formation.

Tip: You can take cuttings from store-bought mint bundles too!


Step 2: Rooting Mint Cuttings in Water

Water propagation is the easiest and most reliable method. Mint loves moisture, so rooting is usually very fast.

How to Do It:

  1. Take a clean glass or jar.
  2. Fill it with clean, chlorine-free water.
  3. Place the cuttings inside, making sure the leaf nodes are submerged.
  4. Keep it in a bright, indirect light location.
  5. Change the water every 2 days to prevent rotting.

What Happens Next (Full Update)

  • Day 2–3: Stems stay fresh, leaves firm up.
  • Day 4–5: Tiny white roots begin appearing.
  • Day 7–10: Strong root growth of 1–2 inches.
  • Day 14: Roots become thick and ready for planting.

Once the roots reach 1–2 inches in length, the cuttings are ready to be moved into soil.


Step 3: Preparing the Perfect Soil Mix for Mint

Mint loves moist, loose, nutrient-rich soil. The ideal potting mix is:

  • 40% garden soil
  • 30% compost/cow dung
  • 30% cocopeat or sand

This combination retains moisture but also ensures good drainage—mint hates waterlogged soil.

Best Container Size

  • Start with a 6–8 inch pot for a few cuttings.
  • If you want a large, bushy mint patch, use a wide container or grow bed.

Mint spreads fast, so a wide space results in fuller growth.


Step 4: Planting the Rooted Cuttings

Follow these steps for a successful transplant:

  1. Fill the pot with the soil mix.
  2. Make a hole with your finger or a stick.
  3. Gently place each rooted cutting into the hole.
  4. Cover roots with soil and press lightly.
  5. Water thoroughly to settle the soil.

Post-Planting Care Update (Next 7 Days)

  • Day 1–3: Plants may look droopy—this is normal.
  • Day 4–5: Plants perk up and new leaves appear.
  • Day 6–7: Growth becomes vigorous, and stems begin expanding sideways.

Your mint plant is now established!


Step 5: Light, Water, and Temperature Requirements

Sunlight

Mint prefers partial sunlight to bright indirect light.
Direct sunlight can burn the leaves, especially during hot summer days.

Best Position:

  • East-facing balcony
  • Shaded terrace
  • Window with filtered light

Watering

Mint loves moisture, but not soggy soil.

  • Water every 1–2 days or whenever the top soil feels dry.
  • Ensure the pot has drainage holes.

Temperature

Mint thrives in temperatures between 18°C–32°C.
It struggles in extreme heat, so provide shade during hot afternoons.


Step 6: How to Make Mint Grow Thick and Bushy

Mint naturally spreads through its runners, but with a few tips, you can make it grow exceptionally bushy:

1. Pinch the Top Leaves

Whenever the plant reaches 6–8 inches in height, pinch the top 2–3 leaves.
This encourages side branching.

2. Harvest Often

Frequent harvesting keeps the plant active and prevents legginess.

3. Feed Monthly

Use organic fertilizers such as:

  • Vermicompost
  • Cow dung compost
  • Mustard cake liquid
  • Seaweed extract

Feeding once every 20–25 days boosts lush growth.


Step 7: Mint Plant Full Growth Updates (Month-Wise)

Week 1:

Cuttings establish roots and new leaves appear.

Week 2:

Plants begin spreading sideways; stems become fuller.

Week 3:

You can start light harvesting by picking 2–3 leaves per plant.

Week 4:

The plant becomes dense and strong—harvest freely now.

Month 2:

Mint grows vigorously. Runners (side stems) spread rapidly and fill the pot.

Month 3:

Plant becomes fully mature. Trim it regularly to prevent overcrowding and keep it fresh.


Step 8: Common Mint Problems and Solutions

1. Yellowing Leaves

Caused by overwatering or poor drainage.
→ Fix: Reduce watering and improve soil aeration.

2. Leggy Growth

Due to lack of sunlight or infrequent pruning.
→ Fix: Move to brighter location and pinch tips regularly.

3. Root Rot

Excess water can rot delicate mint roots.
→ Fix: Use well-drained soil and avoid waterlogging.

4. Pest Attacks

Mint is generally pest-resistant but may attract aphids or whiteflies.
→ Fix: Spray neem oil every 10–12 days.


Step 9: How to Harvest Mint Properly

Harvesting mint correctly ensures continuous growth.

Do This:

  • Cut stems from the top
  • Leave at least 2–3 inches from the base
  • Harvest only one-third of the plant at a time

Regular harvesting actually makes your mint bushier!


Step 10: How to Multiply Your Mint (Forever!)

Once you have one bushy plant, you can create unlimited plants using:

  • Runner cuttings
  • Stem cuttings
  • Dividing the root ball

Mint spreads like wildfire, so you’ll have a never-ending supply.


Final Thoughts

Growing mint from cuttings is one of the easiest gardening projects, even for beginners. With minimal effort, you can have a fresh, fragrant, and unlimited supply of mint right in your home.

Follow the simple steps—rooting, planting, watering, pruning—and watch your mint turn into a lush green patch within weeks. Whether you’re growing it for cooking, tea, aroma, or herbal remedies, mint is a must-have plant in every home garden.

Secret Formula for Heavy Flowering on Vinca (Sadabahar): Grow Bushy, Blooming Plants All Year!

Secret Formula for Heavy Flowering on Vinca (Sadabahar): Grow Bushy, Blooming Plants All Year!

Vinca, also called Sadabahar, Madagascar Periwinkle, or Nayantara, is one of the most beautiful, hardy, and long-blooming flowering plants that thrive almost anywhere. It produces stunning flowers in shades of white, pink, red, purple, peach, and even bi-colors. What makes Vinca truly special is its ability to bloom 365 days a year, especially when given the right care.

If your Vinca plants are looking leggy, producing fewer flowers, or growing slowly, this detailed guide will teach you exactly how to get heavy flowering and keep them bushy, vibrant, and full of blooms.

Let’s unlock the secrets to growing lush, healthy, and continuously blooming Vinca plants at home!


1. Understanding Vinca (Sadabahar): Why It Blooms Continuously

Vinca is a tropical, heat-loving plant that grows extremely well in hot climates. Its nature is simple:

  • Loves full sunlight
  • Thrives in warm temperatures
  • Requires less water
  • Prefers well-draining soil
  • Blooms continuously with proper pinching and feeding

Knowing these basics helps you provide ideal conditions for heavy flowering.


2. Choosing the Right Variety for Maximum Blooms

There are two major Vinca varieties:

(1) Upright or Tall Vinca

  • Grows 1–2 feet tall
  • Ideal for garden beds and large pots
  • Produces large flowers

(2) Dwarf or Bush Vinca

  • Compact and bushy
  • Perfect for small pots, borders, and balcony gardening
  • Produces more blooms

Both varieties flower heavily with the right care, but dwarf vinca plants bloom more densely.


3. Best Containers for Heavy Flowering

Vinca has a shallow root system. The right pot size boosts growth and flowering.

Ideal container size:

  • 8–12 inch pot for one plant
  • Ensure good drainage holes
  • Clay or terracotta pots work best (dry faster and prevent root rot)

If planting multiple vincas together, use a wider container or trough.


4. Perfect Soil Mix to Boost Flowering

Vinca hates wet and sticky soil. It performs best in loose, airy, fast-draining soil.

Best soil mix for Vinca:

  • 40% Garden soil
  • 30% Cocopeat
  • 20% Compost (vermicompost or cow dung)
  • 10% Sand or perlite

You can also add:

  • 1 spoon neem cake powder
  • A pinch of Epsom salt (optional)

The key is drainage—never plant vinca in heavy or clayey soil.


5. Sunlight Requirements for Heavy Flowering

If you want maximum blooms, sunlight is the MOST important factor.

Vinca needs:

  • 4–6 hours of direct sunlight
  • Bright light for the rest of the day

More sunlight = more branching = more flowers.

Plants kept in low light become:

  • Leggy
  • Weak
  • Low flowering

If garden sunlight is limited, place vinca where it receives morning sun.


6. Watering the Right Way (Very Important!)

Vinca is drought-tolerant and does not like too much water.

Watering rule:

  • Water only when the top layer of soil is dry
  • Avoid daily watering
  • Overwatering can cause root rot and yellow leaves

In summer: water every 1–2 days
In winter: water every 3–4 days

Always water at the base—avoid wetting flowers and leaves.


7. Pinching & Pruning: The Secret to Bushy Growth + Tons of Flowers

One of the biggest mistakes people make is not pinching vinca.

Pinching is essential for:

  • More branches
  • Dense growth
  • Maximum flowers

How to pinch:

  • When the plant reaches 4–5 inches, pinch the top 1–2 inches
  • New branches grow from the sides
  • Repeat the process after 20 days for the next flush

Pruning dry or leggy branches improves airflow and encourages more blooms.


8. Fertilizers for Heavy Flowering (Natural & Effective)

Feeding your vinca regularly is the key to a continuous bloom cycle.

Best fertilizers for Vinca (organic options):

Vermicompost

  • Apply once every 20–25 days
  • Encourages healthy foliage and roots

Mustard Cake Liquid Fertilizer

  • High in potassium
  • Best for heavy flowering
  • Use once every 10–15 days

Banana Peel Fertilizer

  • Boosts flower production naturally

Seaweed Liquid Fertilizer

  • Strengthens plant and improves color

Best fertilizer routine:

  • Every 2 weeks: liquid fertilizer (mustard cake/seaweed)
  • Every month: a handful of compost

Do not use too much nitrogen—it causes more leaves and fewer flowers.


9. Protecting Vinca from Pests & Diseases

Vinca is generally low maintenance, but sometimes may face:

Common pests:

  • Aphids
  • Mealybugs
  • Whiteflies

Prevention:

  • Spray neem oil (5 ml per liter) weekly
  • Avoid overwatering
  • Keep area around plant clean

Yellow Leaves Causes:

  • Overwatering
  • Poor drainage
  • Fungal infection
  • Too much fertilizer

Fix the watering schedule and ensure proper airflow.


10. Deadheading: The Trick for Continuous Flowering

Dead or faded flowers should be removed regularly.

Why remove old flowers?

  • Encourages new blooms
  • Saves plant energy
  • Keeps plant neat and clean

Just pinch off the dying flowers with your fingers.


11. Growing Vinca from Seeds or Cuttings

Vinca grows easily in two ways:

From Seeds

  • Sow seeds in warm weather
  • Lightly cover with soil
  • Mist water
  • Germinate in 5–7 days

From Cuttings

  • Take a 4–5 inch healthy stem
  • Remove lower leaves
  • Dip in rooting hormone (optional)
  • Plant in moist soil
  • Roots in 10–15 days

Cuttings bloom much faster than seeds.


12. Tips to Get Maximum Flowers All Year

Follow these special tips for nonstop blooming:

Give 5–6 hours of sunlight daily

Water only when soil feels dry

Use a well-draining soil mix

Pinch tops for bushy growth

Feed liquid fertilizer every 2 weeks

Remove dried flowers (deadheading)

Do not overwater or let water stagnate

Protect from heavy rain during monsoon

Repot yearly for best performance

By following these, your vinca will bloom more than ever!


Conclusion

Vinca (Sadabahar) is an incredibly rewarding flowering plant that can brighten your garden with endless blooms. With just a little care—proper sunlight, correct watering, pinching, and regular feeding—your plant will become bushier, healthier, and full of vibrant flowers throughout the year.

Whether you grow it on your balcony, terrace, or in your backyard, Vinca will never disappoint. Once you master the right techniques, you’ll enjoy heavy flowering season after season.

Grow Endless Spinach at Home: The Ultimate Beginner-Friendly Guide to Fresh, Organic Greens

Grow Endless Spinach at Home: The Ultimate Beginner-Friendly Guide to Fresh, Organic Greens

Spinach is one of the easiest, fastest, and most rewarding leafy vegetables you can grow at home. Whether you live in a small apartment, have a balcony garden, or enjoy a full backyard space, spinach fits perfectly into any setup. It grows quickly, needs very little maintenance, and provides an abundant harvest of nutritious green leaves packed with iron, vitamins, and antioxidants.

If you’ve always wanted a continuous supply of chemical-free leafy greens, this complete guide will walk you through how to grow spinach at home successfully—from soil preparation to harvesting and regrowing again.


Why Grow Spinach at Home?

Growing your own spinach gives you many benefits:

  • Fresh and organic leaves every week
  • Saves money spent on regular market greens
  • Grows quickly (ready in 30–40 days)
  • Thrives in containers, pots, grow bags, boxes, or ground
  • Perfect for beginners
  • Can be harvested multiple times (cut-and-come-again method)

Spinach also tolerates partial shade, making it ideal even for low-sunlight balconies.


1. Choosing the Right Variety

There are two main types of spinach:

Indian Spinach (Desi Palak)

  • Heat tolerant
  • Grows larger leaves
  • Best for warm climates like India

English Spinach (Palak)

  • Prefers cool weather
  • Leaves are softer and juicier
  • Perfect for winter growing

Both do well in containers, but Indian spinach handles heat better.


2. Best Season for Growing Spinach

Spinach prefers cool weather, but can grow year-round with care.

Ideal growing months:

  • October to February (winter) – fastest growth
  • March to June (summer) – requires shade and regular watering
  • Monsoon – grows well but avoid waterlogging

3. Containers and Pots for Growing Spinach

Spinach doesn’t need deep containers because it has shallow roots.

Best container size:

  • Height: Minimum 6–8 inches
  • Width: 12–24 inches (the wider, the better)

You can use:

  • Plastic pots
  • Grow bags
  • Styrofoam boxes
  • Cement pots
  • Raised beds
  • Balcony rail planters

Ensure the container has good drainage holes to avoid root rot.


4. Best Soil Mix for Spinach

Spinach loves loose, airy, and nutrient-rich soil.

Perfect soil mix:

  • 40% Garden soil
  • 30% Compost (Vermicompost / Cow dung / Homemade compost)
  • 20% Cocopeat
  • 10% Sand

Optional boosters:

  • 1 handful neem cake (keeps pests away)
  • 1 spoon bone meal (encourages leafy growth)

Before sowing, loosen the soil so seeds can sprout easily.


5. How to Sow Spinach Seeds Properly

Spinach seeds are small but strong growers. Follow these steps:

Step-by-step seed sowing:

  1. Moisten the soil lightly before sowing.
  2. Sprinkle the seeds evenly across the soil surface.
  3. Maintain 2–3 cm spacing between seeds.
  4. Cover them with a thin layer of soil (0.5–1 cm).
  5. Water gently using a spray bottle to avoid seed displacement.
  6. Keep the pot in partial shade until they sprout.
  7. Seeds germinate in 4–7 days.

Tip:

For faster germination, soak the seeds in water for 4–6 hours before sowing.


6. Caring for Spinach Plants (Daily to Weekly Care)

Spinach is low maintenance but needs consistent care.

Watering

  • Keep the soil moist but not soggy.
  • In summer: water daily
  • In winter: water every 2–3 days
  • Avoid overhead splashing—use a spray or a gentle shower.

Sunlight

Spinach thrives in:

  • 3–4 hours of sun
  • Or bright indirect light for the rest of the day

Too much sun → leaves may become bitter
Too little sun → slow growth

Fertilizing

Feed spinach every 12–15 days to keep leaves tender and green.

Best fertilizers:

  • Vermicompost
  • Cow dung compost
  • Mustard cake water
  • Seaweed extract

How to apply:

Spread compost around the base OR use liquid fertilizer by mixing in water.


7. Preventing Pests and Diseases

Spinach is mostly pest-free, but sometimes you may face:

Common pests:

  • Aphids
  • Leaf miners
  • Caterpillars

Solutions:

  • Spray neem oil (5 ml per liter) weekly
  • Remove affected leaves
  • Keep plants airy, not overcrowded

Avoid chemical pesticides because spinach is eaten fresh.


8. Thinning and Spacing

When seedlings grow 2–3 inches tall, they become overcrowded.
Thin them out by removing some plants, keeping 3–4 inches distance.

Use removed seedlings as microgreens in salads—nothing goes waste!


9. When and How to Harvest Spinach

Spinach grows very fast and is ready to harvest in 30–40 days.

Two harvesting methods:

(A) Cut-and-Come-Again Method

  • Cut the outer leaves
  • Leave the center intact
  • New leaves keep growing continuously

This gives 3–5 harvests.

(B) Full Harvest

  • Pull out the entire plant
  • Use it for curries, soups, smoothies, dal, paratha, etc.

Harvesting tips:

  • Harvest early morning for best freshness
  • Never cut more than 30–40% at once
  • Regular harvesting promotes more leaf growth

10. Regrowing Spinach for Continuous Supply

After first harvest, apply liquid fertilizer and water well.
Spinach starts producing again within 5–7 days.

With proper care, you can enjoy spinach for 2–3 months from one sowing.


11. Growing Spinach in Small Spaces

Spinach is fantastic for compact gardening!

Perfect for:

  • Balcony gardens
  • Kitchen windows
  • Small patios
  • Indoor sunny areas
  • Terraces

You can grow spinach in:

  • Trays
  • Plastic boxes
  • Hanging planters
  • Vertical planters

Even a 1-foot pot can supply a small family with weekly greens.


12. Bonus Tips for Growing Lush Spinach

  • Avoid overwatering—leads to fungal issues
  • Protect from hot summer afternoon sun
  • Add compost monthly for rich leafy growth
  • Mulch the soil to keep moisture intact
  • Sow seeds every 25–30 days for continuous harvest
  • Don’t let the plant bolt (produce flowers)
    • Move to shade
    • Water regularly
    • Keep soil cool

Final Thoughts

Growing spinach at home is incredibly rewarding, simple, and perfect for beginners. With minimal effort, you can enjoy fresh, pesticide-free, and nutrient-rich spinach straight from your balcony or garden.

Whether you want to make palak paneer, smoothies, salads, parathas, or soups—your homegrown supply will always be fresh, safe, and full of flavor.

Grow Croton From Cuttings Fast & Easy: Complete Step-by-Step Guide for Beginners

Grow Croton From Cuttings Fast & Easy: Complete Step-by-Step Guide for Beginners

Crotons are famous for their vibrant, multicolored leaves that can instantly brighten any garden or indoor space. Their dramatic foliage, painted in red, yellow, orange, green, and sometimes even purple, makes them one of the most eye-catching ornamental plants. The best part? You can easily grow crotons at home from cuttings—and it’s surprisingly quick and simple.

Whether you are a gardening beginner or someone who loves multiplying plants, this full-step guide will help you propagate crotons effectively, boosting your plant collection without spending extra money. With the right method, a little patience, and care, your cuttings will root within a few weeks and grow into healthy, vibrant plants.

Let’s dive into the complete 1200-word guide on how to grow croton plants from cuttings—FAST & EASY!


Why Grow Crotons From Cuttings?

Crotons can be grown from seeds, but the process is slow and unpredictable. Growing from cuttings is much better because:

  • It’s fast (roots in 2–4 weeks).
  • The new plant becomes identical to the parent plant (same leaf pattern and colors).
  • You save money by multiplying your existing plant.
  • It’s easy and requires minimal tools.

Propagating crotons from cuttings is a fun and rewarding gardening activity that guarantees results if done the right way.


1. Selecting the Perfect Croton Cutting

Success begins with choosing the right stem for propagation.

Best Type of Cutting:

  • Semi-hardwood stem (not too soft, not too old)
  • 4–6 inches long
  • Has at least 3–4 leaves
  • Healthy, disease-free, vibrant colors

Avoid completely green, soft stems—they rot easily.
Also avoid very old, woody stems—they root slowly.

How to Prepare the Cutting:

  1. Cut the stem using a clean, sharp scissor or pruning shear.
  2. Cut just below a node (where a leaf joins the stem).
  3. Remove the lower leaves, keeping 2–3 leaves at the top.
  4. If the leaves are too large, cut them in half to reduce water loss.

This simple preparation increases the rooting success rate significantly.


2. Use Rooting Hormone for Faster Root Growth (Optional but Helpful)

Rooting hormone is not mandatory, but it speeds up the propagation process.

Dip the bottom of the cutting in:

  • Rooting powder
    or
  • Aloe vera gel (natural rooting agent)

This prevents fungal infections and triggers faster root formation.


3. Best Growing Medium for Croton Cuttings

Croton cuttings root best in a light, airy, and sterile medium. Avoid heavy garden soil because it retains too much moisture and can lead to rotting.

Recommended Soil Mix:

  • 40% Cocopeat
  • 30% Perlite or Sand
  • 20% Compost
  • 10% Garden Soil

This mix ensures:

  • Proper drainage
  • Good air circulation
  • Fast root development

If you prefer the water propagation method, you can also root crotons in a jar of clean water (details below).


4. Two Proven Methods to Propagate Croton Cuttings

You can root crotons in soil or water. Both methods work, but each has its advantages.


Method 1: Soil Propagation (Most Effective)

Steps:

  1. Fill a pot with the prepared soil mix.
  2. Make a small hole using a pencil.
  3. Insert the cutting 1–2 inches deep.
  4. Firm the soil gently around it.
  5. Water lightly.
  6. Cover the pot with a transparent plastic bag to create humidity.

This mini greenhouse environment increases success by keeping moisture locked in.

Ideal Conditions:

  • Warm temperature (20–30°C)
  • Indirect bright light
  • High humidity

Roots develop in about 3–4 weeks.


Method 2: Water Propagation (Easy & Fun)

Steps:

  1. Fill a glass jar with clean, room-temperature water.
  2. Insert the cutting so only the stem touches the water.
  3. Keep it in bright, indirect sunlight.
  4. Change the water every 3–4 days.

Roots appear within 2–3 weeks.

After roots grow 2–3 inches long, transfer the cutting to soil carefully.


5. Watering Croton Cuttings Properly

Cuttings do not have roots, so they lose moisture quickly. Watering correctly is important.

Watering Tips:

  • Keep the soil slightly moist—not soggy.
  • Water only when the top layer feels dry.
  • Never let water accumulate in the pot tray.
  • High humidity helps in faster rooting.

Overwatering is the number one cause of cutting failure, so avoid heavy watering.


6. Light Requirements for Croton Cuttings

Crotons love bright light, but direct sun can burn new cuttings.

Best Light Conditions:

  • Bright indirect sunlight
  • Avoid harsh afternoon sun
  • Morning sunlight is good
  • Never keep freshly planted cuttings in full sun

Once fully rooted, the plant can handle brighter light and its leaf colors will become richer.


7. Temperature & Humidity Needs

Crotons thrive best in warm conditions.

Ideal Temperature:

  • 20–32°C

They cannot tolerate cold climates or chilly winds. Keep them away from AC vents, cold windows, and winter drafts.

Humidity:

  • Grow well in 60–80% humidity
  • Mist lightly once a day
  • You can also place a bowl of water nearby to increase moisture

Higher humidity = faster rooting.


8. Caring for Rooted Cuttings

Once your cutting develops strong roots (after 3–4 weeks), it needs proper care to grow into a full plant.

Repotting Guide:

  1. Take a 6–8 inch pot.
  2. Fill it with a rich croton soil mix.
  3. Plant the rooted cutting carefully.
  4. Water thoroughly once.
  5. Keep in partial shade for 10–12 days.

After establishment, slowly introduce it to brighter light.


9. Fertilizing Newly Rooted Crotons

Do NOT fertilize freshly planted cuttings.

Wait for 4–6 weeks, then begin:

Best Fertilizers:

  • Liquid seaweed
  • Cow dung compost
  • Vermicompost tea
  • Mustard cake liquid (diluted)

Apply once a month for best results.
Avoid chemical fertilizers initially.


10. Common Problems & Solutions

1. Cutting Turning Black

Cause: Too much water, fungus
Fix: Improve drainage, reduce watering, use fungicide

2. Leaves Wilting

Cause: Low humidity
Fix: Mist daily, keep under plastic cover

3. Cutting Rotting in Water

Cause: Stale water
Fix: Change water frequently

4. No Roots After 4 Weeks

Cause: Cutting too old or too soft
Fix: Try fresh semi-hardwood stems


11. Tips to Grow Healthy, Colorful Crotons

  • Keep the plant in bright sunlight (after rooting).
  • Water only when needed.
  • Maintain warm temperature.
  • Provide good humidity.
  • Fertilize monthly.
  • Remove dead or damaged leaves.

Crotons reward you with vibrant, glossy leaves when cared for well.


12. Conclusion: Grow Unlimited Crotons Easily at Home

Growing croton plants from cuttings is one of the easiest and most satisfying ways to expand your garden. With just a few simple steps—selecting the right cutting, using proper soil, maintaining humidity, and giving enough light—you can grow healthy crotons in just a few weeks.

Whether you choose soil propagation or water propagation, success is almost guaranteed if you follow the right method. Soon, your cuttings will turn into beautiful, colorful plants that enhance the beauty of your home, balcony, or garden.

Grow Camellias Like a Pro: Complete Guide to Planting, Caring & Blooming This Stunning Flower

Grow Camellias Like a Pro: Complete Guide to Planting, Caring & Blooming This Stunning Flower

Camellias are among the most elegant flowering shrubs, admired for their glossy evergreen leaves and breathtaking blooms that come in shades of pink, red, white, and even bi-color. Often called the ‘Roses of Winter’, these plants brighten gardens when most other flowers are resting. Whether you’re a beginner gardener or an experienced plant lover, growing camellias is a deeply rewarding experience—if you understand their needs.

In this detailed, 1200-word care guide, you will learn how to grow camellia plants, best soil mix, watering habits, sunlight needs, common problems, and expert tips to boost flowering.


Introduction: Why Camellias Are Garden Favorites

Camellias are native to East and South Asia and belong to the Theaceae family. They are known for:

  • Long-lasting blooms
  • Stunning evergreen leaves
  • Being excellent hedge or ornamental plants
  • Thriving in cooler climates
  • Blooming during late winter and early spring (depending on variety)

With proper care, a camellia plant can live for decades and become the centerpiece of your garden.


1. Choosing the Right Camellia Variety

There are more than 250 species and thousands of hybrids, but the two most popular types are:

Camellia japonica

  • Larger blooms
  • Blooms in late winter to early spring
  • Prefers semi-shade
  • Best for cooler regions

Camellia sasanqua

  • Slightly smaller flowers
  • Blooms from autumn to early winter
  • Tolerates more sun
  • More drought-tolerant

If you live in a warmer climate, choose sasanqua.
If you live in a cooler region, go with japonica.


2. Best Soil for Camellia Growth

Camellias Love acidic soil.
Their ideal soil pH: 5.5 – 6.5

Perfect Soil Mix (Pot or Garden)

You can create an ideal soil mix with:

  • 40% Garden Soil
  • 30% Cocopeat
  • 20% Compost/Vermicompost
  • 10% Sand or Perlite

Mix well so the soil becomes loose, airy, and well-draining.

Camellias hate waterlogged or clay-heavy soil, which causes root rot.


3. Sunlight Requirements

Camellias need bright indirect light or partial shade.

Best Light Conditions:

  • Morning sunlight
  • Afternoon shade
  • Filtered sunlight under trees
  • Avoid harsh midday heat

Direct strong sunlight can burn leaves and buds.
Too much shade reduces flowering.


4. Watering Schedule for Camellias

Camellias prefer consistent moisture, but never soggy soil.

Watering Rules:

  • Water when the top 1–2 inches of soil feels dry.
  • Deep watering once or twice a week is ideal.
  • During summers, increase frequency.
  • During winters, reduce watering.
  • Avoid watering on the flowers (prevents spots and fungal issues).

Mulching with pine bark or dry leaves helps retain moisture and maintain soil acidity.


5. Fertilizing Camellias for Heavy Flowering

Camellias grow slowly, but they appreciate good nutrients.

Best Fertilizers:

Use any fertilizer labeled for acid-loving plants, such as:

  • Azalea fertilizer
  • Rhododendron fertilizer

Or use organic options:

  • Cow dung compost
  • Seaweed extract
  • Mustard cake liquid
  • Bone meal (during flowering season)

When to Fertilize:

  • Early Spring – for healthy growth
  • Mid-Summer – helps in forming flower buds
  • Avoid fertilizing during winter blooming season

Over-fertilizing may burn the roots, so apply lightly.


6. How to Plant Camellia (Pot or Ground)

Planting in Pots

Choose:

  • Minimum 14–16 inch pot for young plant
  • For mature plants, use 18–20 inch deep pot

Steps:

  1. Fill pot with acidic soil mix.
  2. Place the plant at the same depth as it was in the nursery pot.
  3. Do NOT bury the stem too deep.
  4. Water thoroughly.
  5. Keep in semi-shade for 2–3 weeks.

Planting in the Ground

  • Dig a hole twice as wide as the root ball.
  • Place plant slightly above soil level.
  • Backfill with acidic soil mix.
  • Mulch well to protect roots.

7. Pruning Camellias the Right Way

Camellias do not need much pruning, but light trimming improves shape and flowering.

Best Time to Prune:

Immediately after flowering season ends.

What to Prune:

  • Dead branches
  • Weak, thin shoots
  • Crossing branches
  • Excess branches to improve air circulation

Never prune in late summer or fall — it removes flower buds for next season.


8. Common Problems & Solutions

Camellias are generally hardy, but they may face a few issues:

Yellow Leaves

Cause:

  • High soil pH
  • Overwatering

Fix:

  • Add sulfur or acidic fertilizer
  • Improve drainage

Bud Drop

Cause:

  • Underwatering
  • Sudden temperature change
  • Too much sun

Fix:

  • Maintain consistent moisture
  • Give partial shade

Pests

Aphids, mites, scales can appear.

Fix:

  • Neem oil spray once a week
  • Soap water spray for severe infestation

9. How to Encourage Heavy Blooming

Here are expert tips to help your camellia bloom abundantly:

Use acidic soil mix
Provide morning sun + afternoon shade
Water regularly but avoid overwatering
Fertilize lightly during summer
Protect buds from strong heat
Prune immediately after flowering

Camellias take time to establish, but once settled, they bloom heavily every year.


10. Winter Care for Camellias

Camellias bloom in cold weather but still need protection.

Tips:

  • Mulch heavily around plant base
  • Avoid freezing winds
  • Move potted plants under shade or greenhouse
  • Water sparingly in winter

Do NOT keep camellias near heaters or warm walls.


11. Can Camellias Be Grown Indoors?

Yes — but only if you can provide:

  • Cool temperature
  • Bright indirect light
  • Good humidity
  • Slightly acidic soil

Indoor camellias need more care than outdoor ones.


12. Conclusion: A Timeless Beauty for Every Garden

Camellias are not just plants—they’re living artwork. Their glossy leaves, vibrant winter blooms, and long lifespan make them a treasure in any home garden. With the right care—acidic soil, partial shade, consistent watering, and seasonal trimming—your camellia will reward you with spectacular flowers year after year.

Whether you grow it in a pot, garden bed, or as a hedge, a camellia plant adds unbeatable charm and elegance to your home.

Grow Hibiscus Like a Pro: Complete Guide to Lush Blooms & Healthy Plants (Full Tips Inside)

Grow Hibiscus Like a Pro: Complete Guide to Lush Blooms & Healthy Plants (Full Tips Inside)

The hibiscus plant—known for its large, vibrant, eye-catching blooms—has become a favorite among home gardeners. Whether you grow it in pots, containers, or directly in the ground, hibiscus rewards you with stunning flowers almost year-round in warm climates. With the right care and techniques, anyone can grow hibiscus successfully—even beginners.

This complete guide will walk you through everything you need to know: soil, watering, sunlight, feeding, pruning, propagation, pest control, and pro tips for maximum blooms.


Introduction: Why Hibiscus is a Must-Have Plant

Hibiscus (Hibiscus rosa-sinensis) is admired for its tropical charm and comes in countless colors—red, pink, yellow, orange, white, and even multi-shaded varieties. Its large flowers can bloom daily, making it one of the most rewarding flowering plants for home gardens.

It grows beautifully in:

  • Terraces
  • Balcony pots
  • Garden beds
  • Large containers
  • Indoor spaces with bright light

But to keep hibiscus blooming regularly, you must understand its specific care needs. Let’s break it down step-by-step.


Step 1: Choosing the Right Hibiscus Plant

When selecting a hibiscus, look for:

  • Healthy green leaves
  • A strong central stem
  • No signs of pests (whiteflies, aphids)
  • Multiple branches
  • Compact, bushy growth

Choose varieties according to your climate:

  • Tropical hibiscus for warm climates
  • Hardy hibiscus for colder climates

Step 2: Best Pot & Soil Mix for Hibiscus

Pot Size

Hibiscus loves space. For best results:

  • Use a 12–16 inch pot for young plants
  • Upgrade to 18–20 inches as the plant grows
  • Ensure drainage holes at the bottom

A bigger pot = more roots = more blooms.


Best Soil Mix

Hibiscus needs light, airy, and nutrient-rich soil.

Perfect Soil Mix:

  • 40% garden soil
  • 30% compost/vermicompost
  • 20% cocopeat
  • 10% sand/perlite

Add 1 handful neem cake powder to prevent root fungus.

Why this works:
Hibiscus hates waterlogging. This mix ensures drainage + nutrients for continuous growth.


Step 3: Sunlight Requirement

Hibiscus is a sun-loving plant.

  • Needs 4–6 hours of direct sunlight daily
  • Morning sunlight is best

If grown in low light, you’ll notice:

  • No blooms
  • Yellowing leaves
  • Weak stems

Tip: Keep the pot where it receives bright sun but avoid harsh afternoon summer heat in extremely hot regions.


Step 4: Watering the Hibiscus Plant

Hibiscus is moisture-loving but sensitive to overwatering.

Watering Rules:

  • Water when the top soil feels slightly dry
  • In summer: water daily or every alternate day
  • In winter: water every 3–4 days
  • Never let the pot stand in water

Signs of underwatering:

  • Droopy leaves
  • Dry soil

Signs of overwatering:

  • Yellow leaves
  • Mushy soil
  • Root rot

Use a deep watering method—water until it drains out from the bottom.


Step 5: Fertilizing Hibiscus for Heavy Blooming

Hibiscus is a heavy feeder. To bloom continuously, it needs regular nutrition.

Best Fertilizers:

  • Compost or vermicompost – once every 15 days
  • Liquid seaweed fertilizer – weekly
  • Banana peel fertilizer – boosts bud formation
  • NPK 19:19:19 or DAP – once a month (in small quantity)
  • Epsom salt (magnesium) – once monthly for greener leaves

Important Tip:

After applying solid fertilizers, water the plant gently to activate nutrients.


Step 6: Pruning for Bushy Growth & More Flowers

Pruning is essential for hibiscus.

Why prune?

  • Encourages new branches
  • Increases flowering
  • Controls the height
  • Removes weak or dead parts

When to prune?

  • Major pruning: End of winter / early spring
  • Light pruning: Anytime during the growing season

How to prune?

  • Cut 1–2 inches above the nodes
  • Remove leggy and weak stems
  • Don’t prune during extreme winter or heavy flowering

New growth appears within weeks, followed by lots of flower buds.


Step 7: Propagating Hibiscus from Cuttings

Hibiscus propagation is easy and fun.

Steps:

  1. Choose a healthy semi-hardwood branch
  2. Cut 6–8 inch long cuttings
  3. Remove lower leaves
  4. Dip in rooting hormone (optional)
  5. Plant in cocopeat/soil mix
  6. Keep in partial shade
  7. Keep soil slightly moist

Roots appear in 15–25 days.
Shift to a bigger pot after 45–60 days.


Step 8: Pest & Disease Control

Hibiscus may face pests like:

  • Aphids
  • Whiteflies
  • Spider mites
  • Mealybugs

Organic Treatment:

  • Neem oil spray (5 ml in 1 litre water) + 2 drops liquid soap
  • Spray every 7 days
  • Don’t spray in direct sunlight

Fungal Issues:

  • Yellow leaves
  • White powder-like layer
  • Black spots

Treat with:

  • Copper fungicide (monthly)
  • Good drainage

Step 9: Seasonal Care Tips

Summer Care:

  • Water more frequently
  • Give morning sunlight
  • Mulch soil to retain moisture

Rainy Season Care:

  • Avoid overwatering
  • Check for fungus
  • Improve drainage

Winter Care:

  • Reduce watering
  • Protect from frost
  • Move pots indoors if temperature drops below 10°C

Expert Tips to Boost Hibiscus Flowering

Add banana peel fertilizer twice a month
Use seaweed extract for faster growth
Keep the plant in full sun
Prune regularly to make the plant bushy
Remove spent flowers to prevent disease
Avoid shifting the pot too frequently
Maintain slightly acidic soil (pH 6–6.5)


Conclusion: Grow the Most Beautiful Hibiscus at Home

Growing hibiscus is easy once you understand its needs—sunlight, regular watering, nutrient-rich soil, and proper pruning. With these full tips, your hibiscus will reward you with big, colorful blooms throughout the year.

Whether you want to grow hibiscus on your terrace, balcony, or garden, just follow the steps above and watch your plant transform into a full, flower-loaded beauty.

If you want more articles like this, just send the next title!