Which Country Is the Largest Indian Almond Producer in the World?

Which Country Is the Largest Indian Almond Producer in the World?

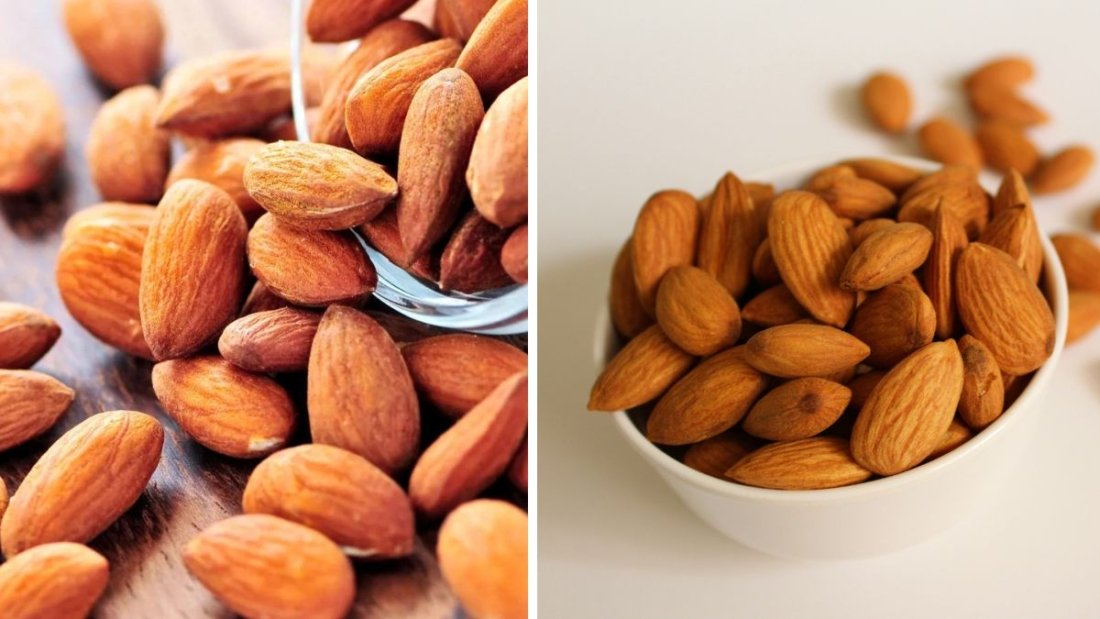
Indian almond, commonly known as Chironji or Charoli, is a treasured dry fruit used in Indian sweets, curries, and festive dishes. Though often confused with regular almonds, Indian almond is a completely different nut with a rich flavor and high nutritional value.

If you’ve ever wondered which country leads the world in Indian almond production, the answer may surprise you. Let’s explore the origins, production, cultivation, health benefits, and why this crop is gaining global importance.


What Is Indian Almond (Chironji)?

Indian almond, scientifically known as Buchanania lanzan, is a tropical tree species native to the Indian subcontinent. The edible seeds inside its fruit are called chironji and are widely used in Indian cooking.

Key Characteristics:

  • Small, oval-shaped seeds
  • Creamy texture and nutty flavor
  • Rich in protein, healthy fats, and minerals
  • Commonly used in sweets like kheer, halwa, and barfi

Unlike regular almonds grown in temperate regions, Indian almonds thrive in hot, dry tropical climates.


Which Country Is the Largest Indian Almond Producer in the World?

India is the largest producer of Indian almonds (Chironji) in the world.

India dominates global production due to its favorable climate, vast forest cover, and long tradition of cultivating and harvesting this valuable nut.

Indian almonds are mostly grown in wild forest regions and through agroforestry systems, making India not only the largest producer but also the most experienced cultivator of this unique crop.


Major Indian Almond Growing Regions in India

Indian almond trees grow naturally in tropical forests and semi-arid regions. The largest production comes from central and eastern India.

Leading States for Chironji Production:

  • Chhattisgarh – The largest producer
  • Madhya Pradesh
  • Odisha
  • Jharkhand
  • Maharashtra
  • Andhra Pradesh
  • Telangana

These regions provide the perfect combination of dry soil, high temperature, and moderate rainfall.


Why India Leads Global Indian Almond Production

India’s dominance is no coincidence. Several natural and cultural factors contribute to its leadership:

1. Native Tree Species

Chironji trees are indigenous to Indian forests, making India their natural home.

2. Ideal Climate

The tree thrives in:

  • Hot summers
  • Moderate rainfall
  • Well-drained soil

3. Traditional Knowledge

Local tribal communities have harvested and processed chironji for generations.

4. High Domestic Demand

Indian sweets and festive foods use chironji extensively, driving large-scale harvesting.

5. Forest-Based Production

Unlike plantation crops, chironji grows naturally in forest ecosystems.


How Indian Almond Is Cultivated

Indian almond trees take several years to mature, but once established, they can produce fruit for decades.

Growing Conditions:

  • Temperature: 25°C – 40°C
  • Rainfall: 600–1200 mm annually
  • Soil: Sandy-loam or rocky soil
  • Sunlight: Full sun

Tree Growth:

  • Takes 8–10 years to start fruiting
  • Fully productive after 15 years
  • Lives for over 50 years

Harvesting usually happens between April and June.


Nutritional Value of Indian Almond

Indian almonds are not just delicious — they are a nutritional powerhouse.

Nutrients Per 100g:

  • Protein: 18–20%
  • Healthy fats: 59%
  • Fiber: 3–5%
  • Iron, calcium, magnesium
  • Vitamin B-complex

Health Benefits:

Boosts immunity
Strengthens bones
Improves brain function
Supports heart health
Enhances skin glow
Aids digestion

In Ayurveda, chironji is used to improve vitality and energy.


Popular Uses of Indian Almond

Chironji is widely used in Indian cuisine and traditional medicine.

Culinary Uses:

  • Kheer
  • Halwa
  • Barfi
  • Pulao
  • Rich gravies
  • Festive desserts

Medicinal Uses:

  • Boosts strength and stamina
  • Improves fertility
  • Supports digestion
  • Enhances skin health

Cosmetic Uses:

  • Face packs
  • Hair oils
  • Natural moisturizers

Export Potential of Indian Almond

India exports chironji mainly to:

  • UAE
  • Saudi Arabia
  • UK
  • USA
  • Canada
  • Australia

With increasing demand for healthy plant-based foods, Indian almond is gaining popularity worldwide.

Why Global Demand Is Rising:

  • Rich nutritional profile
  • Exotic flavor
  • Vegan protein source
  • Gluten-free nut
  • Traditional superfood

Economic Importance for Rural India

Indian almond is a major livelihood source for forest-dependent communities.

Benefits for Farmers & Tribals:

  • High market value
  • Low cultivation cost
  • Grows in wastelands
  • Long-term income source
  • Eco-friendly forestry crop

One mature tree can yield 20–30 kg of seeds annually, making it highly profitable.


Sustainable & Eco-Friendly Crop

Indian almond trees help preserve forests and biodiversity.

Environmental Benefits:

  • Prevents soil erosion
  • Improves forest cover
  • Supports wildlife
  • Requires minimal irrigation
  • No chemical fertilizers needed

This makes chironji an ideal crop for sustainable agriculture.


Comparison with Other Countries

Although India is the global leader, a few other countries also grow Indian almond on a small scale.

Other Producing Countries:

  • Bangladesh
  • Sri Lanka
  • Nepal
  • Myanmar
  • Thailand

However, none come close to India’s production volume, forest coverage, or processing capacity.


Future of Indian Almond Production

With rising health awareness and demand for traditional superfoods, the future of Indian almond looks very promising.

Growth Drivers:

  • Increasing export demand
  • Government agroforestry schemes
  • Rising vegan population
  • Ayurvedic product demand
  • Eco-friendly farming trends

India is investing in improved cultivation techniques and commercial plantations to meet growing global demand.


Interesting Facts About Indian Almond

  • Chironji is sometimes called the “Golden Nut of India”
  • Used in royal Mughal cuisine
  • Mentioned in ancient Ayurvedic texts
  • Considered a luxury dry fruit
  • Often used as a saffron substitute in desserts

Final Answer: The World’s Largest Indian Almond Producer

India is the largest Indian almond producer in the world.

Thanks to its native forests, ideal climate, traditional knowledge, and massive domestic consumption, India remains unmatched in chironji production.

As the world embraces healthier and more sustainable food choices, Indian almond is gaining the global spotlight — and India proudly stands at the center of this growing industry.

Which Country Is the Largest Apple Guava Producer in the World?

Which Country Is the Largest Apple Guava Producer in the World?

Apple guava, also known as common guava, is one of the most popular tropical fruits in the world. Loved for its crisp texture, sweet aroma, and rich nutritional value, apple guava is enjoyed fresh, juiced, or processed into jams, candies, and desserts. With rising demand for healthy fruits, apple guava has become an important commercial crop across tropical and subtropical regions.

But which country leads the world in apple guava production?

In this detailed guide, we explore the largest apple guava–producing country, the reasons behind its dominance, major growing regions, popular varieties, economic importance, and fascinating facts about this superfruit.


What Is Apple Guava?

Apple guava (scientific name: Psidium guajava) is a tropical fruit known for its:

  • Crisp, apple-like bite
  • Sweet and mildly tangy flavor
  • Strong tropical fragrance
  • Green or yellow skin
  • White, pink, or red flesh

It is often called the “Apple of the Tropics” because of its crunchy texture and refreshing taste.


Nutritional Value of Apple Guava

Apple guava is considered one of the healthiest fruits in the world.

Health Benefits

  • Extremely rich in Vitamin C (4–5 times more than oranges)
  • High in dietary fiber for digestion
  • Contains powerful antioxidants
  • Supports heart health
  • Boosts immunity
  • Helps control blood sugar
  • Low in calories

Because of its impressive nutrition profile, apple guava is widely recommended in health and fitness diets.


Global Popularity of Apple Guava

Apple guava is grown across:

  • Asia
  • Africa
  • South America
  • Central America
  • The Caribbean

It thrives in warm climates and is consumed fresh, blended into smoothies, cooked into jams, or processed into juices and candies.

Due to its affordability, nutrition, and delicious taste, apple guava has become a daily fruit in many countries.


Which Country Is the Largest Apple Guava Producer in the World?

India — The World’s Largest Apple Guava Producer

India is the largest producer of apple guava in the world, accounting for nearly 45% of global guava production.

  • Annual production: Over 4 million tonnes
  • Major growing states:
    • Uttar Pradesh
    • Maharashtra
    • Bihar
    • West Bengal
    • Gujarat
    • Punjab
    • Madhya Pradesh
  • Cultivation type: Traditional orchards and modern high-density plantations

India’s tropical climate, fertile soil, and massive domestic demand have made it the undisputed global leader in apple guava production.


Why India Dominates Apple Guava Production

Several natural and economic factors make India the top producer:


1. Ideal Climate

Apple guava grows best in:

  • Tropical and subtropical climates
  • Temperatures between 23°C and 30°C
  • Moderate rainfall
  • Plenty of sunshine

India offers ideal conditions across multiple regions, allowing year-round cultivation in many states.


2. Fertile Soil

Guava grows well in:

  • Sandy loam soil
  • Well-drained fertile land
  • Slightly acidic to neutral soil

India’s diverse soil types allow guava to thrive across vast agricultural regions.


3. Large Cultivation Area

India has millions of hectares under guava orchards. Both small farmers and commercial growers cultivate guava, ensuring massive production volumes.


4. High Domestic Demand

Guava is one of the most affordable and widely eaten fruits in India. It is:

  • Sold fresh in local markets
  • Used in juices and shakes
  • Made into candies and jams
  • Used in Ayurvedic medicine

This strong domestic market keeps production growing every year.


5. Government Support

India supports fruit farming through:

  • Subsidies for saplings and drip irrigation
  • Farmer training programs
  • Research on high-yield varieties
  • Export promotion schemes

These initiatives help farmers increase both quality and yield.


Popular Apple Guava Varieties Grown in India

India grows several high-quality apple guava varieties:

1. Allahabad Safeda

  • Most famous variety
  • White flesh, soft seeds
  • Very sweet and aromatic

2. Sardar (Lucknow-49)

  • Large fruits
  • Thick flesh
  • Good for transport and export

3. Lalit

  • Pink flesh
  • High juice content
  • Ideal for processing

4. Shweta

  • White flesh
  • Good shelf life

5. Red-Fleshed Guava

  • Rich in antioxidants
  • Increasingly popular for juice industry

Other Major Apple Guava Producing Countries

Although India leads globally, several other countries produce apple guava commercially:

China

  • Production: 1.5 million tonnes
  • Major regions: Guangdong, Guangxi
  • Focus: Domestic consumption

Thailand

  • Production: 700,000+ tonnes
  • Major exporter of pink guava

Pakistan

  • Production: 500,000+ tonnes
  • Grown mainly in Punjab and Sindh

Philippines

  • Production: 400,000+ tonnes
  • Export-oriented varieties

Mexico

  • Production: 350,000+ tonnes
  • Supplies North American markets

Global Apple Guava Production (Approximate)

CountryAnnual Production
India4,000,000+ tonnes
China1,500,000 tonnes
Thailand700,000 tonnes
Pakistan500,000 tonnes
Philippines400,000 tonnes
Mexico350,000 tonnes
Others1,000,000+ tonnes

India produces more than double the output of the second-largest producer.


Economic Importance of Apple Guava

Apple guava plays a major role in agricultural economies:

1. Farmer Income

Provides stable income for millions of farmers.

2. Employment

Creates jobs in farming, harvesting, packaging, processing, and transport.

3. Export Revenue

India exports guava to:

  • Middle East
  • Europe
  • Southeast Asia

4. Food Security

Affordable fruit for daily nutrition.

5. Processing Industry

Used in:

  • Juices
  • Jams
  • Jellies
  • Candies
  • Ice creams
  • Beverages

Cultural Importance of Guava

In many countries, guava is part of traditional food culture:

  • In India, guava is eaten with salt and chilli
  • Used in Ayurvedic medicine
  • Offered in religious ceremonies
  • Popular street food fruit

Guava is not just food — it’s part of everyday life.


Fun Facts About Apple Guava

  • Guava has four times more Vitamin C than oranges
  • India produces nearly half of the world’s guava
  • Guava trees start fruiting in just 2–3 years
  • Guava is one of the easiest fruit trees to grow
  • Guava leaves are used in herbal medicine
  • Guava can be eaten raw, cooked, or processed

Final Answer

India is the largest apple guava producer in the world, producing over 4 million tonnes annually and contributing nearly 45% of global production.

Its ideal climate, fertile soil, large cultivation area, rich varieties, and strong domestic market make India the undisputed leader in apple guava production.

Effective Home Remedies to Control Aphids and Ants on Your Plants Naturally

Effective Home Remedies to Control Aphids and Ants on Your Plants Naturally

Every gardener knows that healthy, vibrant plants can be threatened by common pests such as aphids and ants. Aphids are small, sap-sucking insects that weaken plants, distort growth, and transmit diseases. Ants, while often seen as harmless, can exacerbate aphid problems because they protect aphids in exchange for honeydew, the sweet substance aphids secrete. Chemical pesticides may be effective, but they can harm beneficial insects and the environment. Fortunately, there are simple, natural home remedies to control aphids and ants on your plants while keeping your garden safe and thriving.

Understanding the Problem: Aphids and Ants

Aphids are tiny insects that cluster on new growth, leaves, and buds. They feed by sucking plant sap, leading to yellowing leaves, stunted growth, curled foliage, and sticky honeydew. Over time, heavy infestations can weaken plants and reduce flowering or fruiting.

Ants are attracted to the honeydew secreted by aphids. By protecting aphids from predators, ants indirectly increase aphid populations. Certain ants also build nests near the base of plants, disrupting roots and soil structure. Addressing both pests together is key to effective control.

Why Home Remedies Are Effective

Home remedies for aphids and ants are safe, eco-friendly, and cost-effective. They often rely on ingredients commonly found in households, such as soap, garlic, neem, chili, or vinegar. Unlike chemical pesticides, these remedies target pests without harming beneficial insects like bees, ladybugs, or earthworms.

Home Remedies to Control Aphids

1. Soap and Water Spray

  • Mix 1 teaspoon of mild liquid soap in 1 liter of water.
  • Pour into a spray bottle and thoroughly spray affected leaves, stems, and buds.
  • Repeat every 3–4 days until aphids are gone.
  • How it works: Soap breaks down the protective coating of aphids, causing dehydration and death.

2. Neem Oil Spray

  • Mix 2 tablespoons of neem oil with 1 liter of water and a few drops of liquid soap.
  • Spray on the underside of leaves where aphids usually hide.
  • Use every 7 days for heavy infestations.
  • How it works: Neem oil disrupts aphids’ feeding and reproductive cycles.

3. Garlic and Chili Spray

  • Blend 5 garlic cloves and 2–3 fresh chilies with 1 liter of water.
  • Strain the mixture and spray directly on plants.
  • Repeat weekly as needed.
  • How it works: Garlic and chili act as natural repellents due to their strong odor and compounds that irritate aphids.

4. Alcohol Spray

  • Mix 50 ml of rubbing alcohol in 1 liter of water.
  • Spray directly on aphids, but avoid excessive application on delicate leaves.
  • Caution: Test on one leaf first to ensure it does not damage the plant.

5. Companion Planting

  • Plant herbs like basil, chives, or marigold near vulnerable plants.
  • How it works: These plants emit odors that repel aphids and attract beneficial insects.

Home Remedies to Control Ants

1. Vinegar Solution

  • Mix equal parts water and white vinegar in a spray bottle.
  • Spray directly on ant trails, nests near plants, and the base of affected plants.
  • How it works: Vinegar disrupts ants’ scent trails, confusing them and reducing their activity.

2. Cinnamon or Chili Powder Barrier

  • Sprinkle cinnamon or chili powder around the base of plants or along ant trails.
  • Reapply after rain or watering.
  • How it works: Strong smells act as natural deterrents, preventing ants from reaching plants.

3. Borax and Sugar Trap

  • Mix 1 teaspoon of borax with 2 teaspoons of sugar and place in small containers near ant paths.
  • Ants carry the mixture back to the colony, eventually eliminating it.
  • Caution: Keep away from pets and children.

4. Lemon Juice Spray

  • Mix lemon juice with water and spray on ant trails and plant stems.
  • The acidity destroys scent trails and repels ants.

5. Diatomaceous Earth

  • Sprinkle a thin layer of food-grade diatomaceous earth around the base of plants.
  • How it works: The powder has sharp edges that damage ants’ exoskeletons, leading to dehydration and death.

Integrated Approach for Best Results

For effective control of aphids and ants, it’s best to combine remedies and adopt preventive practices:

  1. Monitor Plants Regularly: Check leaves, stems, and buds weekly for early signs of infestation.
  2. Remove Affected Leaves: For small infestations, handpick and dispose of affected leaves.
  3. Encourage Beneficial Insects: Ladybugs, lacewings, and predatory wasps naturally control aphid populations.
  4. Maintain Cleanliness: Remove fallen leaves, debris, and honeydew to reduce pest attraction.
  5. Prune Properly: Trim dense foliage to improve air circulation and make plants less hospitable to pests.

Preventive Measures to Avoid Infestations

  • Healthy Plants: Strong, well-watered, and properly fertilized plants are less vulnerable to pests.
  • Companion Planting: Herbs like mint, oregano, and marigold deter both aphids and ants.
  • Avoid Excess Nitrogen: Over-fertilization encourages soft, tender growth attractive to aphids.
  • Mulch Management: Avoid mulch contact with plant stems to reduce ant nesting sites.

Benefits of Home Remedies

  • Eco-Friendly: Protects soil, beneficial insects, and pollinators.
  • Cost-Effective: Uses easily available household ingredients.
  • Safe for Families: Non-toxic compared to chemical pesticides.
  • Long-Term Control: Repeated use helps reduce the likelihood of recurring infestations.

When to Seek Additional Help

If home remedies are not sufficient:

  • Severe infestations may require targeted biological control agents, such as ladybugs or parasitic wasps.
  • Persistent ant problems may require professional advice or stronger, safe ant management techniques.

Final Thoughts

Controlling aphids and ants naturally is not only safe for your plants but also for the entire garden ecosystem. By using simple home remedies, maintaining plant health, and monitoring for early signs of pests, you can enjoy vibrant, healthy plants without resorting to harmful chemicals.

From soap sprays to vinegar solutions and diatomaceous earth, these methods provide effective, eco-friendly ways to manage common garden pests. Regular attention, preventive measures, and natural repellents will help keep your garden flourishing while reducing reliance on chemical pesticides.

Take charge of your garden today with these home remedies and watch your plants thrive, free from aphids and ants. Healthy plants, beautiful blooms, and bountiful harvests are within your reach!

Propagating Roses in Mini Greenhouses: Step-by-Step Guide Using Boxes for Perfect Growth

Propagating Roses in Mini Greenhouses: Step-by-Step Guide Using Boxes for Perfect Growth

Roses are universally loved for their beauty, fragrance, and elegance. Whether for gardens, patios, or balconies, growing roses is a rewarding experience. One of the most effective ways to multiply your favorite varieties is by propagation, and mini greenhouses in boxes offer an ideal environment to ensure successful rooting. This method creates controlled humidity, warmth, and protection, giving young rose cuttings the best chance to develop into healthy, strong plants. In this guide, we’ll explore how to propagate roses in mini greenhouses using boxes, step by step.

Why Propagate Roses in Mini Greenhouses?

Using mini greenhouses for rose propagation has multiple advantages:

  1. Controlled Environment: Mini greenhouses maintain humidity, temperature, and light, essential for root development.
  2. Higher Success Rate: Protection from wind, pests, and temperature fluctuations increases the likelihood of successful propagation.
  3. Compact and Practical: Ideal for small spaces, balconies, or urban gardening.
  4. Cost-Effective: Allows gardeners to multiply their favorite rose varieties without purchasing new plants.

Choosing the Right Rose Cuttings

Successful propagation starts with selecting the right material. For mini greenhouse propagation:

  • Healthy Parent Plant: Choose disease-free, vigorous rose bushes. Avoid stressed or weak plants.
  • Semi-Hardwood Cuttings: Cuttings taken from semi-hardwood stems (not too young or too old) root best.
  • Length of Cutting: Select 6–8 inch sections with 3–4 nodes (points where leaves emerge).
  • Leaves: Remove most of the lower leaves, keeping 1–2 at the top to reduce water loss.

Preparing Cuttings for Propagation

Proper preparation increases the chances of rooting:

  1. Cut Cleanly: Use sterilized pruning shears or a sharp knife. Make a diagonal cut just below a node to increase rooting surface.
  2. Optional – Rooting Hormone: Dip the cut end in rooting hormone powder or gel. This accelerates root formation and reduces risk of rotting.
  3. Trim Leaves: Remove any flowers or buds, as they divert energy from root development.

Setting Up a Mini Greenhouse in a Box

A mini greenhouse in a box is an excellent solution for propagating multiple cuttings in a compact space:

  • Choose the Box: Use a shallow plastic or wooden box that can hold soil or a rooting medium.
  • Drainage: Ensure the box has drainage holes to prevent waterlogging.
  • Transparent Cover: Cover the box with a clear lid, plastic wrap, or transparent sheet to maintain humidity.
  • Rooting Medium: Fill the box with a well-draining medium such as a mix of sand, coco peat, or perlite.

Planting the Cuttings

  1. Make Holes: Use a pencil or stick to create holes in the rooting medium.
  2. Insert Cuttings: Place the cut end into the hole, burying at least one node in the medium.
  3. Firm the Soil: Gently press the medium around the cuttings to remove air pockets.
  4. Water Lightly: Mist or lightly water the medium to settle it around the cuttings without overwatering.

Creating the Ideal Environment

Mini greenhouses provide a controlled microclimate essential for rooting:

  • Humidity: Covering the box traps moisture, keeping cuttings hydrated.
  • Temperature: Maintain a warm environment, ideally 20–25°C (68–77°F). Avoid direct harsh sunlight that may overheat the greenhouse.
  • Light: Provide bright, indirect light to encourage photosynthesis without stressing the cuttings.

Caring for Rose Cuttings in Mini Greenhouses

Proper care during the rooting phase is crucial:

  • Moisture: Keep the rooting medium consistently moist but not soggy. Mist cuttings if necessary.
  • Air Circulation: Occasionally lift the cover to allow fresh air and prevent mold.
  • Observation: Check daily for signs of rotting, fungal infections, or mold. Remove affected cuttings promptly.
  • Patience: Rose cuttings typically develop roots in 4–6 weeks, depending on the variety and environmental conditions.

Transplanting Rooted Rose Cuttings

Once cuttings have developed a healthy root system, it’s time to transplant:

  1. Prepare Pots: Use small pots with well-draining soil enriched with compost or organic matter.
  2. Careful Removal: Gently remove cuttings from the rooting medium to avoid damaging delicate roots.
  3. Planting: Plant cuttings at the same depth they were in the mini greenhouse. Firm the soil around them.
  4. Watering: Water lightly and place pots in a shaded, sheltered area for a few days to reduce transplant shock.
  5. Acclimatization: Gradually expose the young plants to more sunlight over 1–2 weeks before planting in the garden or larger containers.

Tips for Successful Rose Propagation

  • Use Healthy Plants: Always choose disease-free, vigorous roses.
  • Rooting Hormone: Significantly improves the success rate of cuttings.
  • Humidity Maintenance: Consistent humidity is critical; dry air can cause cuttings to wilt.
  • Avoid Overcrowding: Provide space between cuttings to ensure airflow and prevent fungal issues.
  • Regular Monitoring: Check daily for signs of disease or dryness and adjust care accordingly.

Common Problems and Solutions

  • Rotting Cuttings: Caused by overwatering or poor drainage. Use well-draining soil and water carefully.
  • Mold or Fungal Growth: Ensure adequate ventilation and remove affected cuttings promptly.
  • Wilting: May result from insufficient humidity or temperature fluctuations. Mist regularly and maintain warmth.
  • Slow Rooting: Patience is key. Some rose varieties take longer to root; avoid disturbing cuttings unnecessarily.

Advantages of Mini Greenhouse Propagation

  • Higher Success Rate: Controlled environment reduces failure.
  • Space Efficiency: Ideal for indoor gardening or limited outdoor space.
  • Season Flexibility: Can propagate roses year-round under controlled conditions.
  • Cost-Effective: Multiply roses without purchasing expensive nursery plants.

Final Thoughts

Propagating roses in mini greenhouses using boxes is a simple, efficient, and highly effective method for multiplying your favorite varieties. By providing a controlled environment with the right humidity, temperature, and care, you can ensure your rose cuttings develop into strong, healthy plants ready to brighten your garden.

Whether you’re a beginner or an experienced gardener, using mini greenhouses in boxes makes rose propagation more reliable and accessible. With patience, attention to detail, and proper maintenance, you can enjoy a continuous supply of beautiful roses grown from your own garden.

Start propagating your roses today, and experience the joy of nurturing tiny cuttings into flourishing, fragrant plants that will enhance your garden for years to come.

Graft Your Tomatoes Before Planting: Quick and Easy Techniques for Healthier, High-Yield Plants

Graft Your Tomatoes Before Planting: Quick and Easy Techniques for Healthier, High-Yield Plants

Tomatoes are one of the most popular and rewarding crops for home gardeners and commercial growers alike. But did you know that grafting your tomatoes before planting can significantly improve plant vigor, disease resistance, and fruit production? Grafted tomato plants combine the strengths of a robust rootstock with the desirable traits of a high-yielding scion, giving you healthier, more productive plants. In this guide, we’ll explore why grafting tomatoes before planting is beneficial and provide a step-by-step process to do it quickly and easily at home.

Why Graft Tomatoes?

Grafting is the process of joining two different tomato plants so they grow as one. The lower part (rootstock) provides strong roots, while the upper part (scion) produces the fruits. The benefits of grafting tomatoes include:

  1. Disease Resistance: Rootstocks are often resistant to soil-borne diseases like Fusarium wilt, Verticillium wilt, and nematodes.
  2. Improved Growth: Grafted tomatoes develop stronger root systems, which support better nutrient and water uptake.
  3. Higher Yields: Healthier plants produce more flowers and fruits, often earlier in the season.
  4. Stress Tolerance: Grafted plants are more tolerant of drought, heat, and poor soil conditions.
  5. Variety Combinations: You can grow a high-quality fruit variety on a vigorous rootstock for the best of both worlds.

Selecting the Right Rootstock and Scion

The success of grafting depends on the compatibility and quality of your rootstock and scion:

Rootstock:

  • Choose a disease-resistant, vigorous variety suited to your growing conditions.
  • Common rootstocks include ‘Maxifort,’ ‘Beaufort,’ and ‘Multifort.’
  • Ensure the seedling is 3–4 weeks old and healthy.

Scion:

  • Select the tomato variety you want to grow for fruit production.
  • Choose seedlings that are 2–3 weeks old with 2–4 true leaves.
  • Avoid diseased or weak plants.

Tools and Materials Needed

To graft tomatoes quickly and efficiently, gather the following:

  • Sharp, sterilized grafting knife or razor
  • Grafting clips or small rubber bands
  • Rootstock and scion seedlings
  • Humidity dome or clear plastic bag
  • Tray for holding seedlings

Step-by-Step Guide to Grafting Tomatoes

1. Prepare the Rootstock

  • Select a strong, healthy rootstock seedling.
  • Remove the top portion, leaving about 2–3 inches of stem.
  • Make a clean, diagonal cut across the stem to create a flat surface for the graft.

2. Prepare the Scion

  • Select a scion with 2–3 true leaves.
  • Trim the lower stem to match the cut on the rootstock.
  • Make a diagonal cut that complements the rootstock cut to ensure good cambium contact.

3. Join Rootstock and Scion

  • Align the cambium layers (the green tissue just beneath the bark) of both pieces. Proper alignment is crucial for successful grafting.
  • Place the scion onto the rootstock carefully, ensuring full contact along the cut surfaces.

4. Secure the Graft

  • Use a grafting clip or rubber band to hold the scion in place.
  • The clip should be snug but not overly tight to avoid damaging the plant tissue.

5. Maintain Humidity

  • Place the grafted plant in a tray and cover it with a humidity dome or clear plastic bag.
  • High humidity helps prevent the scion from drying out while the graft union heals.
  • Avoid direct sunlight initially; indirect light is ideal.

6. Healing and Acclimation

  • Keep the grafted plant in a warm, shaded environment (24–28°C / 75–82°F).
  • Gradually acclimate the plant to normal light and temperature over 5–7 days.
  • Remove the humidity cover once the scion shows new growth, indicating the graft has taken.

Caring for Grafted Tomatoes

After grafting, proper care ensures the plant develops a strong root system and produces abundant fruits:

  • Watering: Keep the soil consistently moist but not waterlogged. Overwatering can rot the rootstock.
  • Fertilization: Use a balanced, water-soluble fertilizer to support new growth. Switch to phosphorus- and potassium-rich fertilizers when flowering begins.
  • Pruning: Remove side shoots or suckers from the rootstock below the graft to focus energy on the scion.
  • Support: Use stakes or cages to support growth and prevent damage to the grafted union.

Advantages of Grafting Tomatoes Before Planting

  1. Quick Establishment: Grafted plants adapt quickly when transplanted into the garden or containers.
  2. Early Harvest: Grafted tomatoes tend to produce flowers and fruits earlier than seed-grown plants.
  3. Consistent Quality: You can ensure fruit quality and variety by using selected scions.
  4. Reduced Losses: Resistant rootstocks help plants survive in soils with pathogens or stressful conditions.

Common Grafting Techniques for Tomatoes

  • Splice Grafting: A simple diagonal cut on both scion and rootstock, aligned and held with clips. Ideal for small seedlings.
  • Cleft Grafting: Suitable for slightly larger seedlings, involves inserting a wedge-shaped scion into a slit in the rootstock.
  • Side-Veneer Grafting: Used for young seedlings; the scion is inserted into a cut along the side of the rootstock.

Troubleshooting Common Problems

1. Graft Failure: Often caused by poor cambium contact, excessive heat, or insufficient humidity. Ensure proper alignment and care.

2. Scion Wilting: May occur due to water stress or high temperatures. Maintain consistent moisture and shade.

3. Infection: Use sterilized tools and disease-free seedlings to prevent fungal or bacterial infections.

Transplanting Grafted Tomatoes

Once the graft has healed and the scion shows healthy new growth:

  • Timing: Transplant into the garden or larger pots after 2–3 weeks of healing.
  • Soil: Use well-draining, nutrient-rich soil with a pH of 6.0–6.8.
  • Spacing: Plant grafted tomatoes 18–24 inches apart to allow airflow and reduce disease risk.
  • Care: Water regularly and provide support for vines or branches.

Maximizing Yields from Grafted Tomatoes

  • Sunlight: Ensure at least 6–8 hours of direct sunlight daily.
  • Pruning: Remove lower leaves and suckers to focus energy on fruiting branches.
  • Fertilization: Feed regularly with a balanced or fruiting-specific fertilizer.
  • Pest Management: Monitor for common pests like aphids, whiteflies, and tomato hornworms. Organic solutions like neem oil or insecticidal soap can help.

Final Thoughts

Grafting tomatoes before planting is a quick and effective way to produce healthier, more productive plants. By combining a strong, disease-resistant rootstock with a high-quality scion, gardeners can enjoy earlier harvests, higher yields, and superior fruit quality. Even home gardeners with limited experience can successfully graft tomatoes by following the simple step-by-step method outlined in this guide.

Whether you’re growing tomatoes for fresh salads, cooking, or preserving, grafted plants offer a significant advantage over traditional seed-grown varieties. With proper care, grafted tomatoes thrive in the garden or containers, giving you a season full of delicious, nutrient-rich fruits.

Start grafting your tomatoes before planting, and enjoy stronger plants, abundant harvests, and the satisfaction of mastering a simple yet powerful gardening technique.

Grafting Avocados at Home: Step-by-Step Guide to Growing Healthy, High-Yield Trees

Grafting Avocados at Home: Step-by-Step Guide to Growing Healthy, High-Yield Trees

Avocados are a beloved fruit worldwide, prized for their creamy texture, rich flavor, and numerous health benefits. While you can grow avocados from seeds, grafting is a proven method to produce strong, high-yielding trees that inherit the best qualities of the parent plant. Grafting allows you to combine a healthy rootstock with a desirable scion (fruiting branch) to ensure better growth, disease resistance, and fruit quality. In this guide, we’ll explore how to graft avocados at home with a simple, step-by-step approach suitable for beginners and enthusiasts alike.

Why Graft Avocados?

Grafting offers several advantages over growing avocados from seeds:

  1. Faster Fruit Production: Seed-grown trees can take 7–15 years to bear fruit, while grafted trees often produce fruit within 2–4 years.
  2. Predictable Fruit Quality: Grafted trees inherit the flavor, size, and texture of the scion variety.
  3. Disease Resistance: Choosing healthy rootstock reduces susceptibility to soil-borne diseases.
  4. Dwarfing Options: Certain rootstocks can help control tree size, making them easier to manage in small spaces.

Choosing the Right Rootstock and Scion

Success begins with selecting healthy and compatible plant material:

Rootstock:

  • Choose a vigorous, disease-free seedling or young avocado tree.
  • Common rootstocks include Mexican, Guatemalan, or hybrid varieties suited to your climate.
  • Ensure the rootstock is at least 6–12 months old and strong enough to support grafting.

Scion:

  • Select a branch from a healthy, fruit-producing tree.
  • Look for young, semi-hardwood branches with active growth.
  • Avoid diseased, damaged, or overly woody branches.

Tools and Materials Needed

Before starting the grafting process, gather these essentials:

  • Sharp, clean grafting knife or razor
  • Pruning shears
  • Grafting tape or rubber bands
  • Wax or grafting sealant (optional)
  • Rootstock seedling and scion cuttings
  • Labeling tags for identification

Step-by-Step Guide to Grafting Avocados

1. Prepare the Rootstock

  • Select a healthy rootstock and remove any side shoots near the grafting site.
  • Make a clean cut at the top of the rootstock to create a flat or angled surface for joining with the scion.

2. Prepare the Scion

  • Cut a 4–6 inch section of the scion with at least 2–3 nodes.
  • Make a diagonal or wedge-shaped cut at the base of the scion, ensuring a smooth surface for maximum contact with the rootstock.

3. Join the Scion and Rootstock

  • Fit the scion onto the rootstock carefully so the cambium layers (the green layer beneath the bark) align as closely as possible.
  • Proper cambium contact is crucial for successful grafting and nutrient flow.

4. Secure the Graft

  • Use grafting tape, rubber bands, or strips of parafilm to hold the scion in place.
  • Wrap tightly enough to maintain contact but not so tight that it damages the plant tissue.

5. Seal the Graft (Optional)

  • Apply grafting wax or sealant around the junction to prevent moisture loss and protect against infection.

6. Care for the Grafted Plant

  • Place the grafted tree in a warm, shaded area for 2–4 weeks to encourage healing.
  • Maintain consistent moisture in the soil without overwatering.
  • Avoid direct sunlight on the graft initially to reduce stress on the scion.

Tips for Successful Grafting

  1. Timing: Late spring to early summer is ideal when the plant is actively growing.
  2. Clean Tools: Sterilize knives and shears to prevent bacterial or fungal infection.
  3. Healthy Material: Only use disease-free rootstock and scion to ensure a high success rate.
  4. Proper Alignment: Misalignment of the cambium layers is the most common cause of graft failure.
  5. Protect Young Grafts: Shield newly grafted plants from wind, excessive sun, or pests.

Common Grafting Methods for Avocados

  • Whip-and-Tongue Graft: Ideal for young seedlings, offers strong union and fast healing.
  • Cleft Graft: Suitable for older rootstocks or thicker stems; provides stability for larger scions.
  • Bark Grafting: Used for larger trees during active sap flow; allows multiple scions to be grafted at once.

Caring for the Grafted Tree

Once the graft has taken and the scion shows new growth, ongoing care is essential:

  • Watering: Keep the soil consistently moist, particularly during the first few months. Avoid waterlogging.
  • Fertilization: Apply balanced fertilizers to support growth. After 2–3 months, supplement with phosphorus and potassium for root and fruit development.
  • Pruning: Remove competing shoots from the rootstock to ensure the scion gets maximum energy.
  • Pest Management: Monitor for aphids, mites, or fungal infections. Organic treatments like neem oil can be effective.
  • Sunlight: Gradually acclimate the grafted plant to full sunlight as it strengthens.

Troubleshooting Graft Problems

1. Scion Wilting: Often caused by insufficient water, poor cambium alignment, or heat stress. Ensure proper moisture and shading.

2. Graft Union Failure: Can occur if cambium layers are not aligned or if the tape is too loose/tight. Re-grafting may be necessary.

3. Disease or Rot: Ensure clean tools, healthy material, and good air circulation to prevent fungal infections.

Harvesting Fruit from Grafted Trees

One of the biggest advantages of grafting is faster fruiting:

  • Grafted avocado trees may produce fruit in 2–4 years, compared to 7–15 years from seed-grown trees.
  • Monitor the scion for flowers and fruit set. Proper fertilization, irrigation, and pruning are critical for good yields.
  • Harvest avocados when they reach the desired size and maturity, typically indicated by slight softening or color changes depending on the variety.

Advantages of Home Grafting

  • Cost Savings: Propagate desired varieties without buying expensive nursery trees.
  • Preserve Favorite Varieties: Clone a tree with excellent fruit quality.
  • Experiment and Learn: Grafting allows home gardeners to explore different combinations of rootstocks and scions.

Final Thoughts

Grafting avocados at home is a rewarding technique that allows gardeners to produce healthy, high-yield trees with desirable fruit qualities. While it requires patience, attention to detail, and careful handling, even beginners can achieve success by following the step-by-step process outlined above.

By selecting healthy rootstock and scion, using clean tools, aligning cambium layers carefully, and providing optimal post-grafting care, you can create strong, productive avocado trees in your backyard or home garden. Grafted avocados not only produce fruit faster but also bring the joy of nurturing a tree that reflects the best characteristics of its parent plants.

Whether you’re an avid gardener or a curious home grower, mastering the art of avocado grafting opens the door to delicious, homegrown avocados and the satisfaction of cultivating a thriving fruit tree from your own hands.


Secrets to Growing Luscious Raspberries and Blackberries in Pots: A Complete Guide for Container Gardening

Secrets to Growing Luscious Raspberries and Blackberries in Pots: A Complete Guide for Container Gardening

Raspberries and blackberries are among the most delicious and rewarding fruits to grow at home. Bursting with flavor and packed with vitamins, these berries are a favorite for smoothies, desserts, and healthy snacking. While traditionally grown in gardens or fields, you can successfully cultivate these berries in pots, making them accessible even for those with limited space. With the right techniques, soil, and care, potted raspberries and blackberries can thrive and produce bountiful harvests year after year. This guide reveals the secrets to growing these berries in containers.

Why Grow Berries in Pots?

Growing raspberries and blackberries in pots has several advantages:

  1. Space-Saving: Ideal for balconies, patios, or small urban gardens.
  2. Mobility: Containers can be moved to optimize sunlight exposure or protect plants from harsh weather.
  3. Control Over Soil: You can provide ideal soil conditions, avoiding poor or compacted garden soil.
  4. Reduced Pest Problems: Potted plants are easier to manage for pests and diseases.
  5. Year-Round Enjoyment: Some dwarf or remontant varieties can fruit multiple times in a season.

Choosing the Right Varieties

Not all raspberry and blackberry varieties are suitable for container growth. Look for compact or dwarf varieties that thrive in pots:

  • Raspberries: ‘Heritage,’ ‘Autumn Bliss,’ and ‘Fall Gold’ are excellent choices for pots.
  • Blackberries: ‘Black Satin,’ ‘Apache,’ and thornless varieties are easier to handle in containers.
  • Remontant Varieties: These produce fruit twice a year, making them ideal for container gardening.

Selecting the Right Container

The success of your potted berry plants depends heavily on the container:

  • Size: Choose pots at least 15–20 inches in diameter and depth. Large containers support root growth and provide better yield.
  • Material: Terracotta, ceramic, or heavy-duty plastic containers work well. Terracotta allows good aeration but dries quickly, so monitor watering.
  • Drainage: Ensure the container has adequate drainage holes to prevent waterlogging, which can lead to root rot.

Preparing the Soil

Raspberries and blackberries prefer slightly acidic, well-draining soil with a pH of 5.5–6.5. Proper soil preparation ensures strong roots and healthy growth:

  • Soil Mix: Use a combination of high-quality potting soil, compost, and perlite or sand to improve drainage.
  • Nutrients: Incorporate well-rotted compost or organic matter to provide essential nutrients.
  • Mulching: Apply a layer of mulch (straw, wood chips, or coconut coir) to retain moisture and regulate soil temperature.

Planting Raspberries and Blackberries in Pots

Step-by-Step Planting Guide:

  1. Soak Roots: If using bare-root plants, soak them in water for a few hours before planting.
  2. Planting Depth: Plant so that the crown of the plant (where roots meet stems) is at soil level.
  3. Spacing: If planting multiple plants in a large container, leave at least 12–18 inches between them.
  4. Watering: Water thoroughly after planting to settle the soil around the roots.

Supporting Your Plants

Raspberry and blackberry plants are naturally vining and benefit from support:

  • Trellises or Stakes: Install a small trellis or bamboo stakes in the container. Tie canes loosely with soft ties to avoid damage.
  • Pruning: Regular pruning encourages airflow, prevents overcrowding, and promotes fruiting. Remove weak or dead canes early in the season.

Watering and Fertilization

Container-grown berries require consistent watering and feeding:

  • Watering: Keep soil evenly moist but not waterlogged. Containers dry out faster than garden soil, so daily watering may be needed during hot months.
  • Fertilization:
    • Early Season: Use a balanced fertilizer (10-10-10) to support vegetative growth.
    • Flowering Stage: Switch to a fertilizer higher in phosphorus and potassium (5-10-10) to encourage flowering and fruiting.
    • Organic Options: Compost tea, fish emulsion, or well-rotted manure work well.

Pollination and Flowering

Raspberry and blackberry plants are generally self-pollinating, but bees and other pollinators can improve fruit set. Container plants may benefit from occasional hand pollination:

  • Use a soft paintbrush to transfer pollen between flowers for better yields.
  • Keep pots near flowering plants or herbs to attract pollinators.

Maximizing Fruit Production

To get the best harvest from your potted berry plants, follow these tips:

  1. Sunlight: Place containers in full sun for at least 6–8 hours a day.
  2. Pruning: Remove old canes after harvest to make room for new growth. For summer-bearing varieties, prune after fruiting; for everbearing types, prune lightly in early spring.
  3. Mulching: Mulch helps conserve moisture, suppress weeds, and maintain consistent soil temperature.
  4. Regular Feeding: Fertilize every 4–6 weeks during the growing season for continuous fruiting.
  5. Rotate Watering: Avoid overwatering or letting soil dry completely; aim for consistently moist soil.

Common Problems and How to Solve Them

Pests: Aphids, spider mites, and caterpillars may attack leaves and stems. Use insecticidal soap or neem oil for control.

Diseases: Powdery mildew, root rot, or cane blight can occur if air circulation is poor or watering is excessive. Prevent these issues with proper pruning, drainage, and spacing.

Yellowing Leaves: May indicate nutrient deficiency or water stress. Adjust fertilization and watering as needed.

Poor Fruiting: Often caused by insufficient sunlight, overfertilization with nitrogen, or lack of pruning. Ensure proper care practices.

Overwintering Container Berries

In colder climates, raspberry and blackberry pots may need protection during winter:

  • Insulate Pots: Wrap containers with bubble wrap, burlap, or straw to protect roots from freezing.
  • Move Indoors: If possible, move pots to a garage, greenhouse, or sheltered area.
  • Pruning: Prune dead or weak canes before winter to reduce disease risk.

Harvesting

Harvest berries when they are fully colored, plump, and easily detach from the plant:

  • Raspberries: Pick when they are deep red, purple, or golden, depending on the variety.
  • Blackberries: Fully black and slightly soft to the touch.
  • Frequency: Harvest every few days during peak season to encourage continued production.

Final Thoughts

Growing raspberries and blackberries in pots is not only possible but highly rewarding. With careful selection of varieties, proper containers, well-draining soil, and consistent care, even small-space gardeners can enjoy a bounty of fresh, juicy berries. Regular pruning, fertilization, and attention to watering and sunlight ensure that your container-grown berries remain healthy and productive year after year.

By following these secrets, anyone can transform a balcony, patio, or small garden into a fruitful berry haven. With patience and care, your homegrown raspberries and blackberries will become a highlight of your garden, providing delicious, nutritious, and abundant fruit season after season.

Grow Ginger and Turmeric Together at Home: Easy Tips for a Thriving Spice Box

Grow Ginger and Turmeric Together at Home: Easy Tips for a Thriving Spice Box

Ginger and turmeric are two of the most beloved spices worldwide, known not only for their bold flavors but also for their powerful health benefits. From boosting immunity to improving digestion, these rhizomes have become kitchen essentials. What if you could grow both in the same box right at home? With a little preparation and care, you can enjoy fresh ginger and turmeric all year round, straight from your indoor garden or balcony. This guide will show you step by step how to grow them together in a single container—quick, easy, and rewarding.


Why Grow Ginger and Turmeric Together?

There are several reasons why growing ginger and turmeric in the same box is a smart idea:

  1. Space-Saving: Both plants have similar growing requirements, making it convenient to cultivate them together in a single container.
  2. Fresh and Organic: Growing your own rhizomes ensures they are chemical-free and packed with flavor.
  3. Health Benefits: Fresh ginger and turmeric contain antioxidants, anti-inflammatory compounds, and nutrients that promote overall wellness.
  4. Aesthetic Appeal: Their lush green leaves add a tropical vibe to your balcony or indoor garden.
  5. Cost-Effective: Homegrown rhizomes are cheaper than buying fresh ginger or turmeric frequently from the market.

By growing them together, you save space, effort, and money while enjoying continuous harvests of two superfoods.


Step 1: Choosing Quality Rhizomes

The first step is selecting healthy rhizomes for planting:

  • Ginger: Choose plump, firm rhizomes with visible growth buds (small yellow or green “eyes”). Avoid shriveled or moldy pieces.
  • Turmeric: Look for fresh, firm turmeric rhizomes with vibrant orange skin and small growth buds.

Tip: Organic rhizomes are preferred, as they are less likely to be treated with growth inhibitors.


Step 2: Preparing the Container

Choosing the right container is crucial when planting ginger and turmeric together:

  • Size: Select a wide, shallow box or container at least 12–16 inches deep and 18–24 inches wide. Both plants grow horizontally as their rhizomes spread.
  • Drainage: Ensure the container has sufficient drainage holes to prevent waterlogging, which can cause root rot.
  • Material: Plastic, ceramic, or wooden boxes are suitable. Ensure the material retains moisture but allows airflow.

A larger box gives each rhizome enough space to grow without competition for nutrients.


Step 3: Preparing the Soil

Ginger and turmeric thrive in nutrient-rich, well-draining soil. Here’s how to prepare it:

  1. Mix garden soil with compost or organic matter to improve fertility.
  2. Add sand or perlite for better drainage.
  3. The ideal soil pH is between 6.0 and 6.5—slightly acidic to neutral.
  4. Fill the container with the prepared soil, leaving about 2 inches from the top.

A healthy soil mixture ensures your plants get the nutrients and moisture they need for robust growth.


Step 4: Planting Ginger and Turmeric

Planting is simple if you follow these steps:

  1. Cut larger rhizomes into pieces, each with at least 1–2 growth buds.
  2. Soak rhizomes in warm water for 2–4 hours before planting to kickstart growth.
  3. Make small holes in the soil, 1–2 inches deep, spaced 4–6 inches apart.
  4. Place ginger and turmeric pieces horizontally, buds facing up.
  5. Cover lightly with soil and gently press to secure.
  6. Water lightly to settle the soil.

Tip: Plant ginger and turmeric on opposite sides of the container to give each rhizome space for horizontal growth.


Step 5: Choosing the Right Location

Both plants need similar growing conditions:

  • Sunlight: Ginger and turmeric prefer partial sunlight (4–6 hours of indirect sunlight). Direct sunlight can scorch leaves, especially indoors.
  • Temperature: They thrive in warm conditions between 70–85°F (21–29°C). Avoid cold drafts or temperatures below 60°F.
  • Air Circulation: Ensure good airflow around the box to prevent fungal infections and promote healthy growth.

For indoor gardening, a bright windowsill or balcony with filtered sunlight works best.


Step 6: Watering and Care

Proper watering and care are key to healthy ginger and turmeric plants:

  • Watering: Keep the soil consistently moist but not soggy. Water when the top 1 inch of soil feels dry.
  • Mulching: Use organic mulch like straw or dried leaves to retain moisture and regulate soil temperature.
  • Fertilizing: Apply organic compost or a balanced liquid fertilizer every 3–4 weeks. Avoid chemical fertilizers, as they may affect taste and quality.
  • Weeding: Remove weeds promptly to reduce competition for nutrients.

With consistent care, your plants will grow strong, lush, and healthy.


Step 7: Growth and Maintenance

Both ginger and turmeric are slow-growing plants:

  • Ginger: Leaves emerge first, followed by horizontal rhizome growth under the soil. Rhizomes are usually ready to harvest in 8–10 months.
  • Turmeric: Growth is similar, but turmeric rhizomes take slightly longer—usually 9–12 months to mature.

Pruning: Trim yellow or dead leaves to promote airflow and prevent disease.

Support: Although not required, using a trellis or bamboo sticks can prevent leaves from bending or falling over in windy areas.


Step 8: Harvesting Ginger and Turmeric

Harvesting can be done once the plants mature:

  • Ginger: Carefully dig around the base and lift the rhizomes. Replant a few buds from the harvested rhizomes for the next crop.
  • Turmeric: Harvest when leaves start turning yellow and drying. Gently remove the rhizomes, wash, and dry them before storage.

Tip: Avoid harvesting too early, as immature rhizomes are less flavorful and contain fewer nutrients.


Step 9: Storage and Usage

  • Fresh Use: Wash and peel rhizomes as needed for cooking or smoothies.
  • Long-Term Storage: Store unpeeled rhizomes in a cool, dark place or refrigerate for several weeks. Freeze extra rhizomes to prolong shelf life.
  • Propagation: Save some rhizomes with buds for the next planting season, ensuring a continuous supply.

Step 10: Common Problems and Solutions

Even hardy plants like ginger and turmeric can face some challenges:

  • Root Rot: Caused by overwatering or poor drainage. Solution: Ensure proper drainage and avoid waterlogging.
  • Yellowing Leaves: Often due to nutrient deficiency or overwatering. Solution: Check soil moisture and apply organic fertilizer.
  • Pests: Aphids or spider mites can appear. Solution: Use neem oil or natural insecticidal sprays.
  • Slow Growth: Usually due to low temperatures or insufficient sunlight. Solution: Maintain warm, bright conditions for optimal growth.

By monitoring your plants, most problems can be prevented or corrected easily.


Quick Tips for Success

  1. Plant ginger and turmeric with at least 4–6 inches of space between rhizomes.
  2. Use organic soil and compost to ensure healthy growth.
  3. Keep soil moist but not waterlogged to prevent root rot.
  4. Provide partial sunlight and maintain warm temperatures.
  5. Harvest mature rhizomes carefully to preserve future growth.

Conclusion

Growing ginger and turmeric together in the same box is an easy, space-saving way to enjoy fresh, aromatic, and health-boosting rhizomes at home. With proper soil, water, sunlight, and care, you can cultivate lush, green plants that provide delicious and nutrient-rich rhizomes year-round.

Not only does this method save space, but it also adds a touch of tropical beauty to your balcony or indoor garden. From cooking to natural remedies, fresh ginger and turmeric grown in your own box ensures that you always have these powerful spices at your fingertips.

Start your ginger and turmeric box today, and enjoy the satisfaction of growing your own natural, healthy ingredients—right at home.


Grow Healthy Sprouts & Microgreens at Home: Fast, Easy, and Nutritious!

Grow Healthy Sprouts & Microgreens at Home: Fast, Easy, and Nutritious!

Sprouts and microgreens are tiny nutritional powerhouses that are easy to grow at home, packed with vitamins, minerals, and antioxidants. From crunchy salads to fresh smoothies, they add flavor, color, and health benefits to your daily meals. If you’ve ever wanted to grow your own fresh greens quickly and effortlessly, this guide will show you how to make sprouts and microgreens at home—fast, simple, and fun!


Why Grow Sprouts and Microgreens at Home?

Growing sprouts and microgreens at home is not just convenient—it’s also incredibly rewarding:

  1. Nutrient-Dense: Microgreens can contain up to 40 times more nutrients than mature vegetables. They are rich in vitamins A, C, K, and essential minerals.
  2. Cost-Effective: Buying fresh sprouts and microgreens from stores can be expensive, but growing your own is cheap and sustainable.
  3. Quick Harvest: Unlike traditional gardening, sprouts and microgreens grow in just a few days to two weeks.
  4. Fresh and Chemical-Free: You control what goes into your food, so your greens are organic and free from pesticides.
  5. Versatile in Cooking: Sprouts and microgreens can be added to salads, sandwiches, soups, smoothies, or used as a garnish.

With all these benefits, growing your own sprouts and microgreens is a smart and healthy choice for anyone.


Step 1: Choosing Seeds

The first step is selecting the right seeds. Not all seeds are suitable for sprouting, so look for edible, non-GMO seeds labeled for sprouting or microgreens. Popular options include:

  • Sprouts:
    • Mung beans
    • Lentils
    • Chickpeas
    • Alfalfa
    • Fenugreek
  • Microgreens:
    • Radish
    • Broccoli
    • Sunflower
    • Pea shoots
    • Basil

Tip: Avoid seeds treated with chemicals or coated with pesticides, as they are not safe for consumption.


Step 2: Preparing Your Container

You don’t need fancy equipment—simple kitchen items work perfectly:

  • For Sprouts: Use jars, trays, or sprouting bottles with ventilation holes.
  • For Microgreens: Shallow trays, seedling trays, or even recycled containers with drainage holes work well.

Clean your containers thoroughly to prevent contamination and mold growth.


Step 3: Soaking Seeds

Soaking seeds is a crucial step that kickstarts the germination process:

  1. Place your seeds in a jar or bowl and cover with clean, filtered water.
  2. Soak for 6–12 hours, depending on the type of seed (smaller seeds like alfalfa need less time; larger seeds like mung beans need longer).
  3. After soaking, drain the water thoroughly.

Soaking helps soften the seed coat and speeds up sprouting, making your greens ready faster.


Step 4: Sprouting Seeds

Sprouts are ready to grow after soaking. Here’s the method:

  1. Place soaked seeds in your jar or tray. Spread them evenly.
  2. Cover the jar with a breathable lid or cloth to allow airflow while keeping insects out.
  3. Rinse and drain the seeds 2–3 times per day to prevent mold.
  4. Keep the jar at room temperature, away from direct sunlight.

Most sprouts, like mung beans and alfalfa, are ready in 3–7 days. They should be crisp, green, and tender.


Step 5: Growing Microgreens

Microgreens take a bit longer than sprouts but are still fast-growing:

  1. Fill your tray with a 1–2 inch layer of moist, well-draining soil. You can also use coco peat or a seed-starting mix.
  2. Scatter your seeds evenly on the soil surface, avoiding overlapping too much.
  3. Press seeds lightly into the soil and mist gently with water.
  4. Cover the tray with a lid or plastic wrap to maintain humidity until seeds germinate (usually 2–4 days).
  5. Once seedlings appear, remove the cover and place the tray in indirect sunlight or under a grow light for 10–12 hours a day.
  6. Mist regularly to keep the soil moist but not waterlogged.

Microgreens are usually ready to harvest in 7–14 days, depending on the variety.


Step 6: Harvesting Sprouts and Microgreens

Harvesting is simple and rewarding:

  • Sprouts:
    • Once your sprouts are about 1–2 inches long, rinse them thoroughly.
    • Drain and store in a clean container in the refrigerator. They can last up to a week.
  • Microgreens:
    • Cut stems just above the soil line using scissors.
    • Wash gently and use fresh in salads, sandwiches, or smoothies.

Freshly harvested sprouts and microgreens taste amazing and are packed with maximum nutrients.


Step 7: Storing and Using Your Greens

To keep your sprouts and microgreens fresh:

  • Store in an airtight container in the refrigerator.
  • Rinse before eating if stored for several days.
  • Use within 5–7 days for maximum freshness and nutritional value.

Microgreens can also be frozen or dried for longer storage, but fresh is always best for flavor and nutrients.


Step 8: Common Problems and Solutions

Even though sprouts and microgreens are easy to grow, some challenges may arise:

  1. Mold Growth: Often caused by poor drainage or lack of airflow. Solution: Rinse sprouts regularly, avoid overcrowding seeds, and ensure proper ventilation.
  2. Leggy Growth: Microgreens stretch when they don’t get enough light. Solution: Provide adequate sunlight or use a grow light.
  3. Bitter Taste: Certain microgreens like broccoli or radish can taste bitter if harvested too late. Solution: Harvest promptly when they reach 1–3 inches.
  4. Seed Rot: Occurs if seeds are left soaking too long or soil is overly wet. Solution: Follow soaking times carefully and maintain proper soil moisture.

Step 9: Creative Ways to Enjoy Sprouts and Microgreens

Sprouts and microgreens are incredibly versatile:

  • Salads: Add a crunchy, flavorful boost to green salads.
  • Smoothies and Juices: Blend into green smoothies for extra vitamins.
  • Sandwiches & Wraps: Use as a fresh and healthy layer in sandwiches.
  • Soups & Garnishes: Sprinkle on soups, stir-fries, or pasta for a nutritious touch.
  • Herbal Blends: Combine with herbs for homemade spice blends or salad toppings.

By incorporating them into your meals, you not only enhance flavor but also increase nutritional intake effortlessly.


Quick Tips for Fast and Successful Growth

  1. Always use clean containers and filtered water to avoid contamination.
  2. Do not overcrowd seeds—give each seed enough space to grow.
  3. Keep sprouts and microgreens at the right temperature (65–75°F).
  4. Provide adequate light for microgreens to prevent leggy growth.
  5. Harvest promptly to enjoy peak flavor and nutrition.

Conclusion

Growing sprouts and microgreens at home is fast, easy, and incredibly rewarding. With minimal effort, you can enjoy fresh, nutrient-packed greens that are perfect for boosting your health and adding flavor to your meals. Whether you have a balcony, kitchen counter, or small garden space, you can start your own mini indoor garden today.

By following these simple steps, you’ll have a constant supply of fresh sprouts and microgreens ready in just a few days. From boosting immunity to creating delicious meals, homegrown greens are a natural, healthy, and sustainable choice. Start today and experience the joy of growing your own nutritious food at home!

Grow Chamomile from Tea Bags at Home: Quick, Easy, and Rewarding!

Grow Chamomile from Tea Bags at Home: Quick, Easy, and Rewarding!

Chamomile is more than just a soothing tea—it’s a gentle, aromatic herb cherished for its calming properties, delicate flowers, and natural beauty. Imagine growing your own chamomile right at home using simple tea bags! Not only is it easy, but it’s also a fun and cost-effective way to enjoy fresh chamomile whenever you want. This guide will take you step by step through planting, caring for, and harvesting chamomile from tea bags, making the process quick, easy, and enjoyable.


Why Grow Chamomile at Home?

Chamomile has been valued for centuries for its medicinal, culinary, and decorative uses. Growing it at home offers numerous benefits:

  1. Health and Wellness: Chamomile is well-known for promoting relaxation, aiding digestion, and improving sleep quality. Freshly grown chamomile can be used to make teas, tinctures, and herbal remedies.
  2. Aromatic Beauty: Its sweet, apple-like fragrance enhances your garden, balcony, or indoor space.
  3. Cost-Effective: Growing chamomile from tea bags is inexpensive compared to buying fresh herbs or seeds.
  4. Easy to Grow: Chamomile is hardy, requires minimal maintenance, and grows quickly under the right conditions.
  5. Pollinator-Friendly: Chamomile flowers attract bees and butterflies, supporting local biodiversity.

Step 1: Selecting the Right Chamomile Tea Bags

Not all tea bags are created equal. To grow chamomile successfully, choose high-quality, pure chamomile tea bags:

  • Check the Ingredients: Ensure the tea contains 100% chamomile flowers with no added flavors, fillers, or preservatives.
  • Organic Option: Organic tea bags reduce the risk of chemical contamination in your plants.
  • Number of Bags: One tea bag is enough to grow multiple plants; however, using 2–3 tea bags ensures a higher germination rate.

Once you have your tea bags, you’re ready to start growing!


Step 2: Preparing Chamomile Seeds from Tea Bags

Chamomile seeds are tiny and delicate, but extracting them from tea bags is straightforward:

  1. Carefully open the tea bag without tearing the paper too much.
  2. Gently shake the chamomile flowers into a small bowl.
  3. Optional: Let the flowers dry for a few hours to make seed collection easier.

The seeds are ready to plant once separated from the dried flowers.


Step 3: Choosing the Right Planting Container and Soil

Chamomile can be grown in pots, window boxes, or garden beds. Here’s what to consider:

  • Container: Use a pot or tray with drainage holes to prevent waterlogging.
  • Soil: Chamomile prefers well-draining, sandy or loamy soil. A mix of potting soil with sand or perlite works perfectly.
  • Size: Choose a container that is at least 6–8 inches deep for root development.

A sunny windowsill, balcony, or garden bed with plenty of sunlight is ideal.


Step 4: Planting Chamomile Seeds

Planting chamomile seeds from tea bags is quick and simple:

  1. Fill your container with prepared soil, leaving about 1 inch of space from the top.
  2. Sprinkle the seeds evenly over the soil surface.
  3. Lightly cover the seeds with a thin layer of soil (about 1/8 inch). Chamomile seeds need light to germinate, so don’t bury them too deep.
  4. Mist the soil gently with water using a spray bottle to avoid washing away seeds.
  5. Keep the soil consistently moist but not soggy.

Step 5: Germination and Early Care

Chamomile seeds usually germinate within 7–14 days if provided with the right conditions. To encourage healthy growth:

  • Temperature: Keep the container in a warm spot, ideally 65–75°F.
  • Sunlight: Chamomile requires at least 4–6 hours of sunlight daily. Use a sunny window or supplement with a grow light if indoors.
  • Watering: Mist the soil daily to maintain moisture without flooding the seeds.
  • Thinning: Once seedlings develop 2–3 sets of true leaves, thin them by snipping weaker seedlings at the base to give space for stronger plants to grow.

Step 6: Transplanting Chamomile (Optional)

If you started seeds in a small tray, you might want to transplant them into larger pots or your garden:

  1. Choose a sunny, well-drained location.
  2. Gently remove seedlings, keeping the roots intact.
  3. Plant them 6–8 inches apart to allow space for growth.
  4. Water lightly after transplanting to help them settle in.

Chamomile is adaptable and grows well both indoors and outdoors, making it perfect for urban gardeners.


Step 7: Caring for Chamomile Plants

Chamomile is low-maintenance but thrives with a few simple practices:

  • Watering: Water when the soil feels dry. Avoid overwatering, as chamomile does not like soggy soil.
  • Sunlight: Ensure your plant receives adequate sunlight daily. If indoors, rotate the pot to provide even exposure.
  • Fertilizing: Chamomile doesn’t require heavy feeding. A light organic fertilizer or compost once a month is sufficient.
  • Pruning: Regularly trim spent flowers to encourage continuous blooming.

With minimal effort, your chamomile plants will flourish beautifully.


Step 8: Harvesting Chamomile

Harvesting chamomile is simple and rewarding:

  1. Pick flowers when they are fully open, usually mid-morning after dew has dried.
  2. Use sharp scissors to snip flower heads without damaging the plant.
  3. For drying, spread the flowers on a paper towel or hang small bundles upside down in a dark, dry, and well-ventilated area.
  4. Store dried flowers in airtight containers for teas, baths, or crafts.

Fresh chamomile can also be used immediately for making tea, infusions, or homemade skincare remedies.


Step 9: Common Issues and Solutions

Chamomile is hardy, but you may encounter minor issues:

  • Leggy Growth: Occurs when seedlings don’t get enough sunlight. Solution: Provide more direct light or a grow lamp.
  • Pests: Aphids or spider mites may occasionally appear. Solution: Spray with mild soapy water or neem oil.
  • Fungal Diseases: Caused by overwatering or poor air circulation. Solution: Ensure proper drainage and space between plants.

By monitoring your plants, these problems can be easily managed.


Step 10: Creative Uses for Homegrown Chamomile

Growing chamomile at home opens up a world of possibilities:

  • Herbal Tea: Brew fresh or dried flowers for calming chamomile tea.
  • Skincare: Chamomile-infused oils and baths soothe irritated skin and reduce inflammation.
  • Aromatherapy: Dried chamomile flowers can be used in sachets, candles, or potpourri.
  • Decorative: The small, daisy-like flowers make beautiful accents for gardens and indoor spaces.

Your homegrown chamomile is not only practical but also a charming addition to your daily life.


Quick Tips for Success

  1. Use high-quality, pure chamomile tea bags to ensure good seed viability.
  2. Keep soil lightly moist during germination.
  3. Provide ample sunlight for healthy growth.
  4. Thin seedlings for strong, well-spaced plants.
  5. Harvest flowers at peak bloom for the best flavor and fragrance.

Conclusion

Growing chamomile from tea bags is a simple, cost-effective, and rewarding way to enjoy this aromatic herb at home. With minimal effort, you can transform ordinary tea bags into thriving plants that provide beauty, fragrance, and health benefits. Whether you use it for tea, skincare, or decoration, homegrown chamomile is a delightful addition to any indoor or outdoor space.

Start your chamomile journey today, and in just a few weeks, you’ll enjoy the soothing charm of fresh, homegrown chamomile right at your fingertips. It’s a fun, easy, and sustainable way to bring nature closer to home.