From Snack to Citrus Tree: A Complete Guide to Growing an Orange Tree From a Fresh Orange

From Snack to Citrus Tree: A Complete Guide to Growing an Orange Tree From a Fresh Orange

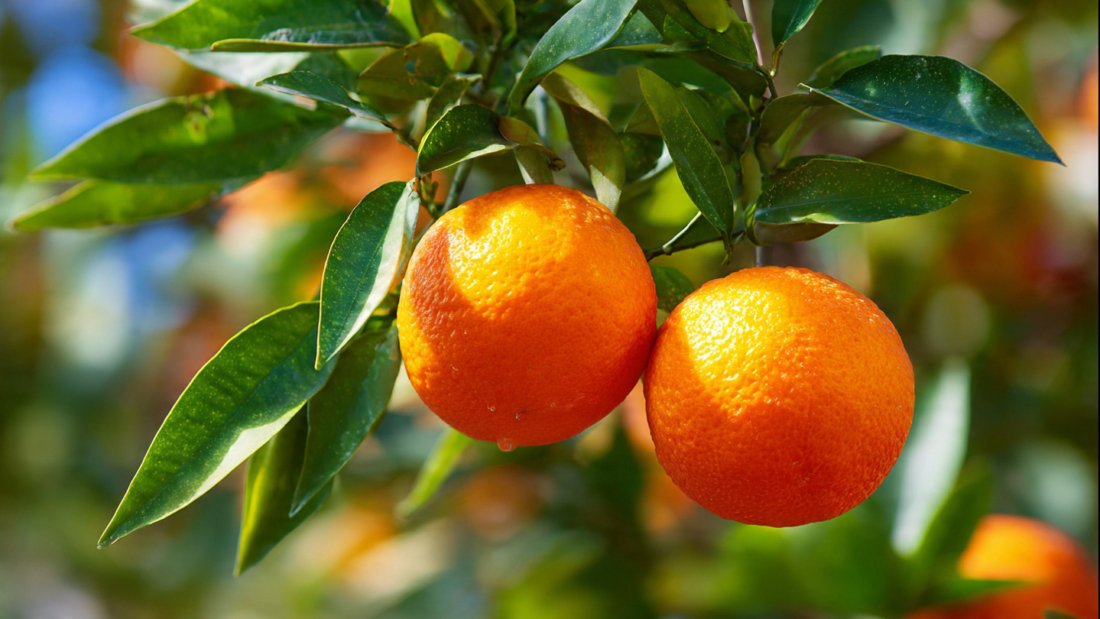
Orange trees are not only beautiful but also incredibly rewarding to grow. The vibrant green leaves, fragrant blossoms, and juicy fruits make them a favorite among gardeners. While most people enjoy oranges as a delicious snack or a refreshing juice, few realize that the seeds inside these fruits can be the start of your very own citrus tree. With patience, care, and the right technique, you can transform an ordinary orange snack into a thriving orange tree right at home. This complete guide will walk you through every step of growing an orange tree from a fresh orange, from seed preparation to harvest.


Why Grow an Orange Tree From a Seed?

Growing an orange tree from seed offers several benefits:

  1. Educational experience: It’s a hands-on way to learn about plant growth, germination, and horticulture.
  2. Sustainable gardening: You reuse seeds that would otherwise go to waste.
  3. Decorative and productive: Even if it takes years to bear fruit, an orange tree adds greenery and beauty to your home.
  4. Cost-effective: It’s cheaper than buying a young tree from a nursery.

However, it’s important to understand that seed-grown orange trees take longer to produce fruit than grafted ones from nurseries. You may need to wait 3 to 10 years for fruiting, depending on the variety and growing conditions. Despite the wait, the journey is rewarding and offers immense satisfaction.


Choosing the Right Orange

Not all oranges are equally suitable for seed planting. Choose fresh, juicy, and healthy oranges from a reliable source. Organic oranges are preferable, as chemically treated fruits may have seeds that won’t germinate. Valencia, Navel, or Blood oranges are excellent choices, as they produce strong and healthy seedlings. Avoid using dried or old fruits, as their seeds are less likely to sprout.


Extracting and Preparing Seeds

The first step is to remove seeds from the orange carefully:

  1. Cut the orange and remove the seeds. Rinse them under running water to remove any pulp or sugar residues, which can cause mold during germination.
  2. Pat the seeds dry with a paper towel. Avoid letting them sit in direct sunlight for too long, as this can dry them out excessively.
  3. Optional: Some gardeners soak the seeds in warm water for 12 to 24 hours to soften the seed coat and improve germination rates.

Proper seed preparation increases the chances of successful sprouting.


Germinating the Seeds

Germination is a critical phase in growing an orange tree. There are a few methods to start seeds effectively:

Method 1: Paper Towel Method

  • Place the seeds between two damp paper towels.
  • Keep them in a warm, dark place.
  • Check daily to ensure the paper towel remains moist.
  • In 2 to 4 weeks, seeds will begin to sprout tiny roots.

Method 2: Direct Planting

  • Fill small pots with a light, well-draining potting mix. A mixture of potting soil and sand or perlite works well.
  • Plant the seeds about 1/2 inch deep.
  • Water gently and cover the pot with plastic wrap to retain moisture.
  • Place the pot in a warm, sunny spot. Germination usually occurs within 2 to 6 weeks.

Keep the soil consistently moist but not waterlogged during this stage. Overwatering can cause seeds to rot, while dry soil may halt germination.


Choosing the Right Pot and Soil

Once your seeds sprout and develop small leaves, it’s time to transplant them into larger pots. Select a container that is at least 6 to 8 inches deep and wide, with drainage holes at the bottom. Good drainage is crucial to prevent root rot.

Orange trees prefer slightly acidic, well-draining soil. A mix of potting soil, sand, and compost works well. Adding a little perlite can improve aeration. Avoid heavy garden soil, which can compact in pots and restrict root growth.


Providing Proper Sunlight

Orange trees thrive in full sunlight. Young seedlings require at least 6 to 8 hours of sunlight per day. Place your pot near a sunny window or on a balcony where it can receive direct sunlight.

If natural light is limited, you can use grow lights for 12 to 14 hours a day. Proper lighting ensures healthy growth, strong stems, and vibrant leaves.


Watering and Care

Consistent watering is key to healthy growth. Water the tree when the top inch of soil feels dry. Avoid overwatering, as orange seedlings are sensitive to waterlogging. As the plant grows, you can reduce the frequency slightly, allowing the soil to dry out between watering.

Mulching with organic matter like shredded leaves or coconut coir can help retain moisture and regulate soil temperature.


Fertilizing Your Orange Tree

Young orange trees benefit from balanced nutrition. Use a diluted liquid fertilizer every 4 to 6 weeks during the growing season. Look for fertilizers labeled for citrus plants, which typically have the right balance of nitrogen, phosphorus, and potassium.

Once your tree develops stronger roots and leaves, you can switch to slow-release granular fertilizers. Avoid over-fertilizing, as excessive nitrogen can lead to lush foliage but weak fruit production.


Pruning and Training

Pruning is essential for shaping your orange tree and promoting healthy growth. When the tree is small, remove weak or damaged branches. As it matures, prune to encourage a strong central stem and an even canopy.

Training young branches with soft ties can help maintain the desired shape and prevent breakage. Regular pruning also improves air circulation, reducing the risk of fungal diseases.


Pest and Disease Management

Orange trees can be susceptible to pests like aphids, scale insects, spider mites, and whiteflies. Regularly inspect leaves and stems for signs of infestation. For small infestations, wash pests off with water or use neem oil.

Fungal diseases like root rot and leaf spot may occur if the soil remains too wet. Ensure proper drainage, avoid overhead watering, and provide adequate sunlight and airflow to minimize disease risk.


Transplanting Outdoors

If you have space in a garden or larger container, your orange tree can eventually be transplanted outdoors. Choose a location with full sunlight, good drainage, and protection from strong winds.

Harden off your tree gradually by placing it outside for a few hours daily over 1 to 2 weeks before permanent planting. This helps the plant adjust to outdoor conditions without shock.


Patience Is Key

Growing an orange tree from a seed requires patience. Seedlings typically take 3 to 5 years to produce fruit, though some varieties may take longer. During this time, focus on providing proper care, watering, sunlight, and nutrition. Even without immediate fruit, your tree will develop beautiful foliage and fragrant blossoms.


Harvesting Fruit

When your tree finally produces flowers and fruit, harvesting requires careful timing. Oranges are usually ready when they are fully colored, firm, and aromatic. Pick them gently to avoid damaging branches. Seed-grown oranges may vary slightly in taste and size compared to the parent fruit, but homegrown oranges often have exceptional flavor.


Additional Tips for Success

  • Label your tree: Note the date of planting and the variety of orange.
  • Rotate pots: If grown indoors, rotate pots regularly for even sunlight exposure.
  • Protect from frost: Young trees are sensitive to cold, so bring pots indoors or cover them during winter.
  • Repot as needed: As the tree grows, move it to larger containers to accommodate root expansion.
  • Experiment with varieties: Trying different orange types can diversify your harvest and improve the gardening experience.

Benefits of Growing an Orange Tree at Home

Growing an orange tree from a snack fruit is more than just a gardening project. It offers numerous benefits:

  1. Fresh fruit at home: Enjoy chemical-free oranges straight from your tree.
  2. Environmental impact: You reuse seeds and reduce waste.
  3. Aesthetic value: Orange trees enhance indoor and outdoor spaces with greenery and fragrance.
  4. Educational value: It teaches patience, responsibility, and plant care.
  5. Health benefits: Consuming homegrown citrus provides vitamin C, antioxidants, and other nutrients.

Final Thoughts

Transforming an orange from a simple snack into a thriving citrus tree is a fulfilling and rewarding journey. With proper seed preparation, careful watering, adequate sunlight, and patient care, anyone can grow an orange tree at home.

While it may take years for your tree to bear fruit, the experience is worth every step. From sprouting seeds to nurturing seedlings and finally enjoying homegrown oranges, this process connects you with nature and promotes sustainable living.

By starting with a fresh orange, you not only create a beautiful plant but also embrace a more eco-conscious lifestyle. Growing your own oranges is a reminder that even the smallest seeds can lead to incredible growth, both in your garden and in your life.

10 Intelligent & Creative Gardening Ideas to Inspire Your Outdoor Space in 2026

10 Intelligent & Creative Gardening Ideas to Inspire Your Outdoor Space in 2026

Gardening is evolving, and 2026 is shaping up to be the year of intelligent, sustainable, and creative outdoor spaces. Homeowners and garden enthusiasts are no longer satisfied with simple lawns and flower beds; they want gardens that reflect innovation, functionality, and aesthetic appeal. Whether you have a small balcony, a sprawling backyard, or a rooftop terrace, incorporating smart and imaginative gardening ideas can transform your outdoor space into a vibrant sanctuary. Here are ten intelligent and creative gardening concepts to inspire you this year.


1. Vertical Gardens for Small Spaces

Vertical gardening is one of the most practical and stylish ways to make the most of limited space. Using wall-mounted planters, trellises, or modular panel systems, you can grow flowers, herbs, or even vegetables without sacrificing floor area. Vertical gardens are not only space-efficient but also visually striking, adding layers of texture and greenery to your outdoor walls.

Consider integrating self-watering vertical planters or hydroponic vertical towers for low-maintenance gardening. These intelligent systems allow plants to receive the right amount of water and nutrients, making them perfect for busy gardeners or urban environments.


2. Smart Irrigation Systems

Water management is crucial in modern gardening, and smart irrigation systems are a game-changer for 2026. These systems use sensors and timers to monitor soil moisture, weather conditions, and plant requirements. By automatically adjusting watering schedules, they save water, prevent overwatering, and promote healthier plant growth.

For example, drip irrigation connected to a smartphone app can allow you to control your garden remotely. Intelligent irrigation not only conserves resources but also ensures that every plant receives optimal hydration, even during hot summer months.


3. Upcycled Planters and Eco-Friendly Decor

Sustainability is a major trend in modern gardening. Upcycling everyday items into creative planters gives your garden character while reducing waste. Think of using old pallets, tin cans, wine barrels, or plastic bottles to grow flowers, herbs, or small vegetables.

In 2026, eco-conscious gardeners are combining functionality with art. For instance, vertical bottle gardens or repurposed furniture planters add personality to your outdoor space. You can even paint and decorate containers to match your garden’s color palette, turning recycled materials into artistic focal points.


4. Edible Landscaping

Edible landscaping is a concept that merges beauty with practicality. Instead of only growing ornamental plants, integrate vegetables, herbs, and fruit-bearing shrubs into your garden design. Tomatoes, strawberries, lavender, and rosemary can be planted in visually appealing patterns, along pathways, or in raised beds.

This approach is both intelligent and sustainable. You gain fresh, homegrown produce while maintaining a stunning outdoor space. Companion planting can further enhance the garden’s productivity, as certain plants repel pests and improve soil health naturally.


5. Zen and Minimalist Gardens

Minimalist and Zen-inspired gardens are gaining popularity for their calming effects. These spaces focus on simplicity, clean lines, and natural elements such as stones, bamboo, and water features. Incorporating small sand or gravel areas, moss, and bonsai trees creates a serene atmosphere perfect for meditation or relaxation.

You can combine these minimalist features with a few vibrant plants to add life without cluttering the space. In 2026, the fusion of intelligent design with natural elements allows outdoor spaces to become functional extensions of your living area.


6. Interactive and Sensor-Based Gardening

The concept of interactive gardens is emerging strongly in 2026. Imagine plants that can “communicate” via sensors to alert you about soil health, humidity, or nutrient deficiencies. Smart plant sensors can track growth patterns and provide actionable feedback to help optimize care routines.

For families, interactive gardens can be educational. Children can learn about plant biology, ecosystems, and sustainability through engaging hands-on experiences. Integrating technology into your outdoor space makes gardening more intelligent, efficient, and engaging.


7. Raised Beds and Modular Gardening

Raised beds are not new, but modular raised bed systems are becoming increasingly popular. These beds allow you to customize the garden layout according to available space, sunlight, and plant type. They also improve drainage, soil aeration, and pest control.

In 2026, intelligent raised beds may include built-in compost systems, reservoirs for water retention, or adjustable heights for ergonomic gardening. Modular designs allow gardeners to expand or rearrange beds as needed, offering flexibility and creativity for dynamic outdoor spaces.


8. Pollinator-Friendly Gardens

Creating a garden that attracts pollinators is both ecologically intelligent and visually stunning. Bees, butterflies, and hummingbirds are essential for pollination and plant health. By planting pollinator-friendly flowers such as marigolds, lavender, coneflowers, and sunflowers, you support biodiversity while enhancing the garden’s aesthetic appeal.

Incorporating features like bee hotels, small water sources, and flowering shrubs encourages wildlife to visit your outdoor space. A pollinator-friendly garden contributes to a healthier ecosystem and produces more fruitful plants, especially if you grow vegetables and fruits.


9. Multi-Layered Planting and Mixed Gardens

Layering plants creates depth, texture, and visual interest. Mix tall plants with medium shrubs and low-growing ground covers. Incorporate climbing plants along fences and walls to maximize vertical space.

This creative approach not only enhances beauty but also creates microclimates that support plant growth. Taller plants can provide shade for delicate species, while ground covers prevent soil erosion and moisture loss. Multi-layered gardens are both intelligent and artistic, offering year-round visual appeal.


10. Seasonal and Rotational Planting

A thriving garden in 2026 is one that adapts to seasons and maximizes yield. Seasonal planting ensures that your garden remains colorful and productive throughout the year. Rotate crops and flowers to maintain soil fertility and reduce the risk of pests and diseases.

For instance, plant cool-season vegetables like lettuce and spinach in winter, and warm-season crops like peppers and melons in summer. Use companion planting strategies to enhance growth and natural pest resistance. Seasonal rotation is an intelligent practice that keeps gardens sustainable, productive, and attractive all year long.


Combining Technology and Creativity

The most inspiring gardens of 2026 combine technology, sustainability, and creativity. Smart irrigation systems, plant sensors, and modular raised beds enhance efficiency and reduce maintenance. At the same time, upcycled planters, vertical gardens, and pollinator-friendly designs add a unique visual and ecological dimension.

Even small spaces can become dynamic outdoor sanctuaries with thoughtful planning. By blending intelligent methods with creative aesthetics, home gardeners can enjoy gardens that are both functional and beautiful.


Benefits of Implementing Intelligent Gardening Ideas

Adopting these creative and intelligent gardening strategies offers multiple advantages:

  1. Sustainability: Reduces water usage, supports biodiversity, and encourages recycling.
  2. Health: Fresh produce improves diet, while green spaces promote mental wellness.
  3. Efficiency: Smart systems and modular designs save time and effort.
  4. Aesthetic Appeal: Creative designs and plant layering enhance visual interest.
  5. Learning Opportunity: Engages family members and children in environmental education.

Intelligent gardening is not just about beauty; it’s about creating an ecosystem that works in harmony with nature.


Tips for Beginners

  • Start small: Focus on one or two creative ideas before expanding.
  • Observe your garden: Note sunlight, wind patterns, and soil conditions.
  • Maintain consistency: Water, fertilize, and prune regularly.
  • Experiment: Combine different styles and plant types to see what works best.
  • Use eco-friendly products: Compost, organic fertilizers, and natural pest controls improve sustainability.

By approaching gardening with patience and creativity, even beginners can transform their outdoor spaces into thriving ecosystems.


Conclusion

Gardening in 2026 is no longer limited to traditional flower beds. Intelligent, creative, and sustainable ideas are shaping outdoor spaces into dynamic, functional, and aesthetically pleasing environments. From vertical gardens and smart irrigation systems to upcycled planters and pollinator-friendly designs, homeowners now have a wide array of techniques to enhance their gardens.

By adopting these strategies, you can maximize space, reduce environmental impact, and enjoy fresh produce, flowers, and greenery all year long. Combining technology with creativity ensures that your garden is not only beautiful but also smart, sustainable, and full of life.

Whether you have a small balcony, a side yard, or a large backyard, these ten ideas provide inspiration for creating an outdoor sanctuary in 2026. Start today, experiment, and watch your garden transform into a vibrant, intelligent, and inspiring space.

Recycle Plastic Bottles to Grow Vegetables at Home

Recycle Plastic Bottles to Grow Vegetables at Home

Growing your own vegetables at home has become increasingly popular, and for good reason. Freshly harvested produce is more nutritious, tastes better, and helps you reduce grocery expenses. But not everyone has a backyard or garden space, which can make traditional vegetable gardening challenging. The solution? Using recycled plastic bottles to grow vegetables at home. This sustainable and space-saving method turns ordinary waste into a productive mini-garden, making it perfect for apartments, balconies, and even small patios.

Recycling plastic bottles into vegetable planters not only reduces environmental waste but also allows anyone to grow food easily and affordably. In this guide, we’ll walk you through everything you need to know to start your own home vegetable garden using plastic bottles.


Why Use Plastic Bottles for Vegetable Gardening

Plastic bottles are among the most commonly discarded items worldwide. Instead of letting them end up in landfills, repurposing them for gardening is an eco-friendly way to give them a second life. Using bottles for growing vegetables has several benefits:

  1. Space-saving: Bottles can be hung vertically, stacked, or arranged in rows, making them ideal for small areas.
  2. Cost-effective: They are free if you recycle what you already have at home.
  3. Portable: Bottle gardens are lightweight and can be moved easily to optimize sunlight.
  4. Customizable: Bottles can be cut, painted, or arranged in any pattern you like.

This method allows anyone, even with minimal space or resources, to cultivate a variety of vegetables and enjoy fresh, home-grown produce.


Materials Needed

To start your plastic bottle vegetable garden, you will need some basic materials that are easy to find:

  • Plastic bottles (1 to 2 liters work best)
  • Sharp scissors or a craft knife
  • A nail or screwdriver to make drainage holes
  • Potting soil
  • Compost or organic fertilizer
  • Rope, twine, or wire for hanging (optional for vertical setups)
  • Seeds or seedlings of vegetables you want to grow

Optional materials include paint, labels, and decorations to personalize your garden.


Choosing the Right Vegetables

Not all vegetables are suitable for bottle gardening. Choose varieties that grow well in small spaces and have shallow root systems. Some ideal options include:

  • Leafy greens: Spinach, lettuce, arugula, and kale grow quickly and thrive in containers.
  • Herbs: Basil, coriander, mint, parsley, and chives are perfect for small spaces.
  • Small vegetables: Cherry tomatoes, chilies, radishes, spring onions, and bell peppers can thrive in bottles.
  • Companion plants: Mix herbs with vegetables to improve growth and repel pests naturally.

Avoid planting root-heavy vegetables like potatoes or large squash, as they require more soil depth than bottles can provide.


Preparing the Plastic Bottles

  1. Clean the bottles: Wash them thoroughly to remove any residue or chemicals. Remove labels for a neat look.
  2. Cutting the bottles: Decide whether you want to place the bottles horizontally or vertically. For horizontal placement, cut a rectangular opening along the side for planting. For vertical setups, cut the top off or create a side opening.
  3. Drainage holes: Use a heated nail or screwdriver to make small holes in the bottom of each bottle. This is essential to prevent waterlogging and root rot.
  4. Optional holes for hanging: If you plan a vertical garden, make two small holes at the top for threading rope or wire.

These steps prepare the bottles for planting and ensure your vegetables grow in healthy conditions.


Making the Soil Mix

Vegetables need nutrient-rich, well-draining soil to thrive in limited container space. A good soil mix includes:

  • 2 parts potting soil
  • 1 part compost
  • 1 part sand or coco peat for aeration and moisture retention

Mix the components thoroughly before filling the bottles. Adding a small amount of organic fertilizer helps boost growth, but avoid chemical fertilizers that may damage delicate plants.


Planting the Vegetables

Once the bottles are prepared and filled with soil, you can begin planting:

  • Seeds: Plant seeds according to the depth specified on the packet, usually shallowly, and cover lightly with soil. Water gently after planting.
  • Seedlings: Make a small hole in the soil, place the seedling carefully, and gently press soil around the roots.

Space the plants properly in each bottle to prevent overcrowding, which can stunt growth. One medium-sized plant or two small herbs per bottle works well.


Setting Up Vertical or Horizontal Gardens

Vertical setup: Vertical gardens save space and create an eye-catching display. Hang bottles using rope, twine, or wire. Ensure each bottle is stable and evenly spaced. Secure the ropes to wall hooks, balcony rails, or a wooden frame.

Horizontal setup: Horizontal placement works well on window sills or shelves. Arrange bottles side by side, ensuring they get adequate sunlight. You can even stack them in tiers for a small vertical effect.

In both setups, ensure that bottles are easily accessible for watering, pruning, and harvesting.


Watering and Fertilizing

Container-grown vegetables dry out faster than garden beds, so regular watering is essential. Check soil daily and water when the top inch feels dry. Water slowly to ensure the roots absorb moisture evenly.

Fertilize every two to three weeks using organic liquid fertilizers or compost tea. This replenishes nutrients in the limited soil and encourages healthy growth. Avoid over-fertilizing, especially with nitrogen-heavy fertilizers, as this can lead to excessive leaf growth at the expense of vegetables.


Managing Pests and Diseases

Plastic bottle gardens are less prone to pests, but you may still encounter:

  • Aphids
  • Spider mites
  • Caterpillars

Inspect plants weekly and remove affected leaves. For natural pest control, spray neem oil or mild soapy water. Avoid chemical pesticides, especially if your vegetables are meant for consumption.

Proper airflow is also important. Ensure bottles are not too close together and avoid overwatering, which can lead to fungal diseases.


Harvesting Your Vegetables

Knowing when to harvest is key to enjoying the best flavor and nutrition:

  • Leafy greens and herbs: Begin harvesting once leaves are mature enough, usually 30–45 days after planting. Regular harvesting encourages new growth.
  • Cherry tomatoes and peppers: Harvest when fruits are fully colored and firm.
  • Radishes and spring onions: These mature quickly, typically within 25–35 days.

Harvest carefully to avoid damaging the plant, allowing it to continue producing vegetables.


Benefits of Recycling Plastic Bottles for Gardening

Recycling plastic bottles for vegetable gardening offers numerous benefits:

  1. Environmental impact: Reduces plastic waste in landfills and oceans.
  2. Sustainability: Promotes self-sufficiency by growing your own food.
  3. Cost savings: Minimizes the need to buy herbs and vegetables from stores.
  4. Health benefits: Fresh vegetables are more nutritious and free from harmful chemicals.
  5. Educational: Teaches children and adults about recycling, sustainability, and gardening.

This simple DIY project turns ordinary waste into something valuable and productive.


Tips for Success

  • Use bottles of the same size to maintain uniformity in your garden.
  • Rotate the bottles periodically to ensure even sunlight exposure.
  • Consider companion planting to maximize space and protect plants naturally.
  • Personalize your bottles with paint or labels for an attractive display.
  • Regularly prune and remove dead leaves to maintain plant health.

With consistent care and attention, your bottle garden can produce fresh vegetables for months.


Conclusion

Recycling plastic bottles to grow vegetables at home is an innovative and sustainable solution for modern living. It combines environmental responsibility, creativity, and practicality, making it ideal for small spaces. By repurposing plastic bottles, preparing nutrient-rich soil, selecting the right vegetables, and maintaining proper care, anyone can create a thriving home garden.

This approach not only reduces waste but also promotes healthier eating habits, saves money, and adds greenery to your surroundings. Whether you’re an experienced gardener or a beginner, a plastic bottle vegetable garden is a rewarding and eco-friendly project that brings the satisfaction of growing your own food directly to your home.

By starting small, you can gradually expand your garden, experiment with different plants, and enjoy the long-term benefits of a sustainable lifestyle. Recycling bottles for gardening proves that even simple actions can have a big impact on the environment and your personal well-being.

Grow Melons Beside Your House | Easy Method for Home Gardeners

Grow Melons Beside Your House | Easy Method for Home Gardeners

Growing melons at home may sound like a challenge, especially if you don’t have a large garden. However, with the right techniques and a little planning, you can successfully grow sweet, juicy melons beside your house, even in small spaces. Whether you have a narrow backyard, a side yard, or a sunny wall, these areas can become productive growing spots for melons.

Melons such as watermelon, muskmelon, and cantaloupe are rewarding crops that thrive in warm conditions and full sunlight. With proper soil preparation, smart space management, and consistent care, home gardeners can enjoy fresh, homegrown melons without needing a farm-sized garden. This guide explains an easy and practical method to grow melons beside your house.


Why Grow Melons Beside Your House?

The area beside your house is often underused. It usually receives good sunlight, has protection from strong winds, and is close to water sources. These factors make it an ideal location for growing melons.

Growing melons near your home also makes maintenance easier. You can monitor plants daily, water them conveniently, and protect them quickly from pests or weather changes.

Another advantage is space efficiency. Instead of letting vines spread randomly, you can train them vertically along walls or fences, saving ground space and improving air circulation.

Homegrown melons are fresher, tastier, and free from harmful chemicals, making the effort worthwhile.


Choosing the Right Melon Variety

Selecting the right variety is essential for success, especially in limited spaces.

Some melon types are better suited for home gardens:

  • Cantaloupe (muskmelon) grows well in containers and small plots
  • Sugar Baby watermelon is compact and suitable for small spaces
  • Honeydew needs more space but can be trained vertically
  • Mini watermelons are ideal for side yards

Look for varieties labeled as “compact,” “bush,” or “container-friendly.” These types produce manageable vines and adapt better to home settings.

Always choose high-quality seeds from reliable sources for better germination and disease resistance.


Understanding Sunlight and Temperature Needs

Melons are sun-loving plants. They require at least six to eight hours of direct sunlight every day. The side of your house that faces south or west is usually the best location.

Temperature also plays a major role. Melons grow best in warm conditions between 22°C and 32°C. Cold temperatures slow growth and affect fruit development.

Avoid planting melons in shaded or damp areas. Lack of sunlight leads to weak vines and poor fruit quality.

If you live in a cooler region, wait until all risk of frost has passed before planting.


Preparing the Growing Area

Proper soil preparation is the foundation of healthy melon plants.

Start by clearing weeds, stones, and debris from the side yard. Loosen the soil to a depth of at least 30 centimeters. This allows roots to grow freely.

Melons prefer well-draining, fertile soil rich in organic matter. Improve soil quality by mixing in:

  • Compost or well-rotted manure
  • Vermicompost
  • Coco peat or sand for drainage

The ideal soil pH is between 6.0 and 6.8. Slightly acidic soil helps plants absorb nutrients efficiently.

If your soil is poor or space is limited, you can use large containers, grow bags, or raised beds beside the house.


Planting Melon Seeds or Seedlings

You can grow melons from seeds or seedlings. Seeds are cheaper, while seedlings save time.

For direct sowing:

Make small holes about 2 centimeters deep. Place two or three seeds in each hole and cover lightly with soil. Water gently.

For seedlings:

Dig holes slightly larger than the root ball. Place the plant carefully and cover with soil. Press gently and water well.

Space plants about 60 to 90 centimeters apart. Proper spacing improves airflow and reduces disease.

If planting near a wall, leave enough distance for roots to spread and vines to climb.


Training Vines Along Walls and Supports

One of the best ways to grow melons beside your house is vertical gardening. Training vines upward saves space and keeps fruits clean.

You can use:

  • Trellises
  • Bamboo frames
  • Wire mesh
  • Wall hooks with strings
  • Fences

Install supports before vines grow long. Gently guide young vines toward the structure and tie them loosely with soft string.

As fruits develop, support them using cloth slings, net bags, or old fabric. This prevents them from falling and breaking off.

Vertical growing improves sunlight exposure and reduces pest problems.


Watering Correctly

Watering is crucial for melon growth and fruit quality.

Melons need consistent moisture, especially during flowering and fruit development. However, overwatering can cause root rot and bland-tasting fruits.

Follow these watering tips:

  • Water deeply two to three times a week
  • Keep soil moist but not soggy
  • Avoid wetting leaves excessively
  • Water early morning or evening

Reduce watering slightly when fruits begin to ripen. This helps improve sweetness.

Mulching with straw, dry leaves, or grass clippings helps retain moisture and control weeds.


Feeding and Fertilizing

Melons are heavy feeders and require regular nutrients for healthy growth.

Before planting, mix compost into the soil. During growth, apply organic fertilizers such as:

  • Vermicompost
  • Compost tea
  • Cow dung liquid
  • Fish emulsion
  • Seaweed extract

Apply fertilizer every two to three weeks during the growing season.

Use nitrogen-rich fertilizer early for leaf growth, and switch to potassium-rich fertilizer during flowering and fruiting.

Avoid excessive chemical fertilizers, as they can harm soil health and reduce fruit quality.


Pruning and Managing Growth

Pruning helps direct plant energy toward fruit production.

Remove weak, damaged, or overcrowded vines. Pinch off excess side shoots if the plant becomes too dense.

Once the main vine produces several fruits, trim unnecessary growth. This improves airflow and sunlight penetration.

Limit each plant to three to five fruits for better size and sweetness.

Regular pruning also reduces pest and disease problems.


Controlling Pests and Diseases

Common melon pests include aphids, spider mites, fruit flies, and beetles. Diseases such as powdery mildew and leaf spot are also common.

Prevent problems by:

  • Inspecting plants regularly
  • Removing infected leaves
  • Keeping area clean
  • Maintaining proper spacing
  • Improving air circulation

Use natural remedies such as neem oil, garlic spray, or soap water for pest control.

Avoid spraying chemicals during flowering, as they harm pollinators.

Healthy plants are naturally more resistant to pests and diseases.


Pollination and Fruit Development

Melon plants produce male and female flowers. Pollination is necessary for fruit formation.

Bees and insects usually handle this naturally. However, if pollinators are scarce, you can hand-pollinate.

Use a soft brush to transfer pollen from male flowers to female flowers. Female flowers have a small fruit-like swelling at the base.

Proper pollination ensures well-shaped, fully developed fruits.


Harvesting Melons at the Right Time

Harvesting at the correct stage is important for flavor and sweetness.

Signs of ripe melons include:

  • Sweet fragrance near the stem
  • Yellowing of the underside
  • Drying of the stem
  • Easy separation from vine
  • Deepened color

For watermelons, a hollow sound when tapped often indicates ripeness.

Use clean scissors or a knife to cut fruits. Do not pull them forcefully.

Harvest in the morning for best freshness.


Growing Melons in Containers Beside the House

If soil space is limited, containers are a great alternative.

Use large pots or grow bags of at least 40 liters capacity. Fill with rich potting mix and compost.

Place containers near a sunny wall. Provide strong supports for climbing.

Container-grown melons require more frequent watering and feeding but are easy to manage.

They are ideal for balconies, patios, and narrow side spaces.


Common Mistakes to Avoid

Beginners often make mistakes that affect melon production.

Avoid these common errors:

  • Planting in shaded areas
  • Overwatering
  • Poor soil preparation
  • Ignoring supports
  • Overcrowding plants
  • Skipping fertilization

Learning from these mistakes improves success in future seasons.


Benefits of Growing Melons at Home

Growing melons beside your house offers many advantages.

You get fresh, chemical-free fruits.
You save money on groceries.
You improve food security.
You enjoy gardening as a hobby.
You enhance your home environment.

Watching fruits grow from flowers is deeply satisfying and rewarding.


Conclusion

Growing melons beside your house is an easy and practical method for home gardeners who want fresh, healthy fruits without needing a large garden. With proper sunlight, fertile soil, vertical supports, and regular care, even small spaces can produce abundant harvests.

By choosing the right variety, managing water and nutrients, controlling pests naturally, and harvesting at the right time, you can enjoy sweet, juicy melons straight from your home garden.

Start small, stay consistent, and learn from each season. With patience and dedication, your side yard can become a productive melon garden that brings joy, nutrition, and satisfaction to your daily life.

How to Create a Vertical Garden from Plastic Bottles: Easy DIY Guide for Sustainable Living

How to Create a Vertical Garden from Plastic Bottles: Easy DIY Guide for Sustainable Living

As urban spaces become smaller and environmental concerns grow, many people are looking for creative ways to live more sustainably. One simple and effective solution is creating a vertical garden using recycled plastic bottles. This eco-friendly project helps reduce waste, saves space, and allows you to grow herbs, flowers, or vegetables even in limited areas. Whether you live in an apartment, have a small balcony, or want to add greenery to a wall or fence, a bottle-based vertical garden is an affordable and rewarding option.

This easy DIY guide will walk you through everything you need to know to create your own vertical garden from plastic bottles and enjoy the benefits of sustainable living.


Why Choose a Plastic Bottle Vertical Garden?

Plastic bottles are one of the most common household waste items. Instead of throwing them away, reusing them for gardening gives them a second life and reduces environmental pollution.

Vertical gardens made from bottles are ideal for small spaces because they use vertical surfaces rather than horizontal ground. They are lightweight, customizable, and suitable for indoor or outdoor use. In addition, growing your own plants helps improve air quality, reduces grocery expenses, and promotes healthier eating habits.

This project is perfect for beginners, students, families, and anyone interested in green living without spending much money.


Materials You Will Need

Before starting, gather all the necessary materials. Most of these items are easy to find at home or in local stores.

You will need several clean plastic bottles, preferably 1.5-liter or 2-liter bottles. Transparent bottles work best, as they allow you to monitor soil moisture. You will also need a sharp cutter or scissors, a nail or screwdriver for making holes, strong string, rope, or wire, and hooks or wall nails for hanging.

Other essential materials include potting soil, compost, small stones or gravel for drainage, seeds or seedlings, and a marker for marking cut lines. Optional items include paint, brushes, and decorative materials if you want to personalize your garden.


Choosing the Right Location

Location plays a key role in the success of your vertical garden. Most plants need at least five to six hours of sunlight each day, so choose a spot that receives adequate light.

Good locations include balconies, window grills, terrace walls, fences, patios, or sunny indoor windows. If you plan to hang the bottles on a wall, make sure it is strong enough to support their weight when filled with soil and water.

Also consider accessibility. You should be able to water, trim, and harvest your plants easily. Avoid placing the garden where strong winds or heavy rain may damage it.


Preparing the Plastic Bottles

Start by washing the bottles thoroughly to remove any residue. Remove labels and let them dry completely.

Next, decide on the orientation. The most common method is horizontal placement, where the bottle lies on its side. Mark a rectangular opening on one side of each bottle using a marker. This opening will serve as the planting area.

Carefully cut along the marked lines using scissors or a cutter. Make sure the edges are smooth to avoid injury. Then, use a heated nail or screwdriver to make small drainage holes at the bottom of each bottle. These holes are essential to prevent water from collecting and causing root rot.

If you plan to hang the bottles vertically, make two small holes near both ends of the bottle for threading rope or wire.


Creating the Hanging System

A strong and secure hanging system is crucial for your vertical garden. Measure the distance between bottles and decide how many rows you want.

Cut equal lengths of rope or wire. Thread them through the holes you made in the bottles, ensuring each bottle is balanced. Tie strong knots below each bottle to keep them in place.

If you are attaching the bottles to a wall, install hooks, nails, or screws at equal distances. Hang the ropes on these supports, making sure everything is level and stable.

For fence or grill installations, you can tie the bottles directly using wire or zip ties.

Always test the setup by gently pulling on it before adding soil and plants.


Preparing the Soil Mix

Healthy soil is the foundation of successful gardening. Since bottles have limited space, the soil must be light, fertile, and well-draining.

A good basic mix includes two parts potting soil, one part compost, and one part coco peat or sand. Compost provides nutrients, while coco peat improves moisture retention and aeration.

If you are growing herbs or vegetables, you may add a small amount of organic fertilizer. Avoid using heavy garden soil, as it can become compacted and restrict root growth.

Mix all components thoroughly before filling the bottles.


Filling and Planting

Place a thin layer of small stones or gravel at the bottom of each bottle to improve drainage. Then fill the bottle with prepared soil, leaving about one inch of space at the top.

For seeds, follow the recommended planting depth mentioned on the seed packet. Usually, seeds should be planted shallowly and covered lightly with soil. Water gently after planting.

For seedlings, create a small hole in the soil, place the plant carefully, and press the soil around its base. Avoid damaging the roots.

Do not overcrowd each bottle. One medium-sized plant or two small herbs per bottle is usually enough.


Choosing the Right Plants

Not all plants are suitable for vertical bottle gardens. Choose varieties with shallow root systems and compact growth.

Herbs such as mint, basil, coriander, parsley, thyme, and oregano grow very well in bottles. Leafy greens like spinach, lettuce, fenugreek, and arugula are also excellent choices.

For flowers, consider petunias, marigolds, begonias, and pansies. These add color and attract pollinators.

Small vegetables like cherry tomatoes, chilies, strawberries, and spring onions can also thrive if given proper care.

Avoid plants with large root systems, such as pumpkins or potatoes, as they need more space.


Watering and Maintenance

Vertical gardens tend to dry out faster than ground gardens, so regular watering is essential. Check the soil daily by touching it. If it feels dry, water gently.

Water from the top so that excess moisture flows down to lower bottles. This ensures even distribution. However, avoid overwatering, as soggy soil can lead to fungal problems.

Fertilize every two to three weeks using diluted organic liquid fertilizer or compost tea. This replenishes nutrients in the limited soil space.

Prune dead leaves, trim overgrown plants, and remove weeds regularly to keep the garden healthy and attractive.


Managing Pests and Diseases

Vertical gardens are less prone to pests, but insects like aphids, mites, and caterpillars may still appear. Inspect plants weekly for signs of damage.

If pests are present, spray a mixture of neem oil and water or use mild soapy water. These natural remedies are safe and effective.

Ensure good airflow between bottles to prevent fungal diseases. Do not place bottles too close together, and avoid watering leaves directly.

Remove infected plants immediately to stop the spread of disease.


Decorating and Personalizing Your Garden

One of the joys of a DIY vertical garden is customization. You can paint bottles in bright colors, add labels, or create patterns on the wall.

You may organize plants according to color, type, or height for visual appeal. Mixing flowers and herbs creates both beauty and function.

Adding fairy lights, small name tags, or decorative stones can enhance the overall look, especially on balconies or patios.

A well-designed vertical garden can become a focal point of your home.


Environmental and Lifestyle Benefits

Creating a vertical garden from plastic bottles contributes directly to environmental protection. It reduces plastic waste, lowers carbon footprint, and promotes recycling.

Growing your own plants reduces dependence on packaged produce and helps you consume fresher, healthier food. Gardening also improves mental well-being, reduces stress, and encourages mindfulness.

For families, this project is an excellent way to teach children about sustainability and responsibility.


Final Thoughts

A vertical garden made from plastic bottles is a simple yet powerful step toward sustainable living. It transforms waste into beauty, saves space, and brings nature closer to your daily life.

With minimal cost and effort, you can create a thriving green wall that provides fresh herbs, colorful flowers, and personal satisfaction. By following this easy DIY guide, you can start your journey toward eco-friendly living and inspire others to do the same.

In a world where small actions make a big difference, your bottle garden is proof that sustainability can begin right at home.

Beginner’s Magic: How to Turn Plastic Bottles Into a Thriving Vegetable Garden From Seeds!

Beginner’s Magic: How to Turn Plastic Bottles Into a Thriving Vegetable Garden From Seeds!

Growing your own vegetables may seem difficult if you have limited space, no backyard, or little gardening experience. However, with creativity and simple household items, anyone can start a productive garden. One of the easiest and most affordable ways is by using plastic bottles as planters. These everyday items can be transformed into mini gardens that support healthy plant growth from seed to harvest.

Turning plastic bottles into a thriving vegetable garden is not only budget-friendly but also environmentally responsible. It reduces waste, promotes sustainable living, and brings fresh food closer to your kitchen. This guide explains how beginners can use plastic bottles to grow vegetables successfully, even in small apartments or urban homes.


Why Use Plastic Bottles for Gardening?

Plastic bottles are lightweight, waterproof, and easily available. Instead of throwing them away, reusing them as planters gives them a second life and reduces environmental pollution.

One major advantage is affordability. Traditional pots and gardening containers can be expensive. Plastic bottles cost nothing and can be collected easily.

They are also flexible in design. Bottles come in various shapes and sizes, allowing you to grow different vegetables according to their root depth.

Using recycled bottles encourages eco-conscious habits. It teaches beginners that gardening and environmental care can go hand in hand.

Another benefit is portability. Bottle planters are easy to move, allowing you to adjust sunlight exposure when needed.


Understanding the Basics of Bottle Gardening

Before starting, it is important to understand how bottle gardening works. In this method, plastic bottles act as containers that hold soil, seeds, and water.

Because bottles are smaller than traditional pots, they require more attention to watering and nutrients. However, they also allow better control over plant conditions.

Bottle gardens work well for balconies, windowsills, rooftops, and even indoor spaces near sunlight.

With proper drainage, soil, and care, these simple containers can support healthy vegetable growth.


Materials You Will Need

Getting started does not require expensive tools. Most materials are easily found at home.

You will need:

  • Empty plastic bottles (1 to 2 liter size works well)
  • Scissors or sharp knife
  • Marker pen
  • Nail or heated metal rod
  • Potting soil or garden mix
  • Small stones or gravel
  • Vegetable seeds
  • Water spray bottle
  • Rope or wire for hanging (optional)

Optional items include paint, stickers, or rope for decoration.


Preparing Plastic Bottles

Start by cleaning the bottles thoroughly. Remove labels and wash away any residue. Let them dry completely.

Decide how you want to use the bottle. You can cut it horizontally, vertically, or make a side opening depending on your design.

Mark the cutting lines using a marker and cut carefully. Smooth sharp edges if needed.

Make several small drainage holes at the bottom using a heated nail or screwdriver. These holes prevent water from collecting and damaging roots.

Place a thin layer of gravel inside the bottle before adding soil. This improves drainage and airflow.


Choosing the Right Vegetable Seeds

Not all vegetables grow well in small containers, so choosing suitable seeds is important for beginners.

Best vegetables for bottle gardening include:

  • Lettuce
  • Spinach
  • Fenugreek
  • Coriander
  • Basil
  • Mint
  • Radish
  • Green onions
  • Cherry tomatoes
  • Chili peppers

Leafy greens and herbs are ideal for beginners because they grow quickly and need less space.

Root vegetables like carrots can grow in deeper bottles, but short varieties are recommended.

Always use fresh, good-quality seeds for better results.


Preparing the Soil Mix

Healthy soil is the foundation of a successful garden. Garden soil alone is often too heavy for containers.

A good soil mix can be made by combining:

  • Two parts potting soil
  • One part compost or vermicompost
  • One part sand or coco peat

This mixture ensures good drainage, nutrients, and root aeration.

Fill the bottle with soil, leaving about two centimeters at the top for watering.

Moisten the soil lightly before planting seeds.


Planting Seeds Properly

Planting seeds correctly improves germination and growth.

Make small holes in the soil using your finger. The depth depends on seed size. Generally, seeds should be planted at a depth twice their size.

Place one to three seeds in each hole, depending on bottle size. Cover lightly with soil and press gently.

Water using a spray bottle to avoid disturbing the seeds.

Label your bottles if you are growing different vegetables.

Keep the soil moist but not soaked during germination.


Providing the Right Light

Sunlight is essential for vegetable growth. Most plants need at least five to six hours of light daily.

Place your bottle garden near:

  • A sunny window
  • Balcony railing
  • Rooftop
  • Terrace edge

If natural light is limited, use LED grow lights for indoor gardening.

Rotate bottles occasionally so all sides receive equal light.

Without enough sunlight, plants become weak and thin.


Watering and Moisture Management

Because plastic bottles hold limited soil, they dry out faster than ground gardens.

Check soil moisture daily by touching the surface. Water when it feels dry.

Use a spray bottle for young plants and a gentle stream for mature ones.

Avoid overwatering, as this leads to root rot and fungal problems.

Ensure excess water drains out freely through holes.

Early morning or evening is the best time to water.


Feeding Your Plants

Vegetables in containers depend entirely on soil nutrients, so regular feeding is necessary.

Use organic fertilizers such as:

  • Compost tea
  • Vermicompost
  • Banana peel water
  • Mustard cake solution

Apply liquid fertilizer every two to three weeks.

Avoid excessive feeding, as it can damage roots and attract pests.

Healthy feeding promotes strong growth and better harvests.


Supporting and Training Plants

Some vegetables, especially tomatoes and peppers, need support as they grow.

Use small sticks, bamboo skewers, or wire frames for support.

Tie stems gently with soft thread to prevent damage.

Trailing plants can be trained along walls or railings.

Supporting plants improves airflow and reduces disease risk.


Preventing Pests and Diseases

Even small bottle gardens can attract pests.

Common pests include aphids, whiteflies, and spider mites.

Use natural remedies such as:

  • Neem oil spray
  • Soap water spray
  • Garlic-chili solution

Inspect plants regularly and remove infected leaves.

Good airflow and sunlight reduce disease problems.

Avoid using chemical pesticides, especially for edible crops.


Harvesting Your Vegetables

Harvesting at the right time improves taste and encourages more growth.

Leafy greens can be harvested by cutting outer leaves while leaving the center intact.

Herbs should be trimmed regularly to promote bushy growth.

Tomatoes and chilies should be picked when fully colored.

Use clean scissors or hands for harvesting.

Frequent harvesting keeps plants productive.


Creative Ways to Arrange Bottle Gardens

Arrangement plays a big role in maximizing space and beauty.

You can create:

  • Hanging bottle gardens
  • Wall-mounted vertical gardens
  • Shelf gardens
  • Window box rows
  • Stacked bottle towers

Vertical setups are perfect for small apartments.

Creative layouts improve sunlight exposure and visual appeal.


Common Beginner Mistakes to Avoid

Many beginners make simple mistakes that affect success.

Do not skip drainage holes.
Avoid overcrowding plants.
Do not overwater.
Avoid poor-quality soil.
Do not ignore sunlight needs.

Learning from mistakes is part of gardening.


Benefits of Bottle Gardening

Plastic bottle gardening offers many advantages.

It saves money.
It reduces plastic waste.
It provides fresh, chemical-free vegetables.
It improves mental well-being.
It encourages sustainable living.

It also builds confidence and patience in beginners.


Conclusion

Turning plastic bottles into a thriving vegetable garden truly feels like beginner’s magic. With simple tools, basic knowledge, and consistent care, anyone can grow fresh vegetables from seeds at home.

This eco-friendly method reduces waste, saves money, and makes gardening accessible to everyone, regardless of space limitations. From preparing bottles to harvesting crops, each step brings learning and satisfaction.

By starting small and staying patient, you can transform discarded bottles into productive green spaces. One seed, one bottle, and one effort at a time, you can create a healthy, sustainable garden that nourishes both your body and the environment.

Wonderful Flower Pots: Creative Plastic Bottle Recycling Ideas for Eco-Friendly Gardens

Wonderful Flower Pots: Creative Plastic Bottle Recycling Ideas for Eco-Friendly Gardens

In today’s world, where environmental concerns are growing rapidly, finding simple ways to reduce waste has become more important than ever. One of the most effective and creative solutions is recycling plastic bottles into beautiful flower pots. Instead of throwing empty bottles into trash bins, you can transform them into charming planters that enhance your garden while protecting the planet. These recycled pots are affordable, customizable, and suitable for homes of all sizes, from apartments to large houses.

Creating wonderful flower pots from plastic bottles is not only an eco-friendly practice but also a fun and meaningful activity. It allows you to combine creativity with sustainability, turning waste into something useful and attractive. This article explores inspiring ideas, practical methods, and modern trends in plastic bottle recycling for eco-friendly gardens.


Why Choose Plastic Bottle Flower Pots?

Plastic bottles are lightweight, waterproof, and highly durable. These qualities make them ideal containers for plants. When reused as flower pots, they help reduce environmental pollution and minimize landfill waste.

One major advantage is cost-effectiveness. Traditional ceramic or clay pots can be expensive, especially when decorating balconies, terraces, or indoor gardens. Plastic bottle planters cost almost nothing and are easy to replace if damaged.

Recycling bottles also promotes environmental awareness. When people see creative recycled pots, they become more conscious of waste management and sustainable living. This inspires positive habits within families and communities.

Another benefit is flexibility. Bottles come in many shapes and sizes, allowing you to grow different types of plants in customized containers.


Understanding the Environmental Impact

Plastic waste is one of the biggest threats to ecosystems worldwide. It takes hundreds of years to decompose and often breaks down into microplastics that contaminate soil and water.

By recycling plastic bottles into flower pots, you help slow down this harmful process. Each reused bottle represents one less item polluting the environment. Over time, these small actions create significant positive change.

Upcycling also supports the idea of a circular economy, where materials are reused instead of discarded. This reduces the need for new plastic production, saving energy and natural resources.

Eco-friendly gardening using recycled materials is becoming a powerful movement for environmental protection.


Materials Needed for DIY Bottle Pots

Before starting your project, gather some basic supplies. Most of these items are easily available at home.

You will need:

  • Empty plastic bottles of different sizes
  • Scissors or a sharp craft knife
  • Marker pen
  • Acrylic or spray paints
  • Paintbrushes
  • Nail or heated metal rod
  • Rope, wire, or string
  • Potting soil
  • Small stones or gravel
  • Plants or seeds

Optional decorations include ribbons, buttons, fabric, stickers, and beads.

Having these materials ready makes the process smooth and enjoyable.


Preparing Bottles for Planting

Start by washing the bottles thoroughly. Remove labels, glue, and any leftover liquid. Let them dry completely.

Decide on the shape of your pot. Mark cutting lines with a marker. You can cut bottles horizontally, vertically, or diagonally depending on your design.

Use scissors or a knife carefully to cut along the marked lines. Smooth sharp edges with sandpaper if necessary.

Make drainage holes at the bottom using a heated nail or metal rod. Proper drainage is essential for healthy plant roots.

Add a thin layer of gravel inside the bottle before filling it with soil. This helps prevent waterlogging.


Creative Plastic Bottle Pot Designs

There are countless ways to turn plastic bottles into wonderful flower pots. Here are some popular and creative ideas.

Hanging Bottle Planters
Cut a side opening, make two small holes near the top, and insert rope or wire. These hanging pots are perfect for balconies and windows. They work well with trailing plants like pothos and ivy.

Animal-Shaped Pots
Create cute animal designs by cutting ears and painting faces. Rabbits, cats, bears, and frogs are popular choices. These pots are especially loved by children.

Vertical Garden Bottles
Arrange multiple bottles on a wall or frame to create a vertical garden. This saves space and improves air quality. It is ideal for small apartments.

Self-Watering Planters
Cut the bottle into two parts. Place the top section upside down inside the bottom and add a cotton wick. This design keeps soil moist for longer periods.

Window Box Planters
Join several bottles together to create long containers for windowsills. These are perfect for herbs and small flowers.

Stacked Tower Pots
Stack bottles vertically on a central rod to create a tower garden. This is excellent for growing leafy greens.


Painting and Decoration Ideas

Decoration is what transforms simple bottles into attractive flower pots. Acrylic paint is ideal because it sticks well to plastic.

Before painting, lightly sand the surface for better adhesion. Apply a base coat and let it dry. Then add patterns, designs, or colors.

You can use stencils for neat shapes or sponge painting for textured effects. Floral prints, geometric patterns, and pastel shades are popular styles.

For a rustic look, wrap bottles with jute rope or twine using glue. This gives a natural, earthy appearance.

Decoupage is another creative method. Paste paper cutouts or fabric pieces and seal them with varnish.

Glow-in-the-dark paint adds beauty and safety to outdoor pots at night.


Choosing Suitable Plants

Selecting the right plants is essential for success in recycled pots. Not all plants thrive in small containers.

Herbs such as basil, mint, parsley, and coriander grow very well in bottle planters. They are useful and easy to maintain.

Succulents and cacti are perfect for beginners. They need minimal water and adapt well to small spaces.

Flowering plants like marigolds, petunias, pansies, and begonias bring color and fragrance.

Trailing plants such as money plant, spider plant, and ivy look beautiful in hanging bottles.

Leafy vegetables like lettuce, spinach, and fenugreek can also be grown in larger bottles.

Always consider sunlight and water needs when choosing plants.


Caring for Bottle Planters

Proper maintenance ensures healthy plants and long-lasting pots.

Water plants according to their requirements. Plastic containers retain moisture, so avoid overwatering.

Place pots where they receive suitable sunlight. Most flowering plants need four to six hours daily.

Check drainage holes regularly to prevent blockage.

Use organic compost or liquid fertilizer occasionally to replenish nutrients.

Clean pots if algae or dirt accumulates on the surface.

Repaint or repair decorations if they fade or peel over time.


Sustainable Gardening Trends

Recycled gardening has become part of a larger sustainability movement. Many people now prefer eco-friendly décor over mass-produced items.

Vertical gardens made from plastic bottles are popular in urban areas. They help reduce heat and improve air quality.

Community gardening projects encourage people to create recycled planters together. These initiatives promote teamwork and environmental awareness.

Eco-friendly home décor is another growing trend. Handmade recycled pots are featured in lifestyle blogs and interior design magazines.

Social media platforms play a major role in spreading these ideas. DIY tutorials inspire millions to try recycling at home.

Schools also use recycled planters in environmental education programs.


Educational and Social Benefits

Recycling bottles into flower pots offers more than environmental benefits.

For children, it teaches creativity, responsibility, and respect for nature. Gardening improves patience and problem-solving skills.

For families, DIY projects strengthen bonds and encourage shared learning.

For communities, recycling activities promote cooperation and collective responsibility.

For individuals, gardening reduces stress and improves mental well-being.

These benefits make recycled gardening a valuable lifestyle practice.


Common Mistakes to Avoid

Beginners often make small mistakes that affect results.

Do not skip drainage holes, as waterlogging damages roots.
Avoid using bottles that contained harmful chemicals.
Do not overcrowd plants.
Avoid placing pots in poor lighting.
Do not use low-quality soil.

Learning from mistakes improves your skills over time.


Conclusion

Wonderful flower pots made from recycled plastic bottles prove that creativity and sustainability can go hand in hand. With simple tools and imagination, anyone can transform waste into beautiful, functional garden décor.

These eco-friendly planters reduce pollution, save money, and encourage responsible living. They make gardening accessible to people with limited space and resources.

As sustainable trends continue to grow, plastic bottle recycling stands out as a practical and inspiring solution. By choosing to upcycle, you contribute to a greener future while enhancing your living space.

One bottle, one plant, and one creative idea at a time, you can help build an eco-friendly garden that reflects care for nature and commitment to a healthier planet.

How Can You Successfully Grow Chickpeas in a Simple Garden Pot?

How Can You Successfully Grow Chickpeas in a Simple Garden Pot?

Growing your own chickpeas at home may sound unusual, but it is surprisingly easy and rewarding. Chickpeas, also known as garbanzo beans, are nutritious, versatile, and well-suited for container gardening. With the right pot, soil, sunlight, and care, you can enjoy a healthy harvest even in a small space. Whether you live in an apartment, have a balcony, or just want to experiment with home gardening, growing chickpeas in a simple pot is a practical and satisfying project.


Understanding Chickpea Plants

Chickpeas are cool-season legumes that thrive in moderate temperatures. They grow as bushy plants, usually reaching about 12 to 24 inches in height. Each plant produces small white, pink, or purple flowers that later develop into pods. Inside each pod are one or two chickpeas.

Unlike climbing beans, chickpeas do not need trellises. They grow upright and compact, making them ideal for containers. They also improve soil health by fixing nitrogen, which benefits other plants if you rotate crops later.


Choosing the Right Pot

Selecting the correct pot is the first step toward success. Chickpea plants develop long roots, so shallow containers are not suitable.

Choose a pot that is at least 10 to 12 inches deep and wide. Larger pots, around 14 inches, are even better because they provide more space for root growth. Make sure the container has drainage holes at the bottom. Without proper drainage, excess water can collect and cause root rot.

Plastic, ceramic, or clay pots all work well. Clay pots allow better airflow but dry out faster, while plastic pots retain moisture longer. Pick one that matches your watering habits and climate.


Preparing the Best Soil

Chickpeas prefer loose, well-draining soil. Heavy or compacted soil can prevent roots from developing properly and may lead to poor growth.

Use a high-quality potting mix rather than garden soil. Potting mixes are lighter and provide better drainage. For extra nutrition, mix in compost or well-rotted manure. A good ratio is three parts potting mix to one part compost.

The ideal soil pH for chickpeas is slightly acidic to neutral, between 6.0 and 7.0. Most commercial potting soils fall within this range, so testing is usually unnecessary unless you want to be precise.


Selecting and Preparing Seeds

Always choose high-quality chickpea seeds. You can buy seeds from garden centers or reputable online suppliers. If you plan to use dried chickpeas from a grocery store, make sure they are not heat-treated, as this can prevent germination.

Before planting, soak the seeds in water for 8 to 12 hours. This softens the seed coat and helps speed up germination. After soaking, drain the water and let the seeds dry slightly before planting.

Avoid using damaged or moldy seeds, as they are unlikely to sprout.


Planting Chickpeas in Pots

Fill your pot with prepared soil, leaving about one inch of space at the top. Gently level the surface without compacting it.

Plant each seed about 1 to 2 inches deep. If your pot is wide enough, you can plant two or three seeds, spacing them at least 4 inches apart. This prevents overcrowding and allows each plant to grow properly.

Cover the seeds lightly with soil and water gently until the soil is evenly moist.

Place the pot in a warm, sunny location immediately after planting.


Providing the Right Sunlight

Chickpeas need plenty of sunlight to grow well. They require at least six to eight hours of direct sunlight every day.

Place your pot on a sunny balcony, terrace, windowsill, or garden spot that receives consistent light. If sunlight is limited, growth may be weak, and flowering may be reduced.

If you are growing indoors, consider placing the pot near a south-facing window or using grow lights to supplement natural light.


Watering the Correct Way

Proper watering is essential for healthy chickpea plants. The soil should be kept moist but never waterlogged.

Water the pot when the top inch of soil feels dry. During hot weather, this may mean watering every day or every two days. In cooler conditions, watering once or twice a week may be enough.

Always water slowly and deeply so moisture reaches the roots. Avoid splashing water on leaves, as this can encourage fungal diseases.

As the plants mature and begin producing pods, reduce watering slightly. Overwatering at this stage can affect pod development.


Feeding and Fertilizing

Chickpeas are light feeders because they fix nitrogen from the air into the soil. This means they usually do not require heavy fertilization.

At planting time, mixing compost into the soil is usually sufficient. If the plants appear weak or pale, you can apply a balanced liquid fertilizer once every three to four weeks.

Avoid fertilizers high in nitrogen, as too much nitrogen encourages leaf growth at the expense of flowers and pods. A fertilizer with equal or lower nitrogen compared to phosphorus and potassium works best.


Supporting Healthy Growth

Although chickpea plants are sturdy, they may need light support if they become top-heavy. Small stakes can help prevent bending or falling over, especially in windy locations.

Regularly remove weeds if they appear in the pot, as they compete for nutrients and water. Also, gently loosen the soil surface occasionally to improve airflow and prevent crusting.

Pinching is usually unnecessary, but removing damaged or diseased leaves helps maintain plant health.


Preventing Pests and Diseases

Chickpeas are relatively resistant to pests, but they can still be affected by aphids, leaf miners, and caterpillars. Inspect your plants regularly for signs of insects.

If pests appear, wash them off with a strong spray of water or use neem oil or insecticidal soap. Avoid harsh chemical pesticides, especially if you plan to eat the harvest.

Fungal diseases such as root rot and leaf spot can occur if the soil remains too wet. Good drainage, proper spacing, and careful watering are the best prevention methods.

Make sure your pot receives good air circulation to reduce humidity around the plants.


Knowing When to Harvest

Chickpeas can be harvested in two main ways: as green chickpeas or as dried chickpeas.

For green chickpeas, harvest when the pods are plump but still green. This usually happens about 70 to 90 days after planting. These fresh chickpeas can be eaten cooked or roasted.

For dried chickpeas, allow the pods to turn brown and dry on the plant. The leaves will begin to yellow and fall off. This stage occurs around 100 to 120 days after planting.

Once most pods are dry, cut the plant at the base and hang it upside down in a dry, well-ventilated area for one to two weeks. After drying, remove the seeds from the pods and store them in airtight containers.


Storing and Using Your Chickpeas

Properly dried chickpeas can be stored for up to a year in a cool, dark place. Make sure they are completely dry before storage to prevent mold.

Homegrown chickpeas are perfect for making hummus, curries, salads, soups, and roasted snacks. Their fresh taste and texture are often superior to store-bought versions.

You can also save some seeds for the next planting season, creating a sustainable gardening cycle.


Common Mistakes to Avoid

One of the most common mistakes is using a pot that is too small. Restricted roots lead to weak plants and low yields. Always choose a sufficiently deep container.

Overwatering is another frequent problem. Chickpeas prefer slightly dry conditions rather than soggy soil. Poor drainage almost always leads to disease.

Lack of sunlight can also limit growth. Without enough light, plants become leggy and produce fewer pods.

Finally, using too much fertilizer, especially nitrogen-rich types, can result in lush leaves but very few chickpeas.


Final Thoughts

Growing chickpeas in a simple garden pot is an excellent way to enjoy fresh, healthy food while making the most of limited space. With the right container, quality soil, proper sunlight, and balanced care, even beginners can succeed.

This low-maintenance crop rewards patience with a generous harvest and adds beauty to balconies, patios, and small gardens. By following these steps and paying attention to your plant’s needs, you can confidently grow your own chickpeas and experience the satisfaction of home gardening from seed to plate

From Fruit to Tree: The Complete Guide to Growing an Orange Tree from a Fresh Orange

From Fruit to Tree: The Complete Guide to Growing an Orange Tree from a Fresh Orange

Growing an orange tree from a fresh orange is a rewarding and fascinating experience. It allows you to witness the entire life cycle of a plant, from a tiny seed to a thriving fruit-bearing tree. While it requires patience and care, this process is accessible even to beginners and can be done at home with simple materials. Whether you want to grow an orange tree for fun, decoration, or eventual fruit production, this complete guide will walk you through every step.


Understanding Orange Seeds and Their Potential

Oranges contain small seeds that can sprout and grow into trees under the right conditions. These seeds are capable of producing healthy plants, although it is important to understand that trees grown from seed may not produce fruit identical to the parent fruit. This is because many commercial oranges are hybrids.

Seed-grown orange trees often take longer to bear fruit than grafted nursery trees. However, they are usually strong, adaptable, and suitable for home growing, especially in containers.

Growing from seed is best viewed as a long-term project and a learning experience rather than a quick way to harvest fruit.


Choosing the Right Orange

The quality of your orange plays an important role in successful germination. Always choose fresh, ripe, and preferably organic oranges. Organic fruits are less likely to be treated with chemicals that may affect seed viability.

Avoid oranges that are overly processed, waxed, or stored for long periods. Freshly purchased or homegrown oranges work best.

Select fruits that contain well-developed seeds. Some modern varieties are seedless, so check before starting.


Extracting and Preparing the Seeds

Begin by cutting the orange and removing the seeds carefully. Avoid damaging them during extraction. Rinse the seeds under clean water to remove any pulp or sugar residue, as leftover fruit material can cause mold.

Once cleaned, inspect the seeds. Healthy seeds are plump, firm, and light-colored. Discard any that appear dark, shriveled, or damaged.

Some gardeners prefer to soak seeds in lukewarm water for 12 to 24 hours. This softens the seed coat and improves germination. After soaking, gently dry them on a paper towel.

Do not allow the seeds to dry completely for long periods, as citrus seeds lose viability when fully dried.


Preparing the Growing Medium

Orange seeds need well-draining, nutrient-rich soil to germinate and grow properly. Regular garden soil is often too heavy for young seedlings, so a lighter potting mix is recommended.

You can prepare a suitable mix by combining:

  • Two parts potting soil
  • One part compost or vermicompost
  • One part sand or perlite

This blend ensures good drainage, aeration, and nutrient availability. Slightly acidic soil with a pH between 6 and 7 is ideal for citrus plants.

Fill small pots or seed trays with the prepared soil and moisten it lightly before planting.


Planting the Seeds

Make small holes about one centimeter deep in the soil. Place one seed in each hole with the pointed end facing downward, if visible. Cover gently with soil and press lightly to secure the seed.

Water the soil carefully so it becomes evenly moist but not waterlogged. Excess water can cause seeds to rot.

If planting multiple seeds, space them a few centimeters apart or use separate containers. This prevents root competition later.

Label your pots with the planting date to track progress.


Creating the Right Environment for Germination

Orange seeds need warmth, moisture, and light to germinate. Place the pots in a warm location with temperatures between 20°C and 30°C.

Covering the pots with transparent plastic wrap or a plastic dome helps retain humidity. Make small holes for ventilation to prevent mold.

Keep the soil consistently moist during germination. Use a spray bottle to avoid disturbing the seeds.

Germination usually takes two to four weeks, though some seeds may sprout earlier or later.


Caring for Young Seedlings

Once seedlings emerge, remove any plastic covering and place the pots in a bright area with indirect sunlight. Direct intense sunlight can burn tender leaves.

Young orange plants need at least six hours of light daily. A sunny windowsill or balcony works well. If natural light is limited, grow lights can be used.

Water regularly, allowing the top layer of soil to dry slightly between watering. Overwatering is a common cause of seedling failure.

As the plants grow, thin out weaker seedlings if multiple sprouts appear in one pot. Keep only the strongest one.


Transplanting to Larger Containers

When seedlings reach 10 to 15 centimeters in height and develop several true leaves, they are ready for transplanting. Choose a larger pot with good drainage holes.

Gently remove the seedling along with its root ball to avoid damage. Place it in the new container filled with fresh potting mix.

Press the soil lightly around the roots and water thoroughly. Allow the plant to adjust in a shaded area for a few days before returning it to full light.

As the tree grows, continue repotting every one to two years into slightly larger containers.


Providing Proper Sunlight and Temperature

Orange trees thrive in full sunlight. Mature plants require six to eight hours of direct sunlight daily. Place them in the brightest available location.

If grown outdoors, protect young plants from strong winds and extreme temperatures. Indoor plants should be kept away from cold drafts and air conditioners.

Ideal growing temperatures range from 18°C to 32°C. Prolonged exposure to cold below 10°C can damage citrus plants.

In colder regions, orange trees should be grown in pots and brought indoors during winter.


Watering and Feeding Schedule

Proper watering is essential for healthy growth. Water deeply when the top few centimeters of soil feel dry. Ensure excess water drains freely.

Avoid letting the pot sit in standing water, as this causes root rot.

Orange trees are heavy feeders and require regular nutrients. Use organic compost, vermicompost, or citrus-specific fertilizer.

Feed young plants every four to six weeks during the growing season. Reduce feeding during winter when growth slows.

Liquid fertilizers are useful for quick nutrient absorption, while slow-release fertilizers provide long-term nourishment.


Pruning and Shaping the Tree

Pruning helps develop a strong structure and improves air circulation. Begin light pruning when the tree reaches about 40 centimeters in height.

Remove weak, damaged, or crossing branches. Pinch the tips of young shoots to encourage bushier growth.

Avoid heavy pruning in the first two years, as the plant needs foliage for photosynthesis.

Once mature, annual pruning keeps the tree healthy and productive.


Managing Pests and Diseases

Orange trees can attract pests such as aphids, spider mites, and scale insects. Regular inspection helps detect problems early.

Use natural remedies like neem oil spray, soap water, or garlic solution to control pests. Avoid harsh chemical pesticides, especially for indoor plants.

Fungal diseases can occur in humid conditions. Ensure good ventilation and avoid wetting leaves excessively.

Remove infected leaves promptly to prevent spread.


Flowering and Fruit Development

Seed-grown orange trees typically take three to seven years to produce flowers and fruit. Patience is essential.

When the tree matures, it will produce fragrant white blossoms. These flowers are self-pollinating, so manual pollination is usually unnecessary.

After flowering, small green fruits begin to form. Provide consistent watering and feeding during this stage for healthy development.

Fruit may take six to twelve months to ripen fully, depending on variety and conditions.


Growing Orange Trees Indoors vs Outdoors

Indoor orange trees are easier to control but may grow more slowly. They are ideal for apartments and cold climates.

Outdoor trees grow faster and may produce more fruit if climate conditions are suitable. They need protection from frost and strong winds.

Container-grown trees offer flexibility, allowing you to move them as needed.

Choose the method that best suits your climate and living space.


Common Mistakes to Avoid

Many beginners face challenges when growing orange trees from seed. Avoid these common errors:

  • Overwatering or underwatering
  • Using heavy, poorly draining soil
  • Insufficient sunlight
  • Neglecting fertilization
  • Exposing young plants to cold
  • Expecting quick fruiting

Understanding these issues improves long-term success.


Benefits of Growing an Orange Tree from Seed

Growing an orange tree from a fresh fruit offers many rewards. It promotes patience, responsibility, and environmental awareness.

Homegrown trees improve indoor air quality and add natural beauty to living spaces. Watching a tree grow from seed creates a strong emotional connection with nature.

It also reduces reliance on commercially grown plants and encourages sustainable living practices.


Conclusion

Growing an orange tree from a fresh orange is a fulfilling journey that transforms a simple seed into a living, productive plant. While it requires time, care, and consistency, the process is accessible to anyone willing to learn.

By choosing healthy seeds, preparing proper soil, providing sufficient light and water, and maintaining regular care, you can successfully grow your own orange tree at home. Although fruit production may take years, the experience itself is deeply rewarding.

From fruit to tree, this process teaches patience, appreciation for nature, and the joy of nurturing life. With dedication and attention, your small seed can one day become a beautiful tree that symbolizes growth, perseverance, and sustainability.

Recycle Plastic Bottles into Beautiful Flower Pots: Eco-Friendly DIY Ideas and Sustainable Trends

Recycle Plastic Bottles into Beautiful Flower Pots: Eco-Friendly DIY Ideas and Sustainable Trends

Plastic waste has become one of the biggest environmental challenges of modern times. Millions of plastic bottles are discarded every day, many of which end up in landfills, rivers, and oceans. At the same time, people are becoming more conscious about sustainable living and eco-friendly practices. One creative and practical solution that connects both concerns is recycling plastic bottles into beautiful flower pots.

Transforming used plastic bottles into planters is not only an environmentally responsible choice, but also a fun and rewarding DIY activity. It allows you to reduce waste, save money, and decorate your home with unique handmade designs. This article explores how you can recycle plastic bottles into flower pots, offers creative ideas, and highlights sustainable trends shaping this green movement.


Why Recycle Plastic Bottles into Flower Pots?

Plastic bottles are durable, lightweight, and waterproof, making them ideal for plant containers. Instead of throwing them away, reusing them as flower pots gives them a second life and reduces environmental pollution.

One major benefit is waste reduction. Every bottle reused means one less item in a landfill. Over time, small individual efforts can make a significant impact on the environment.

Another advantage is affordability. Traditional plant pots can be expensive, especially if you want several for your home or balcony. Plastic bottle planters cost almost nothing and are accessible to everyone.

Recycled pots also encourage creativity. You can customize them in countless ways, matching your personal style and home décor. Each planter becomes a unique piece of functional art.


Understanding the Environmental Impact

Plastic takes hundreds of years to decompose. During this time, it releases harmful chemicals and breaks down into microplastics that contaminate soil and water. By reusing bottles for gardening, you slow down this destructive cycle.

Upcycling plastic into planters promotes a circular economy, where materials are reused instead of discarded. It teaches responsible consumption and encourages mindful living.

When people see attractive recycled pots, they become more aware of sustainability. This inspires others to adopt eco-friendly habits, creating a positive ripple effect in communities.


Basic Materials You Will Need

Before starting your DIY project, gather some simple materials. Most of them are easily available at home.

You will need:

  • Empty plastic bottles of different sizes
  • Scissors or craft knife
  • Marker pen
  • Acrylic paints or spray paints
  • Paintbrushes
  • Nail or heated metal rod for drainage holes
  • Soil or potting mix
  • Small stones or gravel
  • Plants or seeds

Optional decorative items include ribbons, twine, stickers, beads, or fabric scraps. These can enhance the appearance of your pots.


Preparing Plastic Bottles for Planting

The first step is cleaning. Wash the bottles thoroughly to remove labels, glue, and residue. Dry them completely before cutting or painting.

Next, decide on the shape of your planter. Mark cutting lines using a marker. You can cut bottles horizontally, vertically, or diagonally depending on your design.

Make drainage holes at the bottom using a heated nail or screwdriver. This prevents water from accumulating and protects plant roots from rot.

Add a thin layer of gravel before filling with soil. This improves drainage and keeps the roots healthy.


Simple DIY Flower Pot Ideas

There are countless ways to transform plastic bottles into attractive planters. Here are some easy and popular ideas.

One of the simplest designs is the horizontal planter. Cut the bottle in half lengthwise, fill it with soil, and place it on a windowsill or shelf. This style works well for herbs and small flowers.

Vertical hanging pots are perfect for small spaces. Cut a side opening, make holes on both ends, and hang the bottle using rope or wire. These are ideal for balconies and walls.

Animal-shaped planters are especially popular for children’s rooms. Cut ears, paint faces, and turn bottles into rabbits, cats, or bears. These playful designs make gardening fun for kids.

Self-watering planters can be made by cutting the bottle in two and placing the top part upside down inside the bottom. A cotton wick carries water to the soil, keeping plants hydrated longer.

Tiered planters use several bottles stacked vertically. This design maximizes space and creates a visually striking garden feature.


Painting and Decorating Techniques

Decoration is what transforms recycled bottles into beautiful flower pots. Acrylic paints work best because they adhere well to plastic and resist water.

Before painting, lightly sand the bottle surface for better paint grip. Apply a base coat and let it dry completely. Then add patterns, designs, or solid colors.

You can use stencils for neat designs or sponge painting for textured effects. Polka dots, stripes, and floral patterns are popular choices.

For a natural look, wrap bottles with jute rope or twine using glue. This creates a rustic and earthy appearance.

Decoupage is another creative method. Glue printed designs, newspaper cuttings, or fabric pieces onto the bottle and seal with varnish.

Glow-in-the-dark paint can be used for outdoor pots, adding beauty and safety at night.


Choosing the Right Plants

Not all plants thrive in small containers, so selecting suitable varieties is important.

Herbs such as basil, mint, coriander, and parsley grow well in recycled pots. They are useful for cooking and easy to maintain.

Succulents and cacti are perfect for beginners. They require minimal watering and adapt well to small containers.

Flowering plants like petunias, marigolds, pansies, and begonias bring color and fragrance to recycled planters.

Trailing plants such as money plant, pothos, and ivy look beautiful in hanging bottles.

Leafy greens like lettuce and spinach can also be grown in larger bottle planters.

Always consider sunlight, water needs, and space when choosing plants.


Maintenance and Care

Proper care ensures your recycled flower pots remain healthy and attractive.

Water plants according to their needs. Overwatering is a common mistake, especially in plastic containers that retain moisture.

Place pots where they receive appropriate sunlight. Most flowering plants need at least four to six hours of light daily.

Check drainage holes regularly to prevent blockage. Clean them if soil accumulates.

Fertilize occasionally using organic compost or liquid fertilizer to maintain soil nutrients.

Repaint or touch up decorations if they fade over time, especially for outdoor planters.


Sustainable Trends in Recycled Gardening

Recycled gardening has become part of a larger sustainability movement. Many people now prefer upcycled décor over mass-produced items.

Urban gardening is one major trend. In cities where space is limited, plastic bottle planters allow residents to grow plants on balconies, rooftops, and walls.

Vertical gardens made from recycled bottles are gaining popularity. They improve air quality, reduce heat, and beautify buildings.

Community recycling projects are also emerging. Schools and neighborhoods organize workshops where people learn to make planters together, promoting teamwork and environmental awareness.

Eco-friendly home décor is another growing trend. Handmade recycled pots are now featured in interior design blogs and sustainable lifestyle magazines.

Social media platforms have played a big role in spreading these ideas. DIY tutorials and creative projects inspire millions to try recycling at home.


Educational and Social Benefits

Recycling bottles into flower pots is not just about decoration. It also has strong educational value.

For children, it teaches responsibility, creativity, and respect for nature. Gardening helps develop patience and problem-solving skills.

For families, it becomes a bonding activity. Working together on DIY projects strengthens relationships and builds shared values.

In schools, recycled planters are used in environmental education programs. Students learn about waste management, plant life cycles, and sustainability.

For communities, these projects encourage cooperation and collective action toward environmental protection.


Common Mistakes to Avoid

Beginners often face small challenges when making recycled planters. Avoiding these mistakes can improve results.

Do not skip drainage holes, as waterlogging damages roots.
Avoid using bottles that contained harmful chemicals.
Do not place pots in unsuitable lighting conditions.
Avoid overcrowding plants in small containers.
Do not use poor-quality soil, as it affects growth.

Learning from these mistakes helps you improve with every project.


Conclusion

Recycling plastic bottles into beautiful flower pots is a simple yet powerful way to contribute to environmental protection. It reduces waste, saves money, and adds creativity to everyday life. With basic tools and imagination, anyone can turn discarded bottles into attractive, functional planters.

These DIY projects promote sustainable living, encourage mindful consumption, and inspire others to care for the planet. As eco-friendly trends continue to grow, recycled gardening stands out as a practical and rewarding solution for modern homes.

By choosing to upcycle plastic bottles, you are not only decorating your space but also taking a meaningful step toward a greener future. One bottle, one plant, and one creative idea at a time, you can help transform waste into beauty and sustainability into a lifestyle.