How to Get Abundant Fruit on Your Plants: Stop Bud Drop and Boost Harvests Naturally!

How to Get Abundant Fruit on Your Plants: Stop Bud Drop and Boost Harvests Naturally!

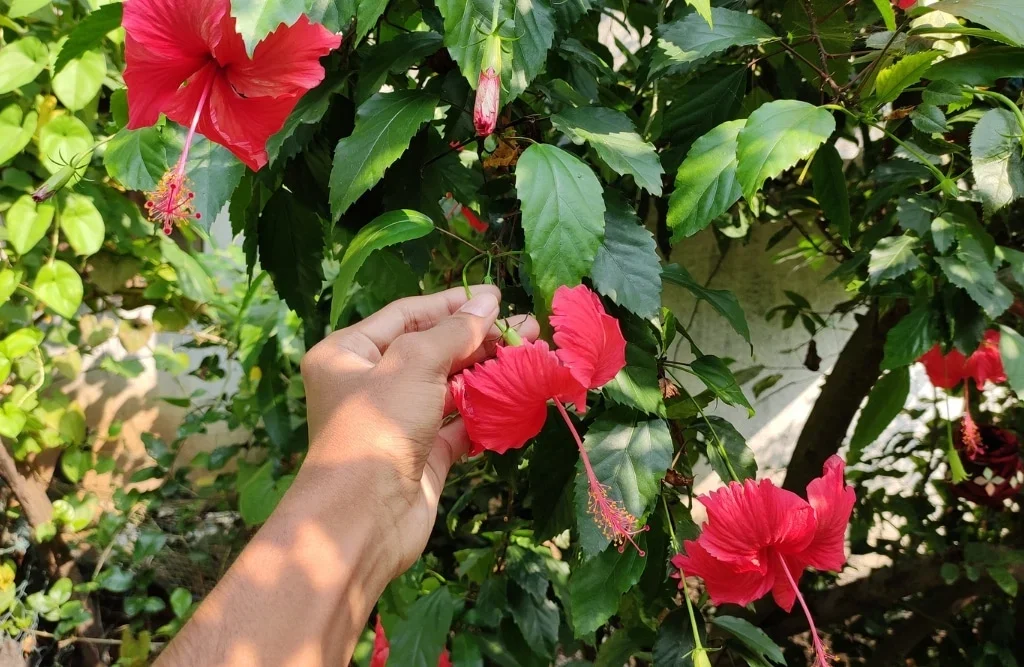
Nothing is more disappointing for a home gardener than watching tiny buds on fruit plants wither and fall before they ever become fruit. Bud drop is one of the most common problems, whether you are growing mangoes, guavas, tomatoes, or citrus trees. The good news is that with the right care, you can prevent bud drop and enjoy an abundant, healthy harvest. In this guide, we’ll explore practical tips, natural solutions, and essential care techniques to help your fruit plants thrive and produce more fruit than ever.


Why Do Fruit Buds Drop?

Before we jump into solutions, it’s important to understand why bud drop happens. Fruit buds are sensitive, and several factors can cause them to fall prematurely:

  1. Water Stress: Both overwatering and underwatering can stress the plant, leading to bud drop.
  2. Nutrient Deficiency: A lack of essential nutrients like nitrogen, phosphorus, potassium, and calcium can weaken buds.
  3. Temperature Fluctuations: Extreme heat, cold, or sudden temperature changes often cause buds to drop.
  4. Pests and Diseases: Insects like aphids, mealybugs, or fungal infections can attack buds, making them fall.
  5. Excessive Pruning or Growth Stress: Over-pruning or sudden growth changes can divert energy from buds to leaves.

By identifying the cause, you can implement the right strategy to stop bud drop and encourage fruiting.


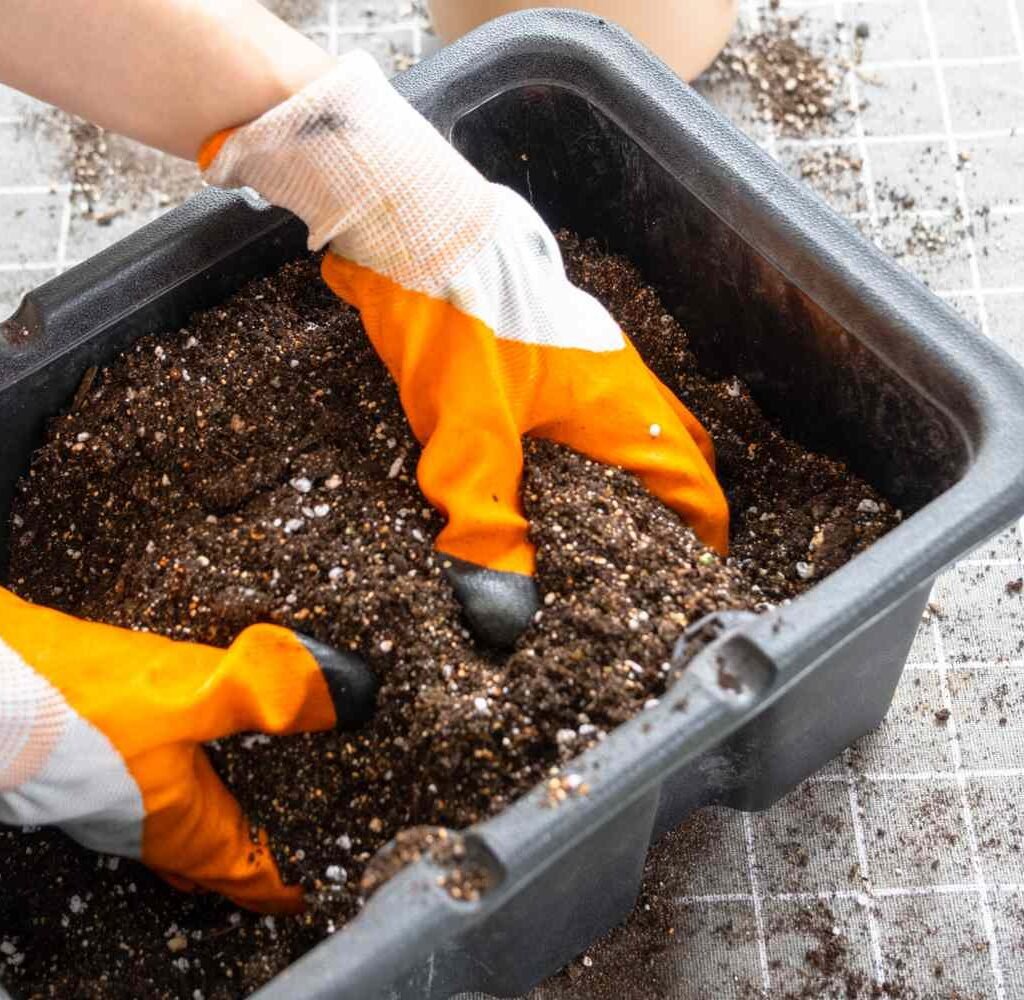
Step 1: Provide Consistent Watering

Watering is the foundation of healthy fruiting. Fruit plants need consistent moisture, especially during flowering and fruit set.

  • Avoid overwatering: Saturated soil can cause root rot and reduce nutrient uptake.
  • Avoid underwatering: Dry soil stresses the plant and leads to premature bud drop.
  • Water deeply: Provide enough water to reach the root zone rather than frequent shallow watering.

Tip: Mulching around the base of your plant helps retain soil moisture and keeps roots cool. Organic mulches like straw, coconut husk, or compost work best.


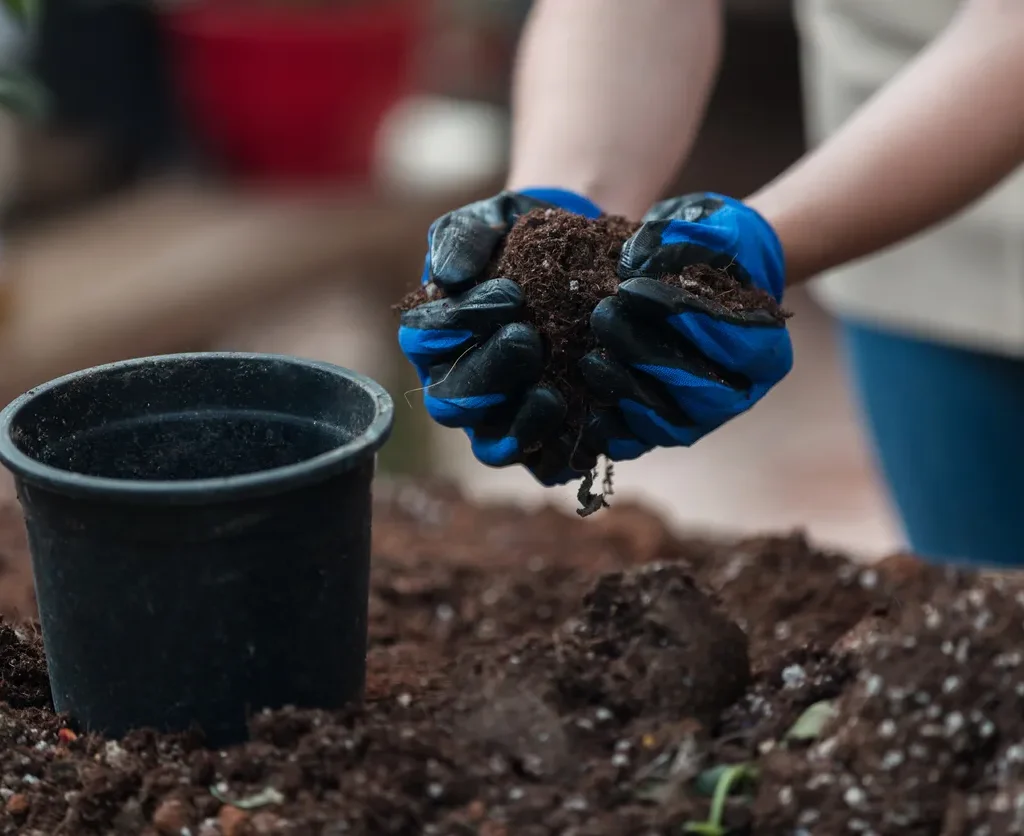
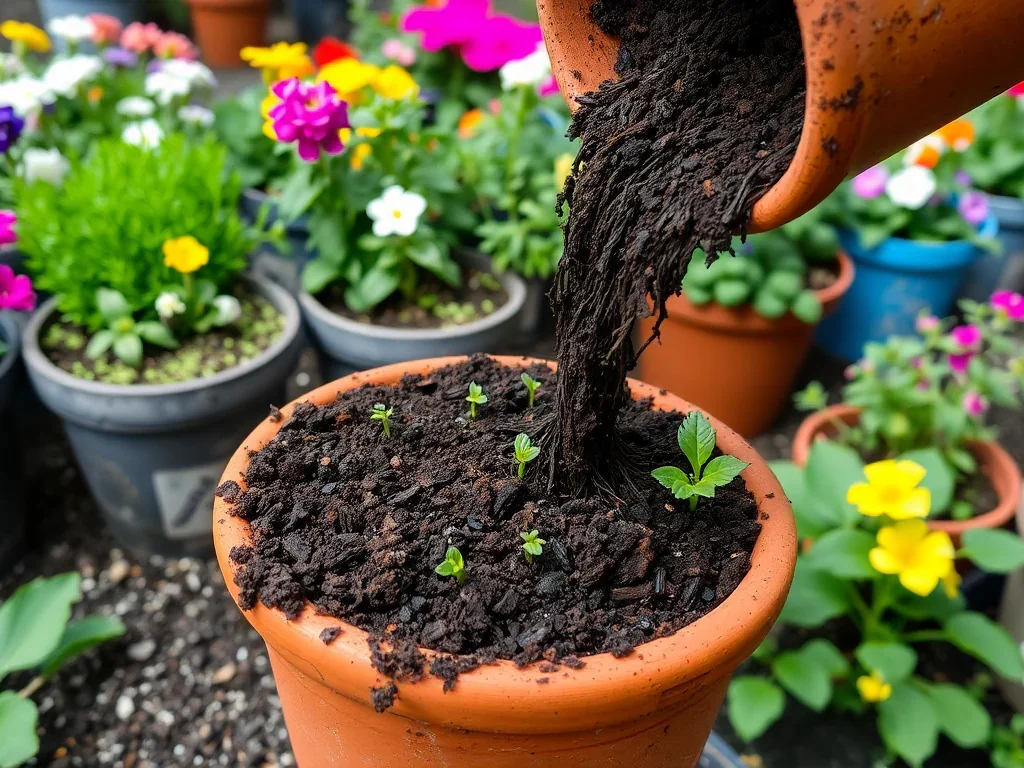
Step 2: Feed Your Plants the Right Nutrients

Fruit buds need energy to develop into flowers and then fruit. Nutrient deficiencies are a major cause of bud drop. Here’s how to keep your plants nourished:

  • Nitrogen (N): Essential for leafy growth but excessive nitrogen can delay flowering. Use balanced amounts.
  • Phosphorus (P): Crucial for flower formation and fruit set. Bone meal, rock phosphate, or organic fertilizers are great sources.
  • Potassium (K): Supports flowering, fruit development, and overall plant health. Banana peel compost or potassium-rich fertilizers can help.
  • Calcium and Magnesium: Prevent bud drop and strengthen cell walls. Eggshell powder or Epsom salt diluted in water can be applied.

Pro tip: Use organic fertilizers whenever possible—they improve soil health and plant immunity over time.


Step 3: Protect Plants from Temperature Stress

Extreme temperatures are a silent culprit behind bud drop. Most fruit plants thrive in moderate, consistent temperatures.

  • Shade cloths: Use during hot afternoons to protect sensitive plants.
  • Windbreaks: Strong winds can damage buds. Planting near fences or using temporary covers can help.
  • Frost protection: For cold-sensitive plants, use covers or move container plants indoors during frost.

Even small adjustments in microclimate can drastically improve flower retention and fruit set.


Step 4: Prune Carefully

Pruning is essential for healthy growth but must be done wisely:

  • Remove dead, diseased, or crowded branches to improve airflow.
  • Avoid heavy pruning during flowering—it can stress the plant and trigger bud drop.
  • Prune lightly after fruit harvest to encourage new growth for the next season.

Pruning encourages better sunlight penetration and energy distribution, which is essential for flower retention.


Step 5: Encourage Pollination

Fruit buds may drop if flowers aren’t pollinated properly. Pollination is key to fruit formation.

  • Attract pollinators: Bees, butterflies, and other insects are natural pollinators. Plant flowers nearby to attract them.
  • Hand pollination: For indoor or balcony gardens, gently brush flowers with a soft brush to transfer pollen.
  • Avoid pesticides during flowering: Chemicals can kill beneficial insects that help with pollination.

Better pollination leads to better fruit set and fewer dropped buds.


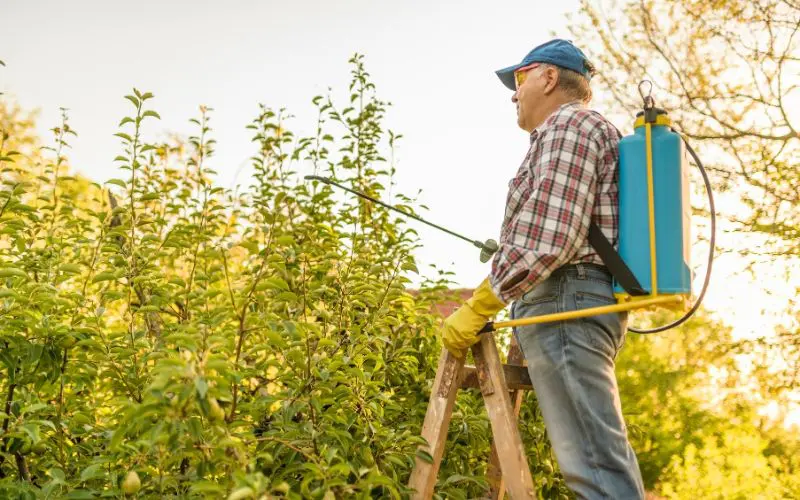
Step 6: Manage Pests and Diseases Naturally

Buds are vulnerable to pests and diseases, which often go unnoticed until drop occurs.

  • Inspect regularly: Check leaves, stems, and buds for insects or fungal infections.
  • Neem oil or garlic spray: Natural solutions that control common pests.
  • Prune infected parts: Remove any affected areas to prevent the spread of disease.

Healthy plants naturally hold onto buds longer and produce more fruit.


Step 7: Reduce Stress During Flowering

Stress is the silent enemy of flower retention. Avoid sudden changes in environment, excessive movement of plants, or sudden fertilization changes during the flowering stage.

  • Avoid heavy pruning or transplanting during flowering.
  • Maintain consistent care—plants flourish with steady attention.
  • Support heavy branches with sticks or trellises to reduce mechanical stress.

Minimizing stress allows the plant to focus energy on bud and fruit development rather than survival.


Step 8: Consider Growth Regulators (Optional)

For serious gardeners looking for guaranteed results, natural growth regulators can help reduce bud drop. For example:

  • Seaweed extract: Improves flower retention and overall plant vigor.
  • Cytokinins: Can boost flower formation and prevent premature dropping (use carefully).

These are optional tools, but when used correctly, they can significantly increase your harvest.


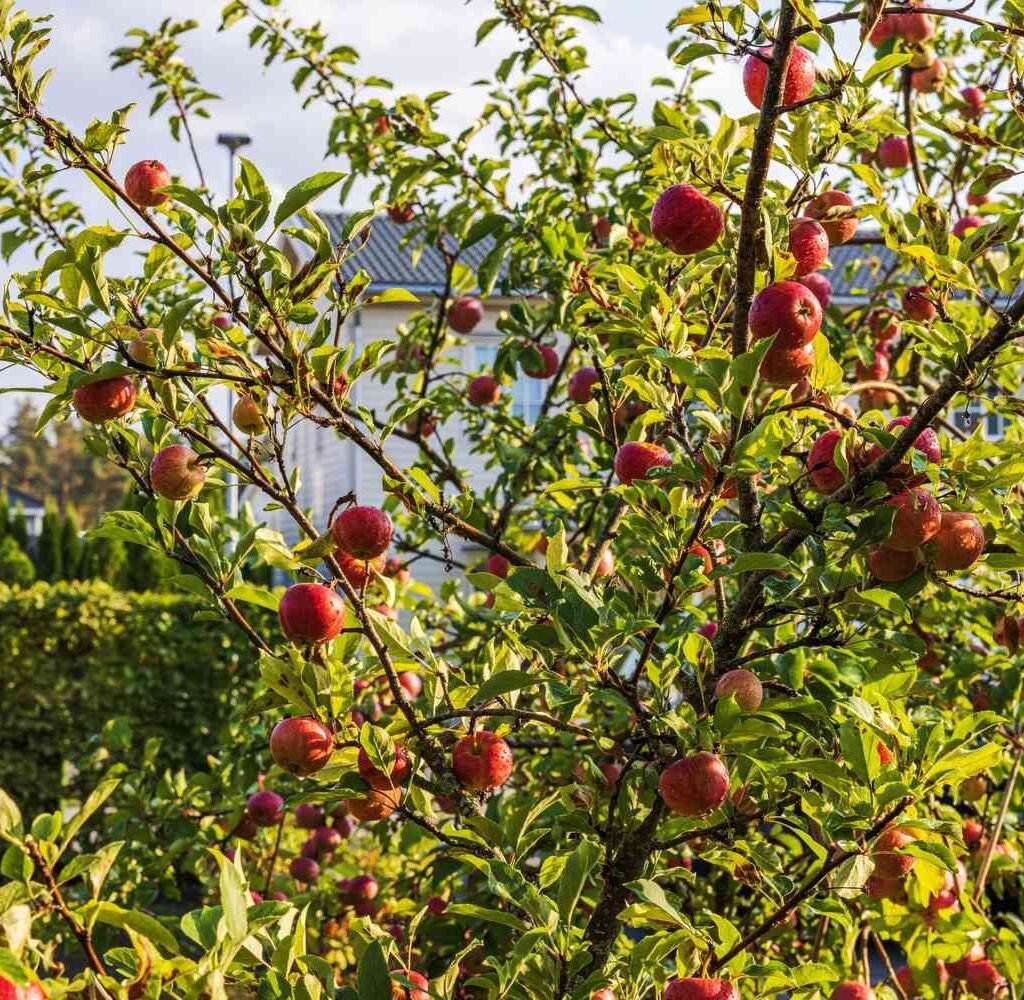
Step 9: Harvesting and Post-Care

Once your buds successfully develop into fruit, proper care ensures maximum yield:

  • Water consistently but avoid overwatering fruits.
  • Provide support for heavy fruits to prevent branch breakage.
  • Apply balanced fertilizer to continue feeding developing fruits.
  • Remove any diseased or damaged fruits promptly.

With these steps, you’ll see more fruits reaching full maturity without unnecessary losses.


Conclusion

Getting abundant fruit from your plants is entirely possible with consistent care, proper nutrition, and attention to detail. By addressing the causes of bud drop—whether it’s water stress, nutrient deficiencies, temperature fluctuations, or pest attacks—you can maximize flower retention and enjoy a healthy, bountiful harvest.

Remember, gardening is a combination of patience, observation, and action. Every plant responds differently, so observe your fruit plants carefully, make small adjustments, and celebrate each success. With these tips, your garden will soon be bursting with colorful, juicy fruits that you can enjoy fresh or share with friends and family.

Stop worrying about bud drop and start growing fruits like a pro—your plants will thank you with abundant harvests season after season!

Grow Pineapple at Home for Free: A Fast, Easy, and Fun Guide

Grow Pineapple at Home for Free: A Fast, Easy, and Fun Guide

Pineapples are more than just a tropical treat—they are a symbol of warmth, hospitality, and homegrown goodness. What if I told you that you could grow your very own pineapple at home without spending a dime? Yes, you heard it right! Growing pineapples can be simple, fun, and rewarding, even if you don’t have a big garden. In this guide, we’ll explore a step-by-step approach to grow pineapples fast and easily using simple techniques.


Why Grow Pineapple at Home?

Pineapples are packed with vitamins, antioxidants, and digestive enzymes that can help boost your health. By growing your own, you get:

  • Freshness: Nothing beats the taste of a freshly grown pineapple.
  • Cost-saving: You can grow a pineapple without buying expensive plants or seedlings.
  • Sustainability: Using kitchen scraps reduces waste and helps the environment.
  • Satisfaction: Watching your pineapple grow from a top to a full plant is incredibly rewarding.

Even if you have limited space, a sunny balcony or a small pot can become your pineapple paradise.


Materials You’ll Need

You don’t need fancy gardening tools. Here’s all you need to get started:

  1. A fresh pineapple: Choose one with healthy green leaves and no signs of rot.
  2. A sharp knife: To remove the leafy top safely.
  3. A container or pot: Preferably with drainage holes.
  4. Potting soil: Light, well-draining soil works best.
  5. Water: Regular watering is essential but avoid overwatering.

Optional: Sand, compost, or a fertilizer to encourage faster growth.


Step 1: Preparing the Pineapple Top

The easiest way to grow a pineapple is from its leafy crown. Follow these steps:

  1. Twist or cut off the top from a fresh pineapple. Remove any fruit flesh attached to the crown to prevent rotting.
  2. Peel off the lower leaves to expose about an inch of the stem.
  3. Let the crown dry for 1–2 days in a cool, dry place. This helps prevent rot when planted.

Pro tip: Look for green, healthy leaves—these are signs of a good, viable plant.


Step 2: Rooting the Pineapple

Before planting, it’s better to encourage roots to form. Here’s how:

  1. Fill a glass with water and place the pineapple top so that only the base is submerged.
  2. Change the water every 2–3 days.
  3. After 2–3 weeks, you’ll notice roots growing from the base.

If you prefer, you can skip the water rooting and plant directly in soil, but rooting first often improves success rates.


Step 3: Planting Your Pineapple

Once roots have formed, it’s time to plant.

  1. Choose a pot with good drainage to prevent waterlogging.
  2. Fill it with light, well-draining potting soil. Mixing sand or perlite with soil works well.
  3. Plant the pineapple top so the roots are buried and the leaves are above the soil.
  4. Press the soil gently around the base to secure the plant.

Place your pot in a sunny spot—pineapples love warmth and sunlight. A balcony, sunny window, or greenhouse works perfectly.


Step 4: Watering and Care

Caring for your pineapple is simple if you follow these tips:

  • Watering: Keep the soil lightly moist but not soggy. Pineapples are drought-tolerant, so it’s better to underwater than overwater.
  • Sunlight: Pineapples need at least 6–8 hours of bright sunlight per day.
  • Fertilizing: Use a balanced fertilizer every 6–8 weeks to encourage growth. Organic compost or liquid fertilizer works well.
  • Temperature: Pineapples thrive in warm temperatures (65–95°F / 18–35°C). Protect from frost or cold drafts.

Remember, patience is key. Pineapple plants grow slowly at first but pick up speed once they are established.


Step 5: Encouraging Faster Growth

Want to speed up growth? Here are a few tips:

  1. Remove dead leaves regularly to allow new growth.
  2. Repotting: Move your pineapple to a larger pot as it grows to avoid root crowding.
  3. Humidity: Pineapples enjoy humid conditions, so misting the plant occasionally helps.
  4. Fertilizer: Use a fertilizer high in nitrogen during early growth and switch to potassium-rich fertilizer before flowering.

With proper care, you’ll notice your pineapple developing a strong, healthy plant within months.


Step 6: Flowering and Fruit Development

Growing a pineapple from top to fruit takes patience—usually 18–24 months, but your effort is worth it.

  • Pineapples produce a single flower spike that eventually turns into a fruit.
  • Once the plant flowers, it’s important to continue sunlight, water, and fertilization.
  • A single pineapple fruit develops in the center of the plant. Depending on the variety, the fruit may take 5–7 months to ripen.

Tip: If your plant flowers early, removing the flowers temporarily can encourage stronger growth before fruiting.


Step 7: Harvesting Your Pineapple

You’ll know your pineapple is ready to harvest when:

  • The fruit turns golden yellow.
  • The aroma is sweet and tropical.
  • The fruit feels slightly soft when pressed gently.

Use a sharp knife to cut the fruit off at the base. You can also save the top to grow a new pineapple, repeating the process for continuous harvests.


Extra Tips for Success

  • Pest control: Pineapples are generally pest-resistant, but watch out for mealybugs and scale insects. A gentle neem oil spray works well.
  • Propagation: Besides tops, pineapples can also be grown from slips (side shoots) or suckers for faster fruiting.
  • Companion planting: Keep your pineapple away from very large plants to avoid competition for sunlight.

Conclusion

Growing a pineapple at home may seem like a long journey, but it’s a rewarding adventure that combines gardening with a touch of tropical magic. By following these simple steps—preparing the crown, rooting, planting, and caring for your plant—you can enjoy fresh, homegrown pineapples for free.

Whether you have a balcony, a small backyard, or even a sunny windowsill, this easy, cost-free method lets you experience the joy of growing your own tropical fruit. From the first green crown to the golden, juicy fruit, your pineapple plant is a testament to patience, care, and the simple pleasures of home gardening.

So why wait? Grab a pineapple, start growing, and watch your tiny plant transform into a tropical delight right at home!

Effortless Succulent Propagation: How to Grow Beautiful Succulents From Cuttings (With Full Updates)

Effortless Succulent Propagation: How to Grow Beautiful Succulents From Cuttings (With Full Updates)

Succulents are among the most loved plants in the world—easy to care for, visually stunning, and perfect for small or large spaces. But what makes them even more exciting is how incredibly easy they are to propagate. Whether you have a single succulent or a full collection, you can multiply your plants endlessly using simple cuttings!

In this complete guide, you’ll learn how to grow succulents from leaf cuttings, stem cuttings, and offsets—with full updates on what to expect at every stage. No links, no complications—just clean, clear, friendly instructions to help you grow a whole garden of new succulents for free.

Let’s begin!


Why Propagate Succulents From Cuttings?

Succulent propagation is perfect for gardeners because:

  • It’s easy, even for beginners
  • You get many new plants from a single parent
  • You can save damaged or leggy succulents
  • It’s free—no need to buy new plants
  • Most cuttings root within weeks

If you’ve ever killed a plant or struggled with gardening, succulents will boost your confidence. They’re forgiving and grow quickly when propagated correctly.


Types of Succulent Cuttings You Can Use

There are three common ways to propagate succulents from cuttings:

1. Leaf Cuttings

Works well for succulents like:

  • Echeveria
  • Graptopetalum
  • Sedum
  • Pachyphytum

2. Stem Cuttings

Ideal for:

  • Jade (Crassula)
  • Aeonium
  • Sedeveria
  • Kalanchoe
  • String succulents

3. Offsets / Pups

Best for:

  • Aloe
  • Haworthia
  • Sempervivum
  • Gasteria

Each method is simple—just follow the steps below.


Step-by-Step: How to Grow Succulents From Cuttings

Step 1: Choose a Healthy Mother Plant

Pick a plant that has:

  • Firm leaves
  • No pests (mealybugs/aphids)
  • Good color
  • Thick, healthy stems

A healthy cutting grows roots faster and becomes a stronger new plant.


Step 2: Take the Cutting

For Leaf Cuttings

  • Gently twist the leaf sideways
  • Remove the entire leaf (no tear at the base)
  • A clean pull increases rooting success

For Stem Cuttings

  • Use a clean scissor or knife
  • Cut 3–4 inches of healthy stem
  • Remove the bottom leaves

For Offsets

  • Detach pups gently with fingers
  • Make sure small roots remain attached

Step 3: Let the Cuttings Dry (Callus Formation)

This step is critical for success.

Let the cutting dry in shade for:

  • 2–3 days for leaf cuttings
  • 3–4 days for stem cuttings
  • 1 day for offsets

When the cut end becomes dry and sealed, it’s ready for planting.

Skipping this step may cause rot, so don’t rush!


Step 4: Prepare the Perfect Soil Mix

Succulents demand fast-draining soil.

Best Succulent Soil Recipe:

  • 40% garden soil
  • 30% coarse sand
  • 20% perlite or pumice
  • 10% compost

Avoid clay or dense soil—succulents hate wet feet.


Step 5: Plant the Cuttings

Leaf Cuttings

  • Lay leaves flat on the soil
  • Do NOT bury them
  • Just place them gently on top

Stem Cuttings

  • Insert cut end into soil
  • Make sure it stands upright

Offsets

  • Plant directly like a small succulent
  • Keep roots covered lightly

Step 6: Watering the Right Way

Succulent cuttings require special watering care.

Watering Rules:

  • Mist the soil lightly every 3–4 days
  • Avoid heavy watering in the beginning
  • Never water the cuttings directly on the cut end

Once roots appear, gradually shift to normal watering:

  • Water only when the soil is fully dry
  • Use bottom watering for smaller pots

Too much water = rot
Too little = slow growth

Find the balance!


Step 7: Provide Ideal Light

Succulent cuttings need:

  • Bright, indirect light
  • Avoid direct sun until roots develop
  • Too much sunlight causes leaf burn

After 3–4 weeks, give them:

  • Morning sunlight for 1–2 hours

This strengthens roots and encourages faster growth.


FULL UPDATES — What Happens After Planting?

Here’s the exciting part: the propagation journey!


Week 1: Callusing & Settling

  • Cuttings stay the same
  • Leaves may wrinkle slightly
  • Soil must stay lightly moist

Don’t worry—this is normal.


Week 2–3: Root Formation Begins

You’ll notice:

  • Tiny pink or white roots
  • Leaf cuttings may show small bumps (sign of rooting)
  • Stem cuttings become firm

This is the first success milestone!


Week 4–5: Baby Plants Appear

Leaf cuttings now show:

  • Tiny rosettes forming
  • New green growth at the base

Stem cuttings:

  • Start producing new leaves
  • Stand firmly in soil

This is when the magic becomes visible.


Month 2–3: Fast Growth Stage

  • Baby succulents grow bigger
  • Old leaves begin drying out
  • Plants look healthier and more colorful

Move them to brighter light for deeper coloration.


Month 4–6: Transplanting Stage

Now the new succulents are ready to move into:

  • Individual pots
  • A decorative succulent garden
  • A mixed dish arrangement

Use small pots (3–4 inches) first for best growth.


Month 6–12: Mature Plant Stage

Your propagated succulents will now:

  • Grow fuller
  • Multiply again
  • Develop stronger roots
  • Grow colorful stress shades
  • Produce pups of their own

By this stage, they behave exactly like fully mature plants.


Common Problems & Easy Solutions

Leaves shriveling

Underwatering
Mist lightly every 3–4 days

Leaves turning mushy

Overwatering
Reduce watering immediately

Cuttings not rooting

Low light
Move to a brighter place

Rot at cut end

Cut wasn’t callused properly
Always air-dry before planting


Expert Tips for Faster Success

  • Use wide trays for leaf propagation
  • Always disinfect tools before cutting
  • Use bottom watering to avoid rot
  • Provide gentle airflow
  • Add perlite for extra drainage
  • Keep out of rain during monsoon
  • Do not move cuttings frequently

Succulents love stability.


Final Thoughts: Creating Your Own Succulent Garden

Propagating succulents from cuttings is like growing magic—tiny leaves transforming into brand-new plants right before your eyes. With patience and the simple steps above, you can fill your home with beautiful succulents at zero cost.

Whether you’re creating a mini succulent forest, gifting plants to friends, or expanding your collection, this guide will help you succeed at every stage.

Unstoppable Hibiscus Blooms: The Ultimate Guide to Prepare Your Plants for Massive Flowering (With Full Updates)

Unstoppable Hibiscus Blooms: The Ultimate Guide to Prepare Your Plants for Massive Flowering (With Full Updates)

Hibiscus plants are one of the most stunning flowering shrubs you can grow at home. Their vibrant, tropical blooms—ranging from red, pink, white, yellow, orange, and even rare multicolors—make them a favorite for every garden lover. But many gardeners struggle with a common problem:

“My hibiscus has lots of leaves… but very few flowers!”

If that sounds familiar, don’t worry. With the right preparation and care, hibiscus plants can bloom continuously, producing large, bright flowers throughout the growing season. In this detailed guide, you’ll learn how to prepare your hibiscus plants to get lots of blooms—naturally and consistently.

Let’s begin your journey to a hibiscus garden full of color!


Understanding Hibiscus Blooming: Why Preparation Is Important

Hibiscus plants are heavy bloomers—but they need specific conditions to start producing flowers. Without proper sunlight, soil, nutrients, and pruning, the plant focuses more on leaves rather than blooms.

Preparing a hibiscus for flowering is like training an athlete—you set the right environment so it can perform beautifully.

Here’s everything your hibiscus needs before it can explode with blooms.


Step 1: Give Your Hibiscus the Right Sunlight (Most Important Secret!)

Hibiscus plants LOVE sunlight.
To get maximum blooms:

Give at least 5–7 hours of direct sunlight daily

  • Morning sunlight (soft & warm) is ideal
  • Avoid dark balconies or indoor corners
  • If sunlight is low, bloom count reduces drastically

If your plant looks green but never blooms, insufficient sunlight is the #1 cause.

Partial Shade?

You can still get blooms, but the plant won’t reach full potential.

Tip: Rotate the plant weekly so all sides receive balanced sunlight.


Step 2: Use the Right Pot and Soil Mix

Hibiscus roots grow fast and need space.

Best pot size:

  • Small plants: 10–12 inch pot
  • Medium: 14–16 inch
  • Large bush: 18–20 inch

Avoid tiny pots—they limit root growth and reduce bloom production.

Soil Mix: Light, airy, and nutrient-rich

Use a perfect hibiscus mix:

  • 40% garden soil
  • 30% cocopeat
  • 20% compost (cow dung/vermicompost)
  • 10% sand
  • A handful of neem cake for pest protection

This soil retains moisture but also drains excess water.
Healthy roots = more flowers.


Step 3: Watering Correctly for More Blooms

Hibiscus needs consistent moisture.

Water every 2–3 days in summer

Every 4–5 days in winter

Keep soil evenly moist—but never soggy

Overwatering leads to:

  • Root rot
  • Yellow leaves
  • Bud drop

Underwatering leads to:

  • Dry buds
  • Small flowers
  • Slow growth

Perfect rule:
Water deeply when the top 2 inches of soil feel dry.


Step 4: Pruning—The Magic Technique for Tons of Flowers

Pruning is the secret to making hibiscus fuller and flower-heavy.

When to prune?

  • End of winter
  • Beginning of spring
  • After every major blooming cycle

How to prune?

  • Remove dead, weak, thin branches
  • Cut back long branches by 30%
  • Trim crossing or inward-growing stems

This encourages:

  • Fresh green shoots
  • More branching
  • More flower nodes = more blooms

Always prune with clean, sharp tools to avoid disease.


Step 5: Fertilizer Routine for Explosion of Blooms

Hibiscus is a hungry plant—it requires regular feeding.

Best Fertilizers for Blooms

  • NPK 10-10-10 (general growth)
  • NPK 0-10-10 or 10-20-20 (bloom booster)
  • Vermicompost
  • Seaweed
  • Banana peel fertilizer

Monthly Feeding Routine

Week 1: Vermicompost
Week 3: Bloom booster liquid feed
Every 15 days: Seaweed + Epsom salt spray

Epsom salt helps in:

  • More blooms
  • Greener leaves
  • Reduced bud drop

Use 1 teaspoon in 1 liter of water, spray on leaves.


Step 6: Keep Pests Away (Healthy Plant = More Flowers)

Hibiscus often attracts:

  • Aphids
  • Whiteflies
  • Mealybugs
  • Spider mites

These pests suck sap and reduce bloom count.

Easy remedies:

  • Neem oil spray (once a week)
  • Soap water spray
  • Keep plant well-ventilated
  • Remove affected leaves

Never spray neem oil in harsh sunlight; use early morning or evening.


Step 7: Ideal Temperature & Climate for Flowering

Hibiscus blooms best in warm climates.

Ideal temperature:

  • 18°C – 35°C

Too much heat causes bud drop.
Too much cold slows growth.

Tip: During peak summers, give light shade from 2–4 PM.


Hibiscus Blooming Cycle: What to Expect (With Full Updates)

Month 1: Recovery and Growth

After pruning and repotting:

  • Plant grows new leaves
  • New shoots appear
  • Branching starts

Feed with balanced fertilizer.


Month 2: Strong Branch Development

You’ll notice:

  • Faster growth
  • More branching
  • Tight leaf clusters

This is the stage where the plant prepares for buds.


Month 3: Bud Formation Begins

Small green bumps appear at branch tips.

To boost bud growth:

  • Increase morning sunlight
  • Use bloom booster
  • Keep soil moderately moist

Avoid shaking or touching developing buds—they drop easily.


Month 4: Blooming Season Starts

Within days, buds enlarge and start opening.

Expect:

  • Daily blooms
  • Larger and brighter flowers
  • Continuous flower production

Each bloom lasts 1 day—but new blooms appear daily if the plant is well-prepared.


Month 5 & Beyond: Continuous Flowering

Your hibiscus will flower regularly if you maintain:

  • Fertilizer schedule
  • Proper sunlight
  • Sufficient water
  • Pest control

You can enjoy flowers for 8–10 months of the year.


Common Problems & Their Solutions

Lots of buds but they fall off

Caused by inconsistent watering & pests
Maintain even moisture, spray neem oil

Plant grows tall but no blooms

Insufficient sunlight
Move to brighter area

Yellow leaves

Overwatering or nutrient deficiency
Adjust watering + add magnesium (Epsom salt)

Small flowers

Low phosphorus
Use bloom booster


Final Tips for Making Hibiscus Bloom Non-Stop

  • Use a big pot for better root expansion
  • Give maximum sunlight possible
  • Feed regularly—hibiscus is a heavy feeder
  • Prune yearly for better shape & blooming
  • Keep the plant slightly moist, never dry for long
  • Protect from pests
  • Don’t disturb buds once they start forming

With this preparation routine, your hibiscus will reward you with massive, continuous blooming all year long!

Desert Jewels in Full Glory: How to Grow Cacti That Bloom Beautifully at Home

Desert Jewels in Full Glory: How to Grow Cacti That Bloom Beautifully at Home

Cacti are often admired for their tough, spiky appearance and low-maintenance nature—but when they bloom, they completely transform into breathtaking living jewels. A flowering cactus is one of the most rewarding sights for any plant lover. Their vibrant blooms—ranging from pure white to fiery red, neon pink, dazzling yellow, and even multicolored shades—turn an ordinary plant into a spectacular display.

If you’ve ever wondered how to make your cactus bloom beautifully (and consistently), this full guide will show you everything you need to know. Whether you’re a beginner or an enthusiast, you’ll learn how to grow healthy, happy cactus plants that burst into color with stunning flowers.


Why Cacti Blooms Are So Special

Cactus flowers are considered some of the most exotic blooms in the plant world. Many open only at certain times—some at dawn, some at dusk, and some just for a single magical night. Their petals are often silky and wide, and many varieties are fragrant too.

But here’s the secret:
A blooming cactus isn’t just lucky. It’s the result of the right care—sunlight, watering cycles, soil, and seasonal changes.


Best Cactus Varieties for Beautiful Blooms

Some cactus species bloom more easily than others. If you’re beginning, choose these star performers:

1. Mammillaria Cactus

Small, round cactus with crown-shaped flowers—pink, red, yellow, purple.

2. Gymnocalycium (Moon Cactus Family)

Blooms frequently with colorful, umbrella-shaped flowers.

3. Echinopsis (Easter Lily Cactus)

Produces large, fragrant blooms that can be 3–6 inches wide.

4. Rebutia

Clusters of mini blooms covering the plant—looks like a flower bouquet!

5. Epiphyllum (Orchid Cactus)

Known for giant, spectacular blooms in vibrant colors.

If you already own any of these, you are halfway to success!


Right Pot & Soil—The Foundation of Beautiful Blooms

Choose the Right Pot

Cacti don’t like staying in soggy soil. Use:

  • Terracotta pots (best airflow)
  • Pots with proper drainage holes
  • Slightly snug containers (cacti bloom better when slightly root-bound)

Use Perfect Cactus Soil Mix

Cactus roots need fast drainage and air space.

Make your own cactus mix:

  • 40% garden soil
  • 30% coarse sand
  • 30% perlite / pumice / gravel

Optional: A handful of crushed charcoal to prevent rot.


Sunlight: The #1 Secret to Cactus Blooming

Cacti LOVE sunlight—but not all varieties tolerate harsh afternoon sun.

How Much Sunlight Every Cactus Needs

  • Desert cacti → 5–7 hours of bright light
  • Tropical cacti (Epiphyllum, Rhipsalis) → filtered sunlight

Sun Stress = More Blooms

When exposed to proper light, cactus skin turns:

  • Pink
  • Purple
  • Slightly reddish

This is GOOD—it signals blooming potential.

Avoid dark green cactus—they are usually under-sunned.


Watering Rules for Maximum Flower Production

Cacti bloom when they experience natural cycles of “dry and wet.”

Use this watering schedule:

Growing Season (Feb–Oct)

  • Water once every 7–10 days
  • Only when the soil is COMPLETELY dry

Winter Dormancy (Nov–Jan)

  • Water once every 20–25 days
  • Some varieties: NO WATER for 4–6 weeks

This dry winter rest triggers flower buds!

Watering tip:
Always water from the bottom or directly into the soil—never on the cactus body.


Fertilizer: The Bloom Booster Formula

Cacti need very little food, but the right nutrients help them bloom more.

Use fertilizer high in Phosphorus (P)

Avoid high Nitrogen (N), which promotes only stem growth.

Best Fertilizers for Blooms

  • NPK 5-10-10
  • Tomato or Bloom Booster fertilizers
  • Diluted seaweed solution (once a month)

Apply fertilizer once every 30 days in the growing season.


Temperature & Seasonal Care

Ideal Temperature for Blooms

  • Day: 22°C – 32°C
  • Night: 15°C – 22°C

Winter Temperature

Cacti need a slightly cooler period to produce buds:
10°C – 16°C is ideal for winter dormancy.

If you live in a warm climate, keep them:

  • Near an open window
  • In a bright, cool balcony
  • Away from heaters or warm rooms

Common Reasons Cacti Don’t Bloom

Not enough sunlight

Cacti in shade rarely flower.

Overwatering

Root rot stops flower development.

No winter dormancy

Warm winters = zero blooms.

Pot is too big

Cacti prefer slightly tight pots.

High nitrogen fertilizer

Leads to only green growth.


How to Encourage Tons of Blooms (Step-by-Step)

Keep cactus outdoors (6 hours of sun)

Especially morning sunlight.

Reduce watering in winter

This triggers natural blooming cycles.

Provide temperature contrast

Warm days + cool nights = flower buds.

Use bloom booster fertilizer

Once a month during spring & summer.

Repot every 2–3 years

Fresh soil gives extra energy for budding.


Cactus Blooming Journey — What to Expect (Full Updates)

Early Growth Phase (Month 1–6)

  • Cactus adjusts to new pot
  • Spine development
  • Root strengthening

No blooms yet—but foundation is forming.


Pre-Flowering Stage (6–12 Months)

You may notice:

  • Slight reddish tint
  • Faster growth
  • New spines
  • More “puffed up” appearance

This means the cactus is preparing for flowering.


Blooming Stage (1–2 Years)

Most cacti start blooming after 1–2 years with proper care.

Signs of upcoming blooms:

  • Small fuzzy bumps on ribs
  • Hairy or woolly spots
  • Elongated buds forming

Soon, your cactus will surprise you with colorful, glowing flowers!


What Cactus Blooms Look Like (The Magic Moment)

Cactus flowers:

  • Open dramatically in a few seconds
  • Look silky and vibrant
  • Some stay open only for 12–24 hours
  • Some last 3–7 days
  • Some bloom at night (Queen of the Night)

The moment your cactus blooms, it feels like watching a desert miracle.


Final Tips to Keep Your Cacti Blooming Every Year

  • Rotate the pot every week for even sunlight.
  • Keep cactus raised above ground during rains.
  • Use clay pots for natural airflow.
  • Clean dust from cactus skin with a soft brush.
  • Avoid touching buds—they fall off easily.
  • Keep cacti safe from mealybugs by brushing neem oil around the soil (not on the cactus body).

Conclusion: Blooming Cacti Are a Reward for Your Patience

A cactus in full bloom is truly breathtaking—a combination of nature’s toughness and delicate beauty. With the right care, sunlight, seasonal routine, and a little love, your cactus will reward you with spectacular blossoms year after year.

If you follow the tips in this guide, your cactus will not only grow healthy but also give you the joy of seeing Beautiful Cacti Bloom—a sight that makes every gardener proud!

Would you like another article on How to Propagate Cactus, How to Prevent Rot, or Best Flowering Cactus Varieties?

Grow Fresh Okra at Home: A Complete Pot Gardening Guide with 100-Day Updates

Grow Fresh Okra at Home: A Complete Pot Gardening Guide with 100-Day Updates

Okra, also known as lady finger or bhindi, is a nutritious and versatile vegetable that thrives in warm climates. Growing okra in pots is perfect for gardeners with limited space, balconies, terraces, or patios. With proper care, your okra plant can produce abundant pods in just 100 days, giving you fresh, organic vegetables right from your home garden. This guide provides a step-by-step approach to growing okra in pots, including tips, care instructions, and a full 100-day update for maximum yield.


1. Why Grow Okra in Pots?

Growing okra in pots offers several advantages:

  • Space-saving: Ideal for small homes, balconies, or patios.
  • Control over soil: Easily provide nutrient-rich soil for optimal growth.
  • Pest management: Easier to monitor and prevent infestations.
  • Continuous harvest: Regular picking encourages more pod production.
  • Freshness: Enjoy organic, homegrown okra with better taste and nutrition.

Pot cultivation allows gardeners to grow vegetables without the need for large garden beds.


2. Choosing the Right Okra Variety

Selecting the right variety is crucial for healthy growth and high yield:

  • Dwarf varieties: Compact plants like “Baby Star” or “Clemson Spineless” are ideal for pots.
  • Tall varieties: Require bigger containers and occasional staking.
  • Local varieties: Adapt well to regional conditions and can produce more pods.

Choosing the right variety ensures faster growth and better adaptability to container conditions.


3. Selecting the Right Pot and Soil

Proper container and soil setup is key for healthy okra plants:

  • Pot size: Use a pot at least 12–16 inches deep with a diameter of 12–14 inches for a single plant. Larger pots can accommodate 2–3 plants.
  • Drainage: Ensure pots have sufficient drainage holes to prevent waterlogging.
  • Soil mix: Use a well-draining mix of garden soil, compost, and coco peat or sand (2:1:1).
  • Soil pH: Slightly acidic to neutral (6.0–7.0) is ideal for nutrient absorption.

Healthy soil provides essential nutrients and proper drainage, both crucial for pot-grown okra.


4. Sowing Okra Seeds in Pots

Planting seeds correctly ensures fast germination and strong seedlings:

  • Seed preparation: Soak seeds in lukewarm water for 12–24 hours to soften the outer coat. This helps faster germination.
  • Planting depth: Sow seeds 1 inch deep in the soil.
  • Spacing: Place 2–3 seeds per hole to ensure germination. Thin later to one healthy seedling per spot.
  • Watering: Lightly water the soil after sowing to keep it moist. Avoid overwatering.

Seeds usually germinate within 5–10 days under optimal conditions.


5. Caring for Okra Seedlings

Proper care during the early stage ensures strong plants:

  • Sunlight: Place pots in a sunny location with 6–8 hours of direct sunlight daily.
  • Temperature: Okra grows best at 24–35°C (75–95°F). Protect young seedlings from cold drafts.
  • Watering: Keep soil consistently moist until seedlings establish. Gradually reduce frequency as plants grow.
  • Thinning: Once seedlings develop 2–3 true leaves, remove weaker seedlings, leaving the healthiest one.

Healthy seedlings set the foundation for strong flowering and pod development.


6. Fertilization and Nutrient Management

Okra requires regular feeding for abundant pods:

  • Initial fertilization: Mix compost or organic manure into the soil before planting.
  • Growth stage: Apply a nitrogen-rich fertilizer every 2–3 weeks during vegetative growth.
  • Flowering stage: Switch to phosphorus and potassium-rich fertilizers to promote flower and pod formation.
  • Organic alternatives: Vermicompost, neem cake, or fish emulsion works well for pot cultivation.

Balanced fertilization ensures strong stems, lush foliage, and higher pod yield.


7. Supporting Tall Varieties

Some okra varieties grow tall and need support:

  • Staking: Use bamboo sticks or wooden stakes to support stems. Tie gently with soft twine.
  • Pruning: Remove any damaged or yellow leaves to promote airflow and reduce disease risk.
  • Spacing: Ensure adequate space between plants to prevent overcrowding in pots.

Proper support prevents stem breakage and ensures healthy pod development.


8. Watering and Daily Care

Consistent watering is crucial for optimal growth:

  • Frequency: Water deeply 2–3 times a week, adjusting for temperature and rainfall.
  • Avoid overwatering: Waterlogged soil can lead to root rot.
  • Mulching: Apply a thin layer of mulch to retain moisture and regulate soil temperature.

Proper watering keeps plants healthy, reduces stress, and promotes steady growth.


9. Flowering and Pod Formation

Okra produces flowers that eventually develop into edible pods:

  • Flowering period: Usually starts 40–50 days after sowing.
  • Pollination: Okra flowers are self-pollinating. You can assist by gently shaking flowers to improve pod set.
  • Pod development: Pods grow rapidly and are ready to harvest 5–7 days after flowering.

Regular observation ensures you can harvest pods at the right stage for tenderness and flavor.


10. Harvesting Okra

Timely harvesting is key to enjoy tender and crisp pods:

  • Harvest stage: Pick pods when they are 3–5 inches long. Older pods can become tough and fibrous.
  • Frequency: Check plants every 2–3 days during peak season. Frequent harvesting encourages new pod formation.
  • Method: Use scissors or gently twist the pods to avoid damaging the plant.

Consistent harvesting ensures continuous yield throughout the growing season.


11. 100-Day Growth Update

Tracking your okra plant for 100 days provides insight into its development:

  • Days 1–10: Seeds germinate, and seedlings emerge.
  • Days 11–30: Seedlings grow true leaves and develop stronger stems.
  • Days 31–50: Vegetative growth accelerates, with robust leaves and a taller plant.
  • Days 51–70: Flower buds appear, signaling the start of fruiting.
  • Days 71–100: Continuous flowering and pod production; plants may produce 10–15 pods per plant, depending on care.

Documenting growth helps plan fertilization, watering, and harvesting for maximum yield.


12. Common Pests and Diseases

Pot-grown okra may face some challenges:

  • Pests: Aphids, whiteflies, jassids, and caterpillars. Treat organically with neem oil or insecticidal soap.
  • Diseases: Powdery mildew, root rot, and leaf spots can occur. Ensure good airflow and proper watering.
  • Preventive care: Rotate pots, maintain clean soil, and monitor plants regularly.

Early intervention prevents crop loss and maintains healthy, productive plants.


13. Tips for Maximum Yield

  • Provide full sunlight: Okra thrives in bright, warm conditions.
  • Use large pots: Ensure enough space for root growth.
  • Regular fertilization: Boosts flowering and pod production.
  • Frequent harvesting: Encourages continuous growth.
  • Mulching: Helps retain moisture and reduces weeds.

Following these tips ensures your pot-grown okra produces abundant, tender, and delicious pods.


Conclusion

Growing okra in pots is a rewarding and practical solution for home gardeners with limited space. With proper care, balanced fertilization, and timely harvesting, you can enjoy fresh, organic okra straight from your balcony or terrace. Following this complete guide with 100-day updates ensures even beginners can cultivate healthy plants that yield tender, flavorful pods. Start today and transform your pot garden into a productive okra paradise!

Golden Blossoms: How to Grow Marigolds from Seeds – Complete Guide with Full Updates

Golden Blossoms: How to Grow Marigolds from Seeds – Complete Guide with Full Updates

Marigolds, with their vibrant yellow, orange, and red blooms, are among the most popular and versatile flowers in gardens worldwide. Known for their beauty, easy maintenance, and pest-repelling properties, marigolds are a favorite choice for both novice and experienced gardeners. Growing marigolds from seeds is a rewarding and cost-effective way to fill your garden, balcony, or containers with cheerful flowers. This comprehensive guide provides full updates, step-by-step instructions, and tips to help you grow marigolds successfully from seeds.


1. Why Grow Marigolds from Seeds?

Growing marigolds from seeds has multiple advantages:

  • Cost-effective: Seeds are much cheaper than buying nursery plants.
  • Variety selection: Choose from numerous varieties such as African marigolds (Tagetes erecta), French marigolds (Tagetes patula), or Signet marigolds (Tagetes tenuifolia).
  • Homegrown freshness: You control soil quality, watering, and fertilizers.
  • Gardening satisfaction: Watching marigolds grow from seed to full bloom is highly rewarding.

While marigolds are easy to grow, starting from seed allows you to explore different varieties and colors at a lower cost.


2. Selecting High-Quality Marigold Seeds

The first step to success is choosing healthy seeds:

  • Fresh seeds: Check the packaging for the expiration date to ensure good germination.
  • Varieties: Select seeds based on your space and preference:
    • African marigolds: Large flowers, tall plants, ideal for borders.
    • French marigolds: Compact plants with abundant blooms, suitable for containers.
    • Signet marigolds: Small, delicate flowers, perfect for garden edges or companion planting.
  • Seed source: Buy seeds from trusted suppliers to ensure disease-free and high-quality seeds.

Good seeds are the foundation of strong, healthy plants and abundant blooms.


3. Pre-Treating Marigold Seeds for Germination

Marigold seeds are relatively easy to germinate but benefit from pre-treatment:

  • Soaking: Soak seeds in lukewarm water for 4–6 hours to soften the seed coat.
  • Scarification (optional): Lightly rub the seeds with sandpaper to improve water absorption.
  • Cold stratification: Not necessary for most marigold varieties, but can slightly improve germination rates for certain types.

Pre-treated seeds germinate faster and produce stronger seedlings.


4. Choosing the Right Growing Medium

Marigolds thrive in light, well-draining soil:

  • Seed-starting mix: Use a fine, sterile seed-starting mix to prevent fungal issues.
  • Soil pH: Slightly acidic to neutral (pH 6.0–7.0) is ideal.
  • Containers: Seed trays, small pots, or cell packs work perfectly for starting seeds indoors.

Healthy, well-draining soil ensures strong seedlings with robust roots.


5. Planting Marigold Seeds

Correct planting ensures high germination rates and healthy seedlings:

  • Sowing depth: Sow seeds about 0.25–0.5 inches deep in the soil.
  • Spacing: Leave small gaps between seeds to prevent overcrowding.
  • Watering: Mist gently to moisten the soil without washing away seeds.
  • Humidity: Cover trays or pots with a transparent lid or plastic wrap to maintain humidity.

Marigold seeds usually germinate in 5–10 days, depending on variety and conditions.


6. Light and Temperature Requirements

Marigolds thrive in bright light and moderate warmth:

  • Temperature: Ideal germination occurs at 20–25°C (68–77°F).
  • Sunlight: Provide 12–16 hours of light daily using a sunny window or grow lights.
  • Indoor care: Rotate seedlings to ensure even growth and prevent legginess.

Proper light and temperature conditions help seedlings develop strong stems and vibrant leaves.


7. Watering and Care

Consistent care is key to producing healthy marigolds:

  • Moisture: Keep soil consistently moist until seeds germinate. After germination, water moderately.
  • Watering method: Water at the base of seedlings to avoid wetting foliage, which can lead to fungal issues.
  • Mulching: Apply a thin layer of mulch around seedlings once transplanted to retain soil moisture.

Balanced watering encourages strong root systems and long-lasting blooms.


8. Transplanting Seedlings

Once seedlings have 3–4 true leaves, they are ready for transplanting:

  • Hardening off: Gradually expose seedlings to outdoor conditions for 7–10 days to reduce transplant shock.
  • Container or garden beds: Ensure containers have drainage holes or beds are well-prepared with nutrient-rich soil.
  • Spacing: Plant seedlings 8–12 inches apart depending on variety to allow proper airflow.
  • Watering: Water immediately after transplanting to help seedlings establish.

Proper transplanting ensures robust growth and abundant flowering.


9. Fertilizing Marigolds

Marigolds are relatively low-maintenance but benefit from occasional feeding:

  • Balanced fertilizer: Apply a water-soluble, balanced fertilizer every 3–4 weeks.
  • Organic alternatives: Compost or vermicompost can provide essential nutrients naturally.
  • Avoid excess nitrogen: Too much nitrogen encourages foliage growth at the expense of flowers.

Proper fertilization promotes continuous blooms and vibrant colors.


10. Pruning and Maintenance

Routine maintenance keeps marigolds healthy and flowering abundantly:

  • Deadheading: Remove spent flowers regularly to encourage new blooms.
  • Trimming: Cut leggy or damaged stems to encourage bushy growth.
  • Pest monitoring: Watch for aphids, spider mites, or snails and treat with organic solutions as needed.

Regular pruning extends the flowering period and keeps plants looking neat.


11. Pest and Disease Management

Marigolds are generally hardy but can face challenges:

  • Common pests: Aphids, spider mites, and snails. Use neem oil, insecticidal soap, or barriers.
  • Diseases: Powdery mildew, root rot, and leaf spot may occur in overly damp conditions.
  • Preventive care: Ensure proper spacing, airflow, and avoid wetting foliage.

Timely intervention ensures healthy plants and abundant blooms.


12. Tips for Beginners

  • Succession planting: Sow seeds every few weeks for continuous flowering.
  • Labeling: Keep track of different varieties and colors.
  • Companion planting: Marigolds repel pests and are excellent companions for tomatoes, peppers, and other garden plants.
  • Patience: Marigolds from seed take 8–10 weeks to bloom, but the results are spectacular.

Following these tips ensures beginners achieve a thriving, colorful marigold garden.


13. Benefits of Growing Marigolds from Seeds

  • Variety and creativity: Choose from numerous colors and types to design your garden.
  • Cost-effective: Seeds are cheaper than buying mature plants.
  • Gardening experience: Enhances skills in seed sowing, care, and maintenance.
  • Pest control: Marigolds naturally repel harmful insects in the garden.
  • Long-lasting blooms: With proper care, marigolds bloom for months, brightening your space.

Growing marigolds from seeds is a fulfilling and visually rewarding experience.


Conclusion

Marigolds are cheerful, hardy, and versatile flowers that can brighten any garden or balcony. By selecting high-quality seeds, pre-treating them, planting correctly, providing proper light, water, and nutrients, and maintaining regular care, even beginners can enjoy vibrant marigolds from seed to bloom.

This complete guide with full updates ensures that gardeners of all skill levels can grow abundant, healthy marigolds in pots, containers, or garden beds. Start your marigold-growing journey today and transform your garden into a golden paradise of color and fragrance!

Petunia Paradise: How to Grow Petunias from Seeds – Complete Guide with Full Updates

Petunia Paradise: How to Grow Petunias from Seeds – Complete Guide with Full Updates

Petunias are among the most popular flowering plants, celebrated for their bright, vibrant colors and long-lasting blooms. Whether used in garden beds, hanging baskets, or containers, petunias add charm and beauty to any space. While many gardeners purchase young plants, growing petunias from seeds is a cost-effective and rewarding way to enjoy these stunning flowers. This guide provides full updates, step-by-step instructions, and tips to help beginners successfully grow petunias from seeds.


1. Why Grow Petunias from Seeds?

Growing petunias from seeds has multiple advantages:

  • Cost-effective: Seeds are cheaper than purchasing mature plants.
  • Variety selection: Choose from an extensive range of colors, patterns, and hybrid varieties.
  • Homegrown freshness: Control the growth environment and avoid chemicals.
  • Gardening experience: Learning to grow flowers from seeds provides patience, skill, and satisfaction.

Though petunias take time to bloom from seeds, the process is educational and rewarding for all gardeners.


2. Selecting High-Quality Petunia Seeds

The success of your petunia garden begins with quality seeds:

  • Fresh seeds: Check the expiration date; fresh seeds germinate more reliably.
  • Varieties: Consider different types based on growth habits:
    • Grandiflora: Large, showy flowers, ideal for beds and containers.
    • Multiflora: Smaller flowers, prolific bloomers, great for mass planting.
    • Milliflora: Tiny, delicate blooms, perfect for borders and hanging baskets.
  • Seed source: Purchase seeds from reputable suppliers to ensure disease-free, high-quality seeds.

Choosing the right seeds improves germination rates and produces healthy, vibrant plants.


3. Pre-Treating Petunia Seeds for Germination

Petunia seeds are tiny and delicate, requiring proper care for successful germination:

  • Soaking: Soak seeds in lukewarm water for 1–2 hours to improve water absorption.
  • Light requirement: Petunia seeds need light to germinate; do not bury them under soil.
  • Optional stratification: Some gardeners refrigerate seeds for a few hours to mimic natural conditions, though it is not strictly necessary.

Pre-treated seeds germinate faster and produce stronger seedlings.


4. Choosing the Right Growing Medium

Petunias thrive in light, well-draining soil:

  • Seed-starting mix: Use a fine, sterile seed-starting mix for best results. Avoid heavy garden soil.
  • pH level: Slightly acidic to neutral soil (pH 6.0–7.0) is ideal.
  • Containers: Seed trays, cell packs, or small pots work well for starting seeds indoors.

Healthy, well-draining soil ensures strong seedlings and reduces the risk of fungal diseases.


5. Planting Petunia Seeds

Planting seeds correctly is crucial for successful germination:

  • Sowing method: Lightly scatter seeds on the soil surface; do not cover with soil as they need light to germinate.
  • Spacing: Leave small gaps between seeds to prevent overcrowding.
  • Watering: Mist the soil gently to maintain moisture without washing away seeds.
  • Humidity: Cover trays with a clear plastic lid or plastic wrap to retain humidity.

Petunia seeds typically germinate in 7–14 days, depending on variety and conditions.


6. Light and Temperature Requirements

Petunias require bright light and moderate temperatures to thrive:

  • Temperature: Ideal germination occurs at 20–24°C (68–75°F).
  • Light: Provide 12–16 hours of bright light daily using a sunny window or grow lights.
  • Indoor care: Rotate seedlings periodically to ensure even growth and prevent legginess.

Proper light and temperature conditions help produce strong, healthy seedlings.


7. Watering and Care

Consistent care is key to growing vigorous petunias:

  • Moisture: Keep soil consistently moist but avoid waterlogging.
  • Watering method: Water at the base to prevent fungal infections on leaves.
  • Mulching: Once transplanted, add a thin layer of mulch to retain moisture and prevent soil erosion.

Balanced watering promotes strong roots and long-lasting blooms.


8. Transplanting Seedlings

Seedlings are ready for transplanting once they have 3–4 true leaves:

  • Hardening off: Gradually expose seedlings to outdoor conditions over 7–10 days to reduce transplant shock.
  • Containers or garden beds: Ensure pots have drainage holes or beds are well-prepared with rich soil.
  • Spacing: Plant 6–12 inches apart depending on the variety to allow good airflow.
  • Watering: Water immediately after transplanting to help seedlings establish.

Careful transplanting supports robust growth and healthy flowering.


9. Fertilizing Petunias

Petunias benefit from regular feeding to encourage continuous blooms:

  • Balanced fertilizer: Apply a water-soluble fertilizer every 2–3 weeks.
  • Organic alternatives: Compost or vermicompost can provide natural nutrients.
  • Avoid excess nitrogen: Too much nitrogen encourages foliage growth at the expense of flowers.

Proper fertilization ensures vibrant, long-lasting blooms.


10. Pruning and Maintenance

Regular maintenance keeps petunias healthy and blooming:

  • Deadheading: Remove faded flowers to encourage new blooms.
  • Pinching: Trim leggy stems to promote bushy growth.
  • Pest monitoring: Watch for aphids, spider mites, or slugs and treat with organic solutions if necessary.

Routine care extends flowering periods and maintains plant health.


11. Pest and Disease Management

Petunias are generally hardy, but pests and diseases can occur:

  • Common pests: Aphids, snails, slugs, and spider mites. Use neem oil, soapy water, or physical barriers.
  • Diseases: Powdery mildew and root rot may occur in damp conditions. Ensure good spacing and drainage.
  • Preventive care: Maintain proper airflow, avoid wetting foliage, and remove diseased leaves promptly.

Timely action ensures healthy plants and abundant blooms.


12. Tips for Beginners

  • Succession planting: Sow seeds every few weeks to maintain continuous blooms.
  • Labeling: Keep track of varieties for color planning and bloom timing.
  • Container gardening: Hanging baskets and window boxes are perfect for compact spaces.
  • Patience: Petunias from seed take 10–12 weeks to flower, but the results are spectacular.

Following these tips ensures beginners can achieve a beautiful, vibrant petunia display.


13. Benefits of Growing Petunias from Seeds

  • Variety and creativity: Choose from numerous colors and patterns for a customized garden.
  • Cost savings: Seeds are much cheaper than nursery plants.
  • Gardening skill development: Teaches patience, planning, and care.
  • Long-lasting blooms: With proper care, petunias can provide continuous color for months.

Growing petunias from seeds is both cost-effective and fulfilling, adding beauty to any garden space.


Conclusion

Growing petunias from seeds is a fun, rewarding, and affordable way to add vibrant color to your garden or balcony. By selecting high-quality seeds, pre-treating them, providing proper light and temperature, planting carefully, and maintaining consistent care, beginners can enjoy a flourishing display of petunias.

This complete guide with full updates ensures even novice gardeners can experience the satisfaction of nurturing petunias from seed to flower. Start your petunia-growing journey today and transform your garden with vibrant, long-lasting blooms!


Bloom Your Garden: How to Grow Pansy from Seed – Complete Guide with Full Updates

Bloom Your Garden: How to Grow Pansy from Seed – Complete Guide with Full Updates

Pansies are among the most charming and colorful flowers you can grow, brightening gardens, balconies, and window boxes with their cheerful faces. Known for their vibrant petals and long-lasting blooms, pansies are a favorite among gardeners of all levels. Growing pansies from seeds may seem challenging, but with the right techniques, even beginners can enjoy a flourishing display of these stunning flowers. This comprehensive guide provides full updates and step-by-step instructions to help you grow pansies successfully from seed.


1. Why Grow Pansies from Seed?

Growing pansies from seeds offers several benefits:

  • Cost-effective: Buying seeds is cheaper than purchasing mature plants.
  • Variety selection: You can choose from a wide range of colors, patterns, and hybrid varieties.
  • Homegrown freshness: Enjoy vibrant, healthy flowers grown naturally without chemicals.
  • Gardening satisfaction: Nurturing flowers from seed provides a rewarding and educational experience.

Though pansies take a little patience to flower from seeds, the vibrant blooms and variety options make it worthwhile.


2. Choosing High-Quality Pansy Seeds

The success of your pansy garden depends on selecting good seeds:

  • Fresh seeds: Check the expiration date; fresh seeds have a higher germination rate.
  • Varieties: Popular types include:
    • Standard pansies: Large, colorful blooms.
    • Violas: Smaller flowers with delicate petals.
    • Hybrid pansies: Bred for unique patterns, sizes, or longer bloom periods.
  • Seed source: Choose reputable suppliers to ensure healthy seeds free from diseases.

Good seeds increase germination rates and produce vibrant, healthy plants.


3. Pre-Treating Pansy Seeds for Germination

Pansy seeds have a hard outer coating and benefit from pre-treatment:

  • Cold stratification: Place seeds in a damp paper towel inside a ziplock bag and refrigerate for 1–2 weeks. This mimics winter conditions and improves germination.
  • Soaking: After stratification, soak seeds in lukewarm water for 4–6 hours to soften the seed coat.
  • Scarification (optional): Lightly rub seeds with fine sandpaper to help water penetration.

Pre-treated seeds germinate faster and more uniformly, giving seedlings a strong start.


4. Choosing the Right Growing Medium

Pansies thrive in light, well-draining soil:

  • Seed-starting mix: Use a fine, sterile seed-starting mix for best results. Avoid heavy garden soil, which can hinder germination.
  • pH level: Slightly acidic to neutral soil (pH 6.0–7.0) is ideal.
  • Containers: Seed trays, small pots, or cell packs work well for starting pansy seeds indoors.

Healthy soil ensures strong seedlings with vigorous growth.


5. Planting Pansy Seeds

Planting pansy seeds correctly is crucial:

  • Sowing depth: Sprinkle seeds lightly on the soil surface; do not cover them deeply as they need light to germinate.
  • Spacing: Leave small gaps between seeds to prevent overcrowding.
  • Watering: Mist soil gently to keep it moist but not soggy.
  • Humidity: Cover trays or pots with a transparent lid or plastic wrap to maintain humidity.

Pansy seeds usually germinate in 7–14 days, depending on the variety and environmental conditions.


6. Light and Temperature Requirements

Pansies prefer cool temperatures and adequate light:

  • Temperature: Ideal germination temperature is 15–20°C (59–68°F).
  • Light: Once seedlings emerge, provide 12–14 hours of bright light daily using a sunny windowsill or grow lights.
  • Indoor care: Rotate seedlings periodically to ensure even growth and prevent leggy stems.

Proper temperature and light conditions ensure strong, healthy seedlings.


7. Watering and Care

Consistent care is key to growing vibrant pansies:

  • Moisture: Keep soil consistently moist but avoid waterlogging.
  • Watering method: Water at the base to prevent wetting leaves, which can cause fungal issues.
  • Mulching: Add a thin layer of mulch around seedlings to retain moisture and regulate soil temperature.

Balanced watering helps plants develop strong roots and promotes long-lasting blooms.


8. Transplanting Seedlings

Once seedlings have 3–4 true leaves, they are ready for transplanting:

  • Hardening off: Gradually expose seedlings to outdoor conditions for 7–10 days to reduce transplant shock.
  • Container or garden bed: Choose pots with good drainage or well-prepared garden beds.
  • Spacing: Plant seedlings 6–8 inches apart to allow air circulation and prevent disease.
  • Watering: Water immediately after transplanting to help seedlings settle.

Proper transplanting ensures robust growth and a healthy flowering cycle.


9. Fertilizing Pansies

Pansies benefit from regular feeding for vibrant blooms:

  • Balanced fertilizer: Apply a water-soluble, balanced fertilizer every 2–3 weeks.
  • Organic alternatives: Compost or vermicompost can be used to provide nutrients naturally.
  • Avoid over-fertilization: Excess nitrogen encourages leaf growth over flower production.

Regular fertilization ensures colorful, abundant blooms throughout the season.


10. Pruning and Maintenance

Routine care keeps pansies healthy and blooming:

  • Deadheading: Remove faded flowers regularly to promote new blooms.
  • Trimming: Cut leggy or damaged stems to encourage bushy growth.
  • Pest monitoring: Watch for aphids, snails, or slugs, and treat with organic solutions as needed.

Proper pruning and maintenance extend the flowering period and maintain plant health.


11. Pest and Disease Management

Pansies are relatively hardy but can face challenges:

  • Common pests: Aphids, snails, and spider mites. Use neem oil, soapy water, or physical barriers.
  • Diseases: Powdery mildew and root rot may occur in overly wet conditions. Ensure proper spacing and drainage.
  • Preventive care: Maintain good air circulation and avoid wetting leaves.

Early detection and treatment ensure healthy plants and abundant flowers.


12. Tips for Beginners

  • Succession planting: Sow new seeds every few weeks to maintain continuous blooms.
  • Labeling: Track different pansy varieties for color planning and bloom timing.
  • Container gardening: Use hanging baskets or window boxes for compact spaces.
  • Patience: Pansies from seed may take 10–12 weeks to bloom, but the reward is vibrant, long-lasting flowers.

Following these tips helps beginners grow successful pansy gardens.


13. Benefits of Growing Pansies from Seed

  • Variety and control: Choose from numerous colors and patterns.
  • Cost-effective: Saves money on nursery plants.
  • Gardening experience: Teaches patience, planning, and care.
  • Long-lasting blooms: Properly grown pansies bloom for months, enhancing your garden’s beauty.

Growing pansies from seeds is a fulfilling experience that brightens any space.


Conclusion

Growing pansies from seed is a fun, rewarding, and cost-effective way to add vibrant color to your garden. By selecting high-quality seeds, pre-treating them, planting correctly, providing proper light, water, and nutrients, and maintaining routine care, beginners can achieve a flourishing display of beautiful flowers.

This complete guide with full updates ensures even novice gardeners can enjoy the satisfaction of nurturing pansies from seed to bloom. Start your pansy garden today and watch your outdoor or indoor spaces transform with cheerful, colorful blossoms!

Revive and Reuse: Complete Guide on How to Reuse Your Old Soil (With Full Updates)

Revive and Reuse: Complete Guide on How to Reuse Your Old Soil (With Full Updates)

Gardening is rewarding, but maintaining healthy soil can be expensive and time-consuming. Did you know that you can breathe new life into your old garden soil? Reusing old soil not only saves money but also reduces waste and keeps your plants thriving. With proper techniques, old soil can be rejuvenated to support healthy plant growth season after season. This complete guide provides full updates, step-by-step instructions, and practical tips for reusing old soil effectively.


1. Why Reuse Old Soil?

Reusing soil has several advantages for gardeners:

  • Cost-effective: Reduces the need to buy new soil or compost.
  • Eco-friendly: Minimizes garden waste and environmental impact.
  • Nutrient retention: Properly treated soil retains valuable nutrients.
  • Soil health: Improves structure and supports microbial life for future planting.

By reusing soil, you can create a sustainable gardening cycle that benefits both your plants and the planet.


2. Assessing Old Soil

Before reusing soil, it’s important to evaluate its quality:

  • Check for pests: Remove any insects, larvae, or eggs.
  • Look for diseases: Avoid reusing soil with fungal infections or plant diseases.
  • Texture check: Soil should not be compacted or overly sandy; good soil is crumbly and aerated.
  • Nutrient content: Old soil may be depleted; consider supplementing with compost or fertilizers.

Assessing soil ensures that you are starting with a foundation that can support healthy plants.


3. Removing Debris from Old Soil

Cleaning old soil is a crucial step before reusing it:

  • Roots and plant matter: Remove leftover roots, stems, or leaves from previous plants.
  • Rocks and stones: Sift soil to remove stones or hard clumps that can impede root growth.
  • Plastic or foreign materials: Ensure soil is free from trash or non-biodegradable materials.

Properly cleaned soil provides a healthy, aerated environment for new plants.


4. Sterilizing Old Soil

Old soil may contain harmful pathogens, fungi, or pests. Sterilization helps make it safe:

  • Sun sterilization: Spread soil in a thin layer under direct sunlight for 2–3 days. Sunlight kills many pathogens naturally.
  • Oven method: Place soil in an oven-safe container and bake at 180°C (350°F) for 30 minutes.
  • Steam sterilization: Use steam to heat soil to 70°C (158°F) for 30 minutes to eliminate pests.

Sterilized soil prevents diseases and ensures your new plants grow in a healthy environment.


5. Reviving Nutrients in Old Soil

Old soil often lacks essential nutrients. Reviving it ensures strong plant growth:

  • Add compost: Mix 20–30% organic compost to replenish nutrients.
  • Manure: Well-rotted cow or poultry manure enriches soil fertility.
  • Organic fertilizers: Bone meal, neem cake, or vermicompost boost nutrient content.
  • Balanced feeding: Avoid over-fertilizing; too many nutrients can harm young plants.

Revived soil provides essential nourishment to support healthy roots, stems, and foliage.


6. Improving Soil Structure

Over time, soil can become compacted or lose its texture. Improving its structure is important:

  • Aeration: Use a garden fork or hand trowel to loosen compacted soil.
  • Adding sand or perlite: Improves drainage and prevents waterlogging.
  • Mulching: Organic mulch such as leaves or straw enhances soil texture and retains moisture.
  • Worms: Introducing earthworms naturally aerates and enriches the soil.

Well-structured soil allows roots to penetrate deeply and promotes strong, healthy plant growth.


7. Using Old Soil for Different Plants

Different plants have varying soil requirements. Reused soil can be adapted accordingly:

  • Vegetables: Add compost and a balanced organic fertilizer to enrich soil for leafy greens, tomatoes, or peppers.
  • Flowers: Mix in organic matter to support flowering plants like marigold, petunia, or geraniums.
  • Herbs: Well-draining soil with some sand works best for herbs like basil, mint, and coriander.
  • Indoor plants: Use sterilized soil mixed with perlite for houseplants such as pothos, snake plant, or spider plant.

Tailoring soil to plant needs ensures optimal growth and productivity.


8. Reusing Soil in Pots and Containers

xr:d:DAExGPW3BBw:9628,j:6344866066005832725,t:24022810

Container gardening is perfect for reused soil:

  • Check drainage: Ensure pots have holes at the bottom for proper water flow.
  • Mixing soil: Combine old soil with fresh compost or coco peat for extra nutrition.
  • Layering technique: Add pebbles at the bottom to prevent waterlogging.
  • Top dressing: Apply compost or vermicompost every few weeks to maintain nutrient levels.

Pots and containers make it easier to monitor soil health and adjust nutrients as needed.


9. Reusing Soil in Garden Beds

For outdoor garden beds, reusing old soil is equally effective:

  • Loosen soil: Turn the soil with a spade or tiller.
  • Incorporate organic matter: Add compost, manure, or mulch to replenish nutrients.
  • Check pH: Adjust pH if necessary with lime (to raise) or sulfur (to lower).
  • Crop rotation: Plant different crops to prevent nutrient depletion and reduce pests.

Properly rejuvenated soil keeps garden beds fertile and productive for multiple seasons.


10. Benefits of Reusing Old Soil

Reusing old soil provides several advantages:

  • Cost-saving: Reduces the need to purchase fresh soil every season.
  • Sustainability: Minimizes garden waste and supports eco-friendly gardening.
  • Healthy plants: Revived soil promotes vigorous growth and abundant harvests.
  • Learning opportunity: Teaches gardeners how to maintain and manage soil fertility.

Reusing soil is both economical and environmentally responsible.


11. Common Mistakes to Avoid

While reusing soil is simple, beginners often make mistakes:

  • Not sterilizing soil: Leads to pest infestations and plant diseases.
  • Skipping nutrient enrichment: Plants may struggle if soil is depleted.
  • Overwatering: Old soil may retain water differently; monitor moisture levels carefully.
  • Ignoring soil structure: Compacted soil prevents root growth and reduces yield.

Avoiding these mistakes ensures successful reuse and healthy plants.


12. Tips for Beginners

  • Keep soil covered: Store old soil in a dry, ventilated area until reuse.
  • Mix small batches: Start with small quantities to experiment and observe results.
  • Use organic amendments: Compost, vermicompost, and mulch work best for enriching soil.
  • Observe plants: Healthy growth indicates properly revived soil; adjust care as needed.

Following these tips helps beginners efficiently reuse soil while maintaining plant health.


Conclusion

Reusing old soil is an effective, sustainable, and budget-friendly gardening practice. With proper cleaning, sterilization, nutrient enrichment, and structure improvement, old soil can support healthy plants season after season. Whether used in pots, containers, or garden beds, rejuvenated soil promotes strong root systems, vibrant foliage, and abundant harvests.

By following this complete guide with full updates, gardeners can transform old, depleted soil into a fertile, thriving medium for flowers, vegetables, herbs, and houseplants. Start reusing your old soil today and enjoy sustainable, cost-effective, and productive gardening!