Cacti are resilient, low-maintenance plants, but even the hardiest succulent can fall prey to rotting, wilting, or dying if neglected, overwatered, or attacked by pests. Seeing your cactus shrivel or turn black can be heartbreaking, but don’t worry! With the right techniques, you can revive a rotting cactus and save it completely.
In this detailed guide, you will learn why cacti rot, step-by-step recovery methods, soil tips, care updates, and long-term prevention, ensuring your cactus thrives again.
Why Do Cacti Rot or Die?
Understanding the root cause is essential to save your plant. Common reasons include:

- Overwatering
- Most cactus rot comes from waterlogged soil.
- Roots cannot breathe and start decaying.
- Poor Drainage
- Heavy soil or non-draining pots trap water.
- Pests and Fungal Infections
- Mealybugs, root mealybugs, or fungal pathogens weaken the plant.
- Sunburn or Cold Damage
- Sudden temperature changes or harsh sunlight can stress the plant.
- Age and Natural Decline
- Older plants may rot at the base if nutrients are insufficient.
Materials You’ll Need
To save your cactus, gather:
- Clean, sharp knife or scissors
- Rubbing alcohol for sterilization
- Sandpaper (optional, for hard rot removal)
- Well-draining cactus soil mix
- Small pots with drainage holes
- Cinnamon powder or fungicide
- Gloves (cacti are spiky!)
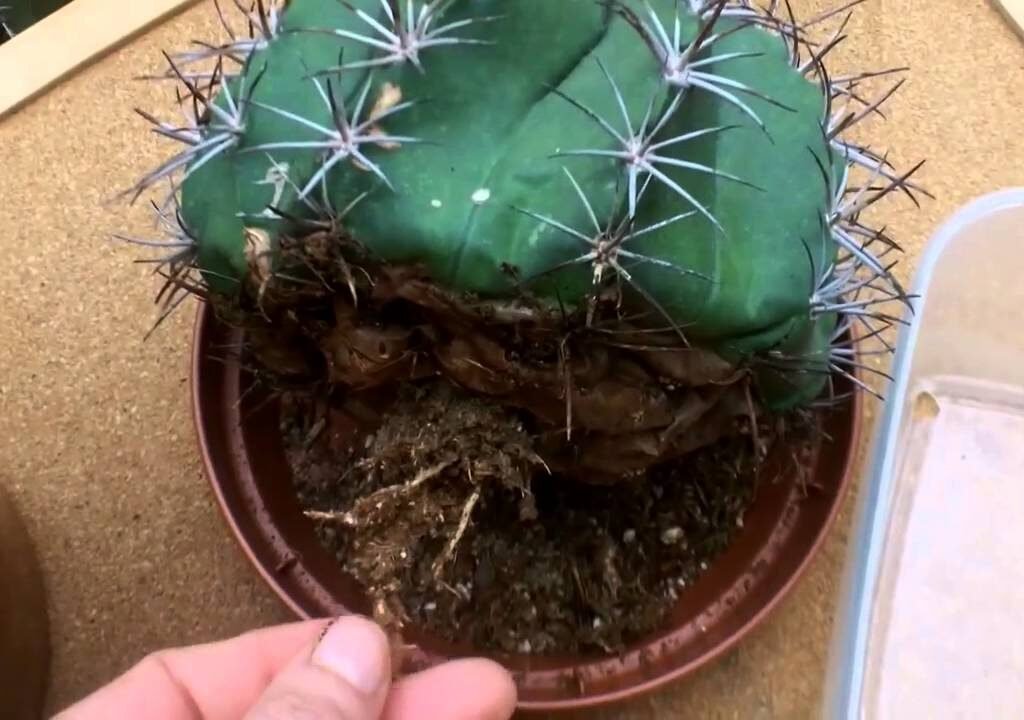
Step 1: Identify the Rot

Rotting can appear as:
- Soft, mushy tissue
- Brown or black discoloration
- Foul smell
Tip:
- Healthy tissue is firm and green.
- Cut away any mushy, soft parts before they spread.
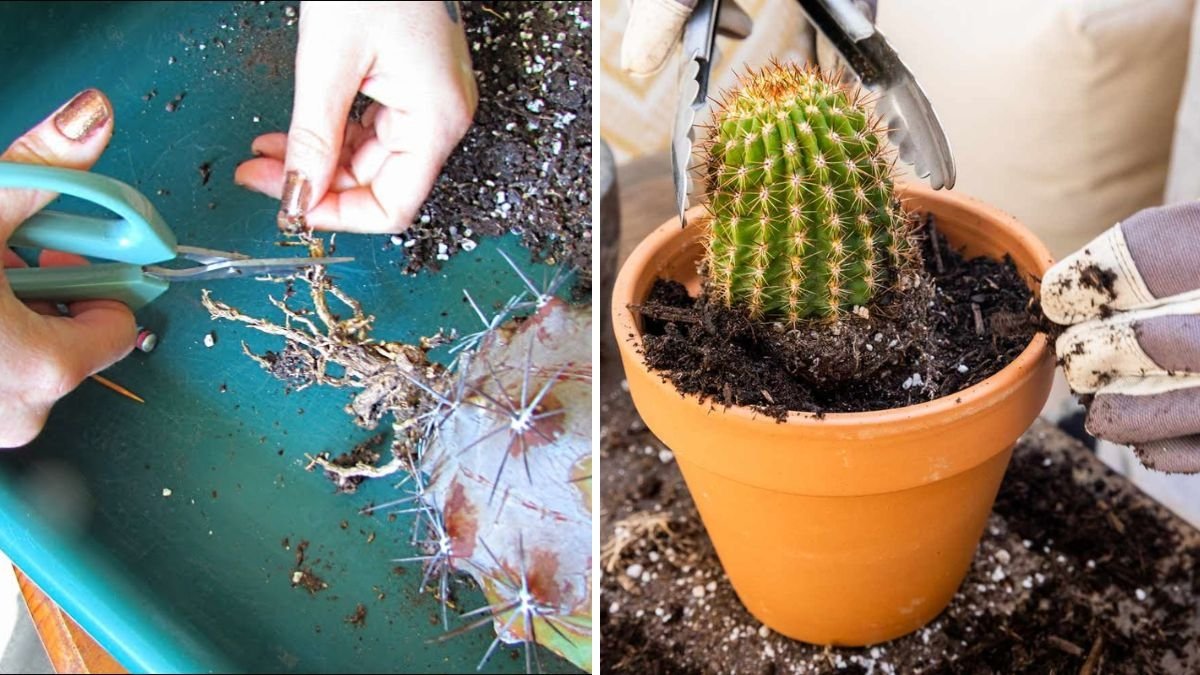
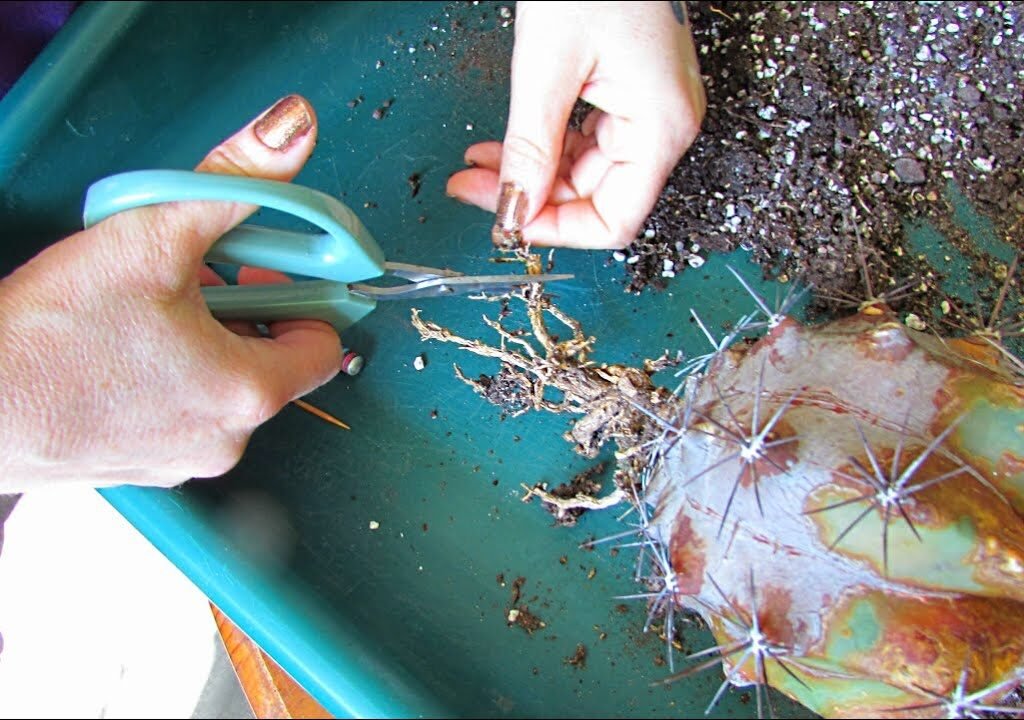
Step 2: Remove the Rot
- Remove the cactus from its pot gently.
- Inspect roots and stem carefully.
- Using a sterilized knife, cut away all soft, black, or brown tissue.
- If the rot is at the base, cut the cactus above the rotted area to save the healthy part.
- Optional: Lightly sand the cut area to remove remaining decay.
Pro Tip:
- Dip the cut areas in cinnamon powder or fungicide. Cinnamon acts as a natural antifungal agent.
Step 3: Allow the Cuts to Heal (Callusing)
- Place the cactus in a dry, shaded area for 3–7 days.
- Avoid watering during this time.
- Let the cut ends form a callus to prevent future rot.
Tip: For large cacti, allow up to 2 weeks for full callus formation.

Step 4: Repot in Well-Draining Soil
Choose a pot with drainage holes.
Recommended Soil Mix:
- 50% coarse sand or perlite
- 30% garden soil or cocopeat
- 20% small gravel or pumice
Tip: Avoid dense garden soil—it retains water and promotes rot.
Step 5: Watering Routine
- Do not water immediately after repotting.
- Wait 5–7 days until the cactus settles.
- Then, water sparingly, only when soil is fully dry.
- Water slowly at the base; avoid wetting the stem.
Rule of Thumb: Cacti need less water in winter and slightly more in the growing season (spring-summer).

Step 6: Light and Temperature Requirements

- Place your cactus in bright, indirect sunlight initially.
- Gradually expose it to direct morning sunlight.
- Avoid intense afternoon sun for 2–3 weeks.
- Ideal temperature: 20–30°C; avoid frost.
Step 7: Prevent Pests and Fungal Infection
- Check regularly for mealybugs, aphids, and fungal growth.
- Treat pests with insecticidal soap or neem oil spray.
- Sprinkle cinnamon powder around the base as a natural antifungal barrier.
- Ensure good air circulation around the cactus.
Step 8: Fertilizing Your Cactus
- Avoid fertilizing a recovering cactus for 1 month.
- After 4 weeks, feed lightly with cactus fertilizer or a diluted NPK 10-10-10.
- Fertilize only during the active growing season (spring-summer).
Tip: Over-fertilizing stressed cacti can cause more damage.
Step 9: Propagation From Healthy Parts (Optional)
If the rot has destroyed the base but some healthy tissue remains:
- Take offsets or cuttings from healthy parts.
- Allow them to callus for 3–5 days.
- Plant in well-draining soil.
- This ensures the plant survives even if the original stem fails.
Week-by-Week Update Timeline (For Recovery Videos)
Week 1 – Rot Removal & Callusing
- Cut out all rotting tissue
- Cactus placed in dry shade to callus
- Soil remains dry
Week 2 – First Signs of Recovery
- Stem feels firm at cut areas
- No mushiness
- Roots adjusting to new soil
Week 3–4 – Root Growth
- Roots anchor in soil
- Tiny root hairs may appear
- Stem looks plump and healthy
Week 5–6 – Active Growth Begins
- New offsets or small shoots may appear
- Stem color improves
- Watering lightly starts
Week 8–10 – Full Recovery
- Cactus fully anchored
- Stem firm and healthy
- Ready for gradual sun exposure
Extra Tips for Long-Term Success
- Avoid overwatering; check soil moisture first
- Keep cactus in bright, indirect light initially
- Ensure good air circulation
- Repot every 2–3 years
- Watch for pests regularly
Signs of a Fully Recovered Cactus
- Firm, plump stem
- No soft or black spots
- Healthy roots anchoring well in soil
- New growth or offsets appearing
A properly saved cactus can live for decades with minimal care!

Conclusion
Saving a rotting or dying cactus is absolutely possible with careful inspection, rot removal, proper callusing, well-draining soil, and controlled watering. By following this step-by-step guide and update timeline, your cactus can recover fully, become strong, and continue thriving in your garden or home.
Even if it seems hopeless, a little patience and correct care can revive almost any cactus, turning your sad plant into a healthy, vibrant one.

Leave A Comment